|
|
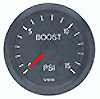
So far, I can't think of any other mod I've done that has caused such a influx of email when I first started the project. Eeeeevrybody wanted to know where, how, when, how much etc. It's a shame Audi neglected to put a boost gauge in the A4. This project took a long time because I wanted it to look stock and integrate cleanly with the dash. I've seen A-pillar mounts, dash pods and any number of solutions but I didn't care for any of them -- they all looked cheap or out of place. Mounting it in place of the ashtray seemed like a good idea but it was too low on the dash to look at quickly while driving. I decided the only way I'd be happy was to mount the gauge in the location of the useless storage compartment (exists only for those without heated seats as far as I know). I also considered moving all the switches to the right side and putting the gauge on the far left but the wiring harnesses are too short.
The problem: the gauge measures 2-1/16" diameter (as do most automotive gauges) but the console panel opening is only 1.80". What we have here is a large round peg in a small rectangular hole problem. A friend designed and manufactured a bezel that would allow me to mount the gauge behind the console panel otherwise, the console panel would have to be cut for clearance -- not an option in my book. The design drawing. The bezel is flush with the dash panel and the face of the bezel is radiused to match the contour of the switches. The machinist forgot to radius the corners so they are square -- a minor glitch but I'm probably the only person who would notice. The glass is actually behind the bezel and the bezel face is recessed so that the whole gauge is visible from the drivers seat. Without the recess portions of the gauge were obscured do to the viewing angle. I removed the trim ring on the gauge to allow the face to mount flush with the back of the bezel and I trimmed the gauge body housing top and bottom because it was too large to fit into the dash carrier. Some modifications (with a dremel tool) were also required to the dash carrier to make room for the gauge even after I modified the gauge housing.
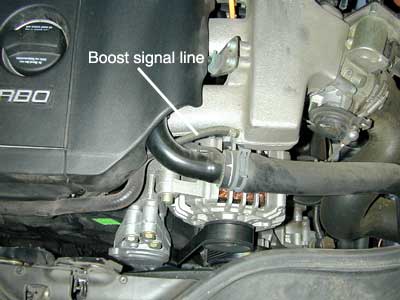
I don't have step by step pictures and instructions because I nibbled on the project over a long period of time and didn't take shots at the time. I will be replacing the gauge soon as the one I currently have has been disassembled so many times it's no longer accurate. I'll take pictures and compose instructions when I have everything apart for the exchange. Where did I hook up the gauge? There's a port near the first intake runner. A line runs over toward the turbo to the wastegate controller. I put a tee in this line. I've seen some use the line to the fuel pressure regulator as a source... I'm not real fond of this location because if the line should develop a leak for some reason it could cause the car to run lean -- not good for a turbocharged engine. If the wastegate line develops a leak or is disconnected the turbo only puts out 5 lbs of boost so you'd know something went wrong right away.
Where do you run the boost signal line? To get from the engine compartment to the interior I used an open port on the box that houses the engine computer. The ECU box is open to the interior on the bottom so I just ran the line through the rubber sealing boot on the front of the box and then down into the interior, under the dash and to the console. Word of caution: If you hook up a gauge be sure to put clamps on all of your hose fittings. Remember, you're dealing with positive manifold pressure. Simply crammin' the hoses onto a tee could be bad as boost pressure may blow the line off. |
|
Advertising |
Contact Us |
Cookie Policy |
Privacy Statement |
Terms of Service |
Do Not Sell My Personal Information
© 2020 MH Sub I, LLC dba Internet Brands |


