When you click on links to various merchants on this site and make a purchase, this can result in this site earning a commission. Affiliate programs and affiliations include, but are not limited to, the eBay Partner Network.
I can see a sensor sticking up on the cat and I think that's sensor 2 post-cat, but how do I access sensor 1? Am I going to have to go through the wheel well? And does sensor 1 stick up or is it underneath the pipe?
Iv done them before but its been awhile, theres really no set way. Just get as much as you need out of the way, coolant resivour, intake hose and boot on throttle body. And just try 22mm wrench, or oxygen sensor socket. I end up spending over an hour just trying different positions and tools untill it breaks it loose.
Thanks, but I need to know if I have the banks listed correctly, I don't want to pull the wrong sensor. Also, the sensor that is sticking upward out of the cat is number 2 right?
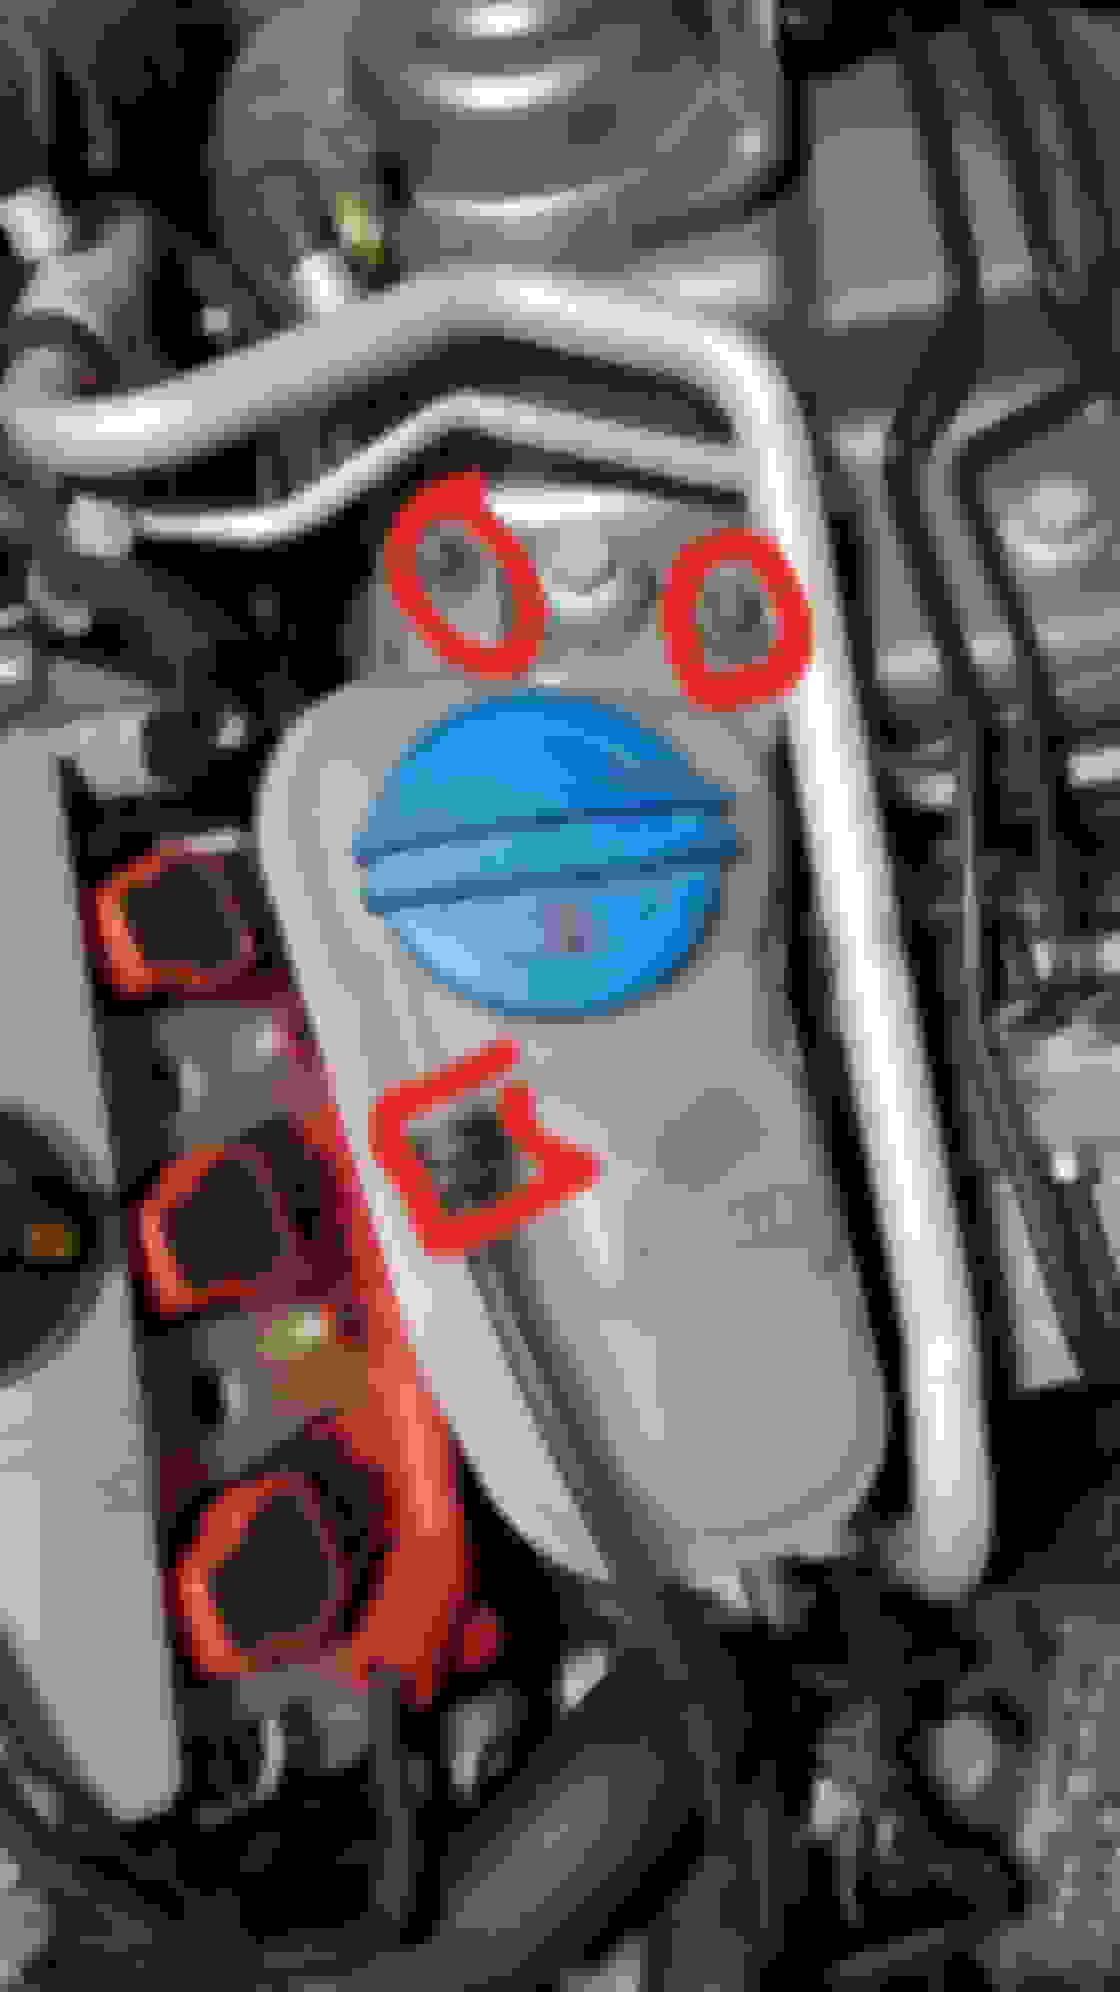
Yes your layout is correct. The post cat sensor (B2S2) is close to the firewall sticking up vertically. The pre-cat sensor (B2S1)is under the head angled slightly above the horizontal and toward the firewall. This applies to both banks.
Both the post and pre cat sensors can be replaced from the top contrary to a lot of information on the internet. The trick is to use a few wobble extensions, a O2 socket with a slot in the side and work from the opposite side of the car once the socket is on the sensor. It definitely helps to take the time and remove some of the hoses out of the way. I replaced mine last summer. I have an '03 A4 B6 quattro 3.0L. The B2S1 sensor is easier to get to than the B1S1 sensor. Hope this helps.
Thanks mate for the info, but I succeeded in replacing both driver-side sensors. It was easy and I thought it would be difficult. I used a modified 7/16 wrench and a breaker bar -very easuy. I took a lot of pics and I will be doing a write-up soon.
I wanted to post that it took me 1.5 hours to replace the upstream bank 2 oxy sensor. I feel pretty lucky considering how many people have spent MUCH longer on this job.
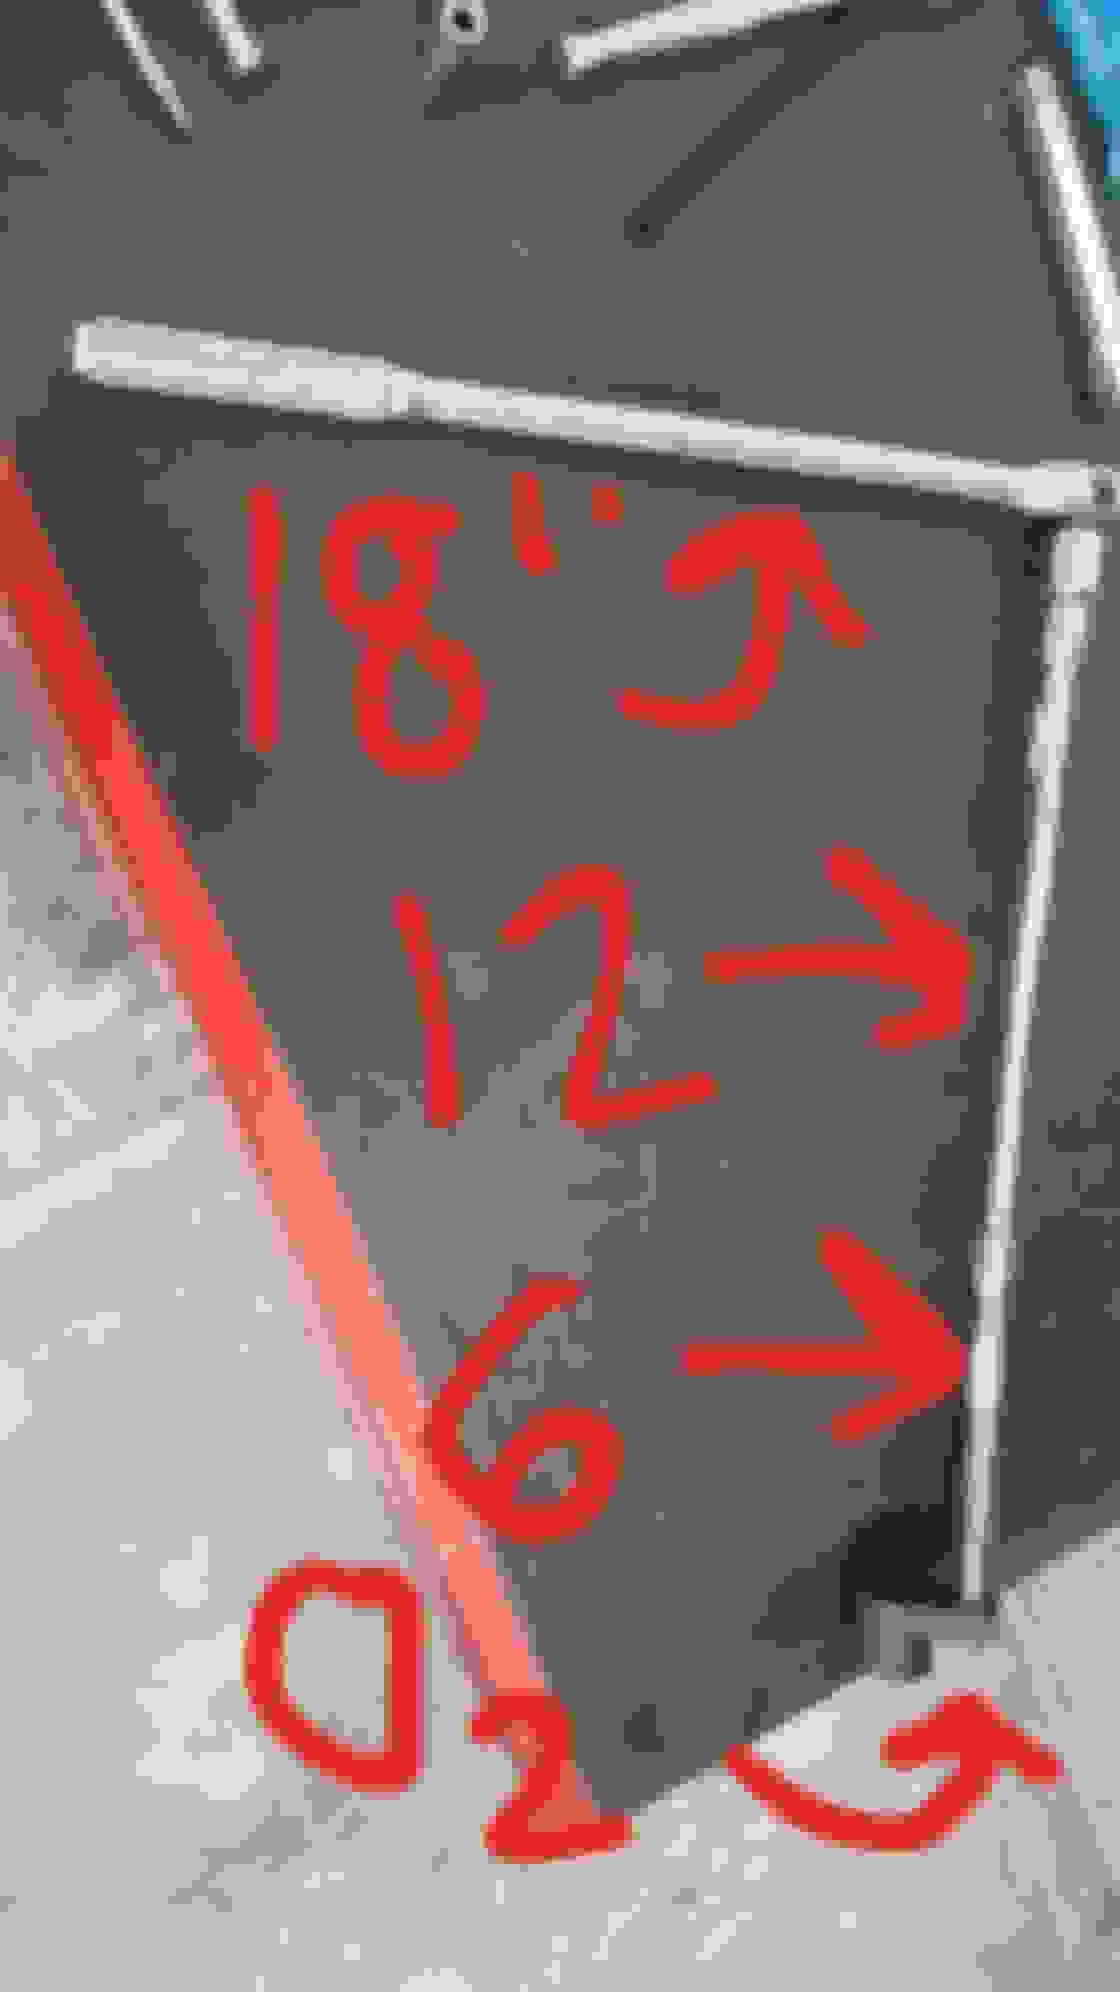
The only "special tools" were an O2 socket, a torque ratchet, and an 18" prybar which I used from below to push the O2 connector union out of its metal bracket retainer.
Please see pics below of the job. Hope it helps someone one day.
STEP 1: Removed two 10mm nuts and upper coolant line (plugged it) in order to make room for access to sensor.
STEP 2: Identifying both sensors for bank 2
MIL code says this is the culprit. Sensor 1 (upstream) Bank 2 (driver)
STEP 3: From below, removed both the front and middle debris protector panels. I then used the prybar to gently push up on the O2 connector union to free it from the metal retaining bracket to provide room to disconnect the harness/connector.
STEP 4: From topside, clipped two tie straps to free up the sensor harness.
STEP 5: Freed loose the O2 sensor. This is what I used to free the O2 sensor. Nothing fancy except a 17$ O2 Socket. Once free, I pulled the connector harness straight up with no slack and twisted the cable counter clockwise. This helped unthread the old sensor without using hands in small space. Came out easily. I used an 18" thin flathead to release the clip, and separated the O2 harness from the vehicle's connector. I then pulled out the old sensor.
Definitely some heavy carbon, but visually I dont know if this looks bad. Codes that she threw pointed this as faulty, however.
STEP 6: Inserted the new sensor to simply catch the first thread, then twisted the wiring harness clockwise to thread the sensor in, without hands. Then I used the tooling above to tighten, which I closed up with 37 ft lbs.
STEP 7: Underside, I reattached the two panels and reattached the coolant tank with the two 10mm nutd and top coolant line
NOTE: I disconnected the battery when I started, but MIL light was still on after reassembly. I drove 17 miles to have the codes reset/erased. I drove back home - no MIL. Used two new cable ties to correctly route and secure t Zhe harness
 11-17-2012, 02:33 PM