When you click on links to various merchants on this site and make a purchase, this can result in this site earning a commission. Affiliate programs and affiliations include, but are not limited to, the eBay Partner Network.
Thanks - I will work out how to edit and clean up. Regarding your questions:
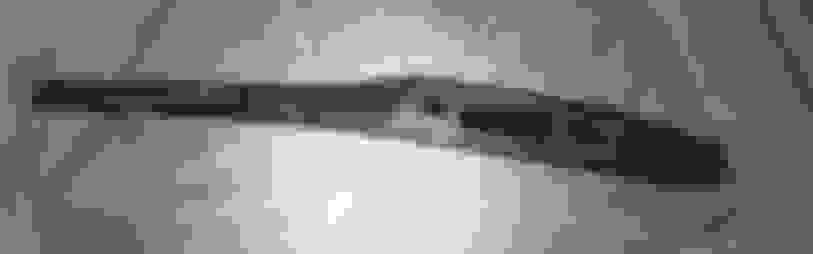
The screen was completely blank.
No decoder.
Its an Innolux from a 20 model, similar to your case.
Got it - thanks for confirming.
Am I right that the decoder needs to be at the screen end with the box behind it somewhere?
If there was an option to put the decoder at the MMI end I could put the 10.1" screen in now which would save having to repeat the whole dash removal process when I get the delivery. But in the technical documents the MIB-CAN and LVDS buses seem to both be in the screen connector and separated at the MMI end - is that right?
I will fix the earlier post but I have had to apply for edit rights which I dont have yet.
You'll need to remove the dash again. There is really one only way to connect the decoder. Just match the colors with the cable included with the decoder.
You'll need to remove the dash again. There is really one only way to connect the decoder. Just match the colors with the cable included with the decoder.
but several valuable lessons learned about my car.
Finished my 10" OEM screen upgrade. Love it!
Thanks to Chemengin for the info he supplied.
YES, you do need the decoder. Got momentarily nervous when I saw that the screen coming out was an Alpine and I was installing an Innolux - but no problem.
Here's a link to the best step-by-step install I found. It is for the RSNAV unit but it is easily adapted. RSNAV S3 Installation Guide for B9 (audizine.com)
1. You DO NOT need to drop the glove box for this install. There are two screws that hold the trim on the passenger side and they are accessible if you look - flashlight works.
2. On my car - 2019 A4 Premium - there were 2 additional bolts in the drivers manual cubby that needed to be removed before I could drop the drivers side trim - all to get to the one trim screw on the drivers side. Not mentioned elsewhere.
3. Once I had the air vent trim unbolted, I just left it resting on a towel on the center console - there are only 3 bolts holding the screen tray and they are easily accessible.
Last edited by Len Ferrara; 08-16-2023 at 11:47 AM.
Reason: addition
2. On my car - 2019 A4 Premium - there were 2 additional bolts in the drivers manual cubby that needed to be removed before I could drop the drivers side trim - all to get to the one trim screw on the drivers side. Not mentioned elsewhere.
This is also not needed. There is only 1 bolt on the driver's side, to the right of the steering wheel that needs to be unbolted. Installation can be done without removing any bolts on the left of the steering wheel.
Finished my 10" OEM screen upgrade. Love it!
Here's a link to the best step-by-step install I found. It is for the RSNAV unit but it is easily adapted. RSNAV S3 Installation Guide for B9 (audizine.com)
1. You DO NOT need to drop the glove box for this install. There are two screws that hold the trim on the passenger side and they are accessible if you look - flashlight works.
2. On my car - 2019 A4 Premium - there were 2 additional bolts in the drivers manual cubby that needed to be removed before I could drop the drivers side trim - all to get to the one trim screw on the drivers side. Not mentioned elsewhere.
Thanks Len - your tips help me look forward to getting the decoder and doing the upgrade even more.
You are welcome - it's all about the collective mind.
Just keep in mind that there are 3 screws to remove the trim piece above. I do not know if there is a difference between the 2017 and the 2019 model years but I could not access the screw on the drivers side without dropping the cubby which had two bolts inside it. If you open the glove box and look up you should easily find the two screws for the passenger side.
I did not find a need to modify the connector(s). everything fit quite nicely.
Last edited by Len Ferrara; 08-17-2023 at 06:42 AM.
Reason: addition
Just keep in mind that there are 3 screws to remove the trim piece above. I do not know if there is a difference between the 2017 and the 2019 model years but I could not access the screw on the drivers side without dropping the cubby which had two bolts inside it. If you open the glove box and look up you should easily find the two screws for the passenger side.
.
In this respect at least, our cars are the same - when I had my "practice run" without the decoder I also had to remove the DS cubby to get at the last of the three torx head screws but I also dropped the glove box; now known to be unnecessary
I also got some (genuine) MMI keys just in case, but never mind.
In this respect at least, our cars are the same - when I had my "practice run" without the decoder I also had to remove the DS cubby to get at the last of the three torx head screws but I also dropped the glove box; now known to be unnecessary .
My decoder arrived and the OEM Innolux 10.1" screen is now installed and working, so thanks again to the OP, Len, and all here who helped me find a good path to a good upgrade. As others have reported, there is a little distortion / coloration; for me this is most noticeable on simple text screens with narrow lines - see picture. Cant see any artifacts at all on the map screens.
 08-14-2023, 11:18 AM


 but several valuable lessons learned about my car.