New here and New A6 Prestige owner w. detailingpics
 10-18-2011, 04:10 PM
#11
AudiWorld Newcomer

Join Date: Oct 2011
Location: Elgin,IL
Posts: 4
Likes: 0
Received 0 Likes
on
0 Posts
a little background on me since im new here. Ive been a car nut my whole life and always had a soft spot for Audi's. my love for them grew immensely after test driving a 2008 A5 6spd manual. It was the first one i had ever driven and they had me from the beginning. I run a business designing and installing residential/commercial audio video systems (home theaters, automation, whole home audio ETC.) unfortunately the timing wasn't right for the a5 as the economy was starting to collapse. in September of 2009 we purchased a Q5 to cart around customers and do sales consultations. Now there is a A6 sitting in the driveway. I also have a thing for MINI's. my first car was a 6 speed 2006 mini cooper s and sold it when the economy took a dump. I know have a 2011 6 speed clubman S black with lime green accents. I dont feel connected as much as i did with my 2006 and will be purchasing either a TTrs (if i can get one) or an S5. I am a complete and total car care nut. I spend hours on my rides making sure they are perfect. Neither the MINI or A6 have swirls (they are black and you know how hard black is to care for). I look forward to becoming part of the Audi world community 
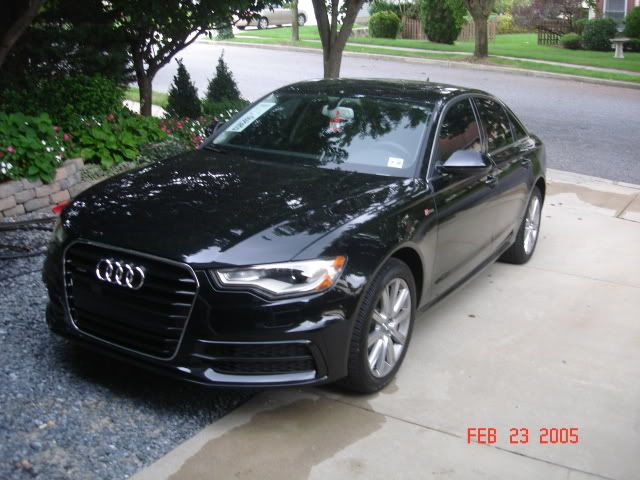
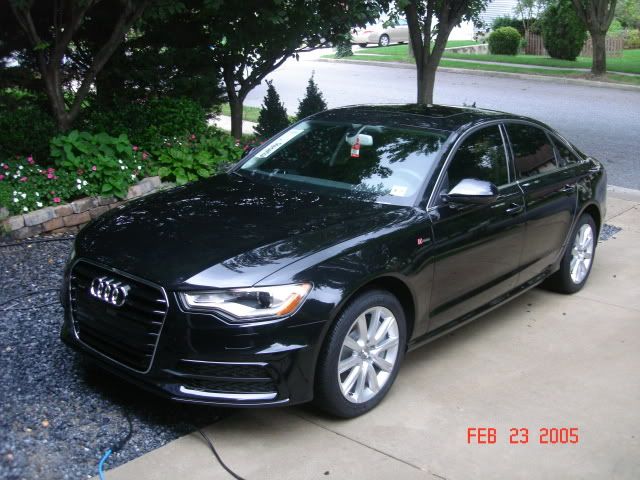
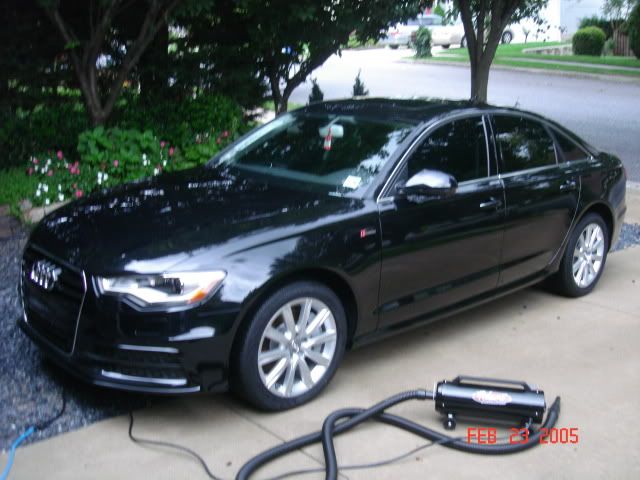
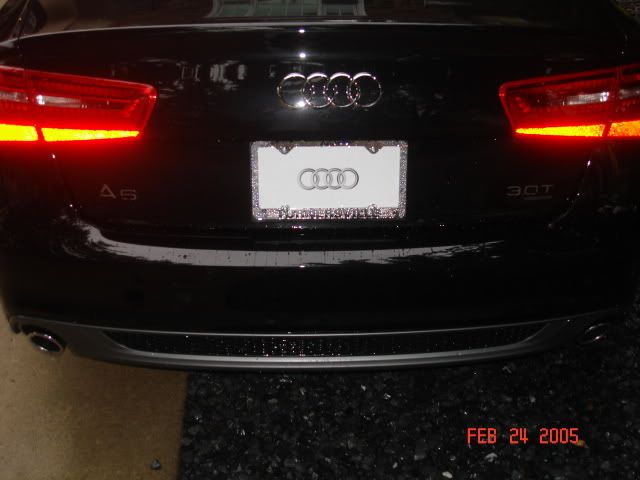
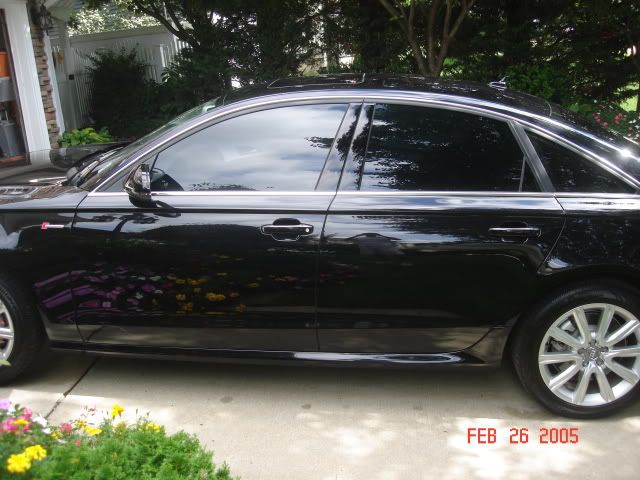
Took delivery of this Beauty last Monday. Traded in our 2010 Q5 premium plus for her. The dealer gave us a bloody good deal and my jaw about hit the ground when they came back with the number on the q5, of course i didnt show that and squeezed another 1500 out of them in the trade. i cannot believe how well the Q held its value lol.
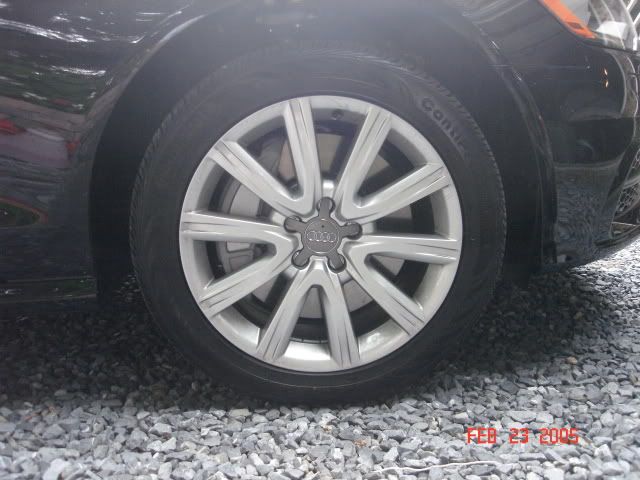
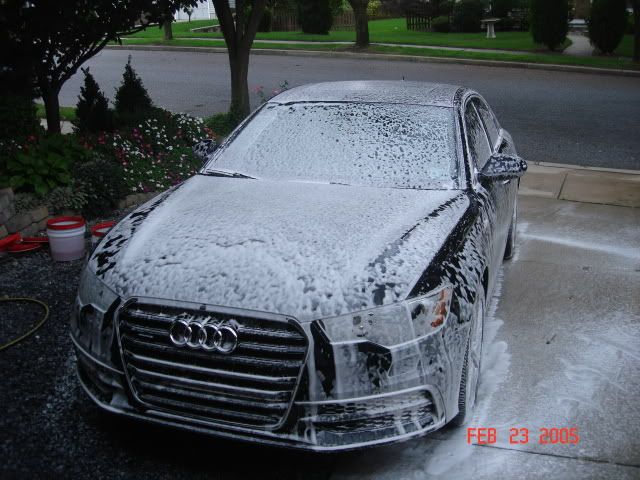
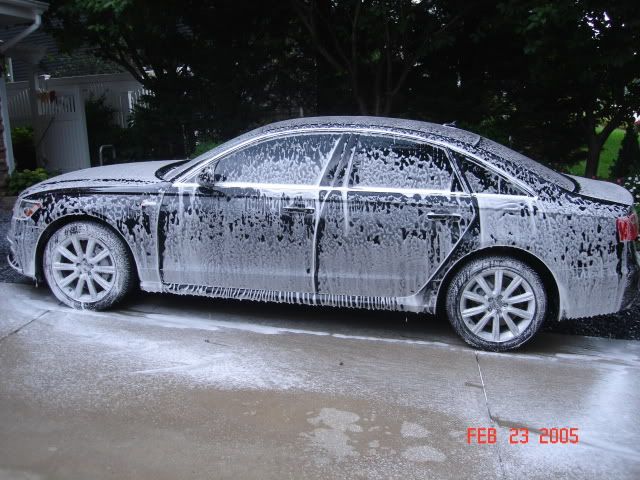
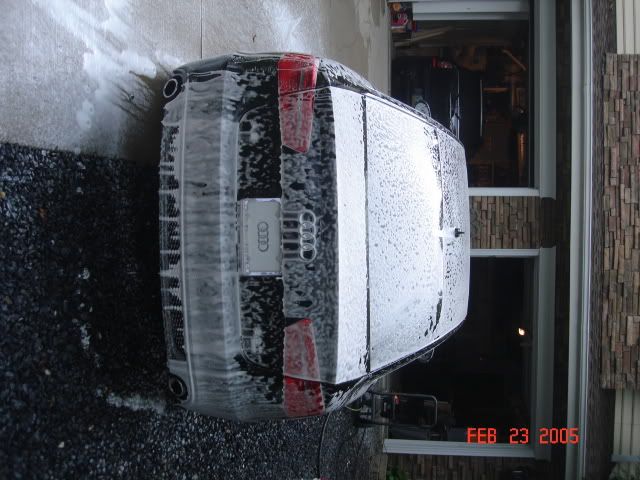
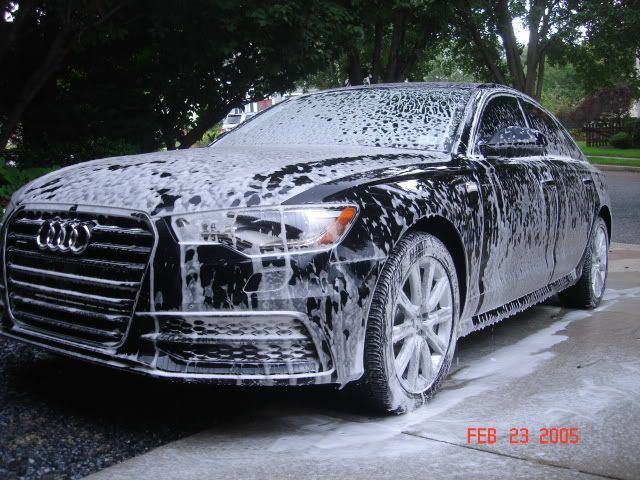
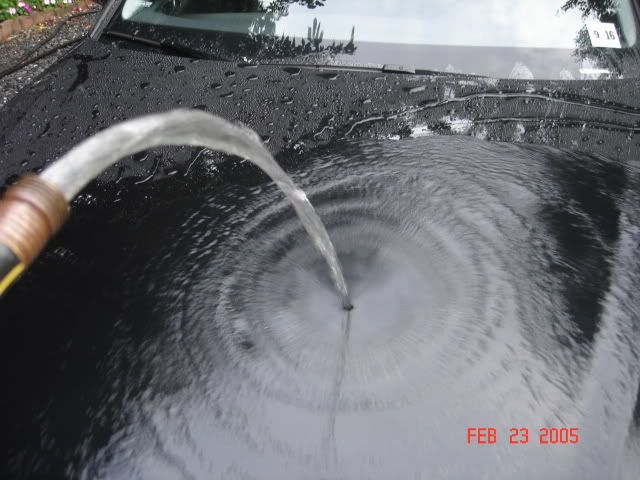
After i picked the Audi up from getting tinted i pulled it in the driveway and got to work. It started off with the wheels, used sonax full effect wheel cleaner. I then hit the tires with Adams All purpose cleaner to remove the dealers nasty tire wet. I then proceeded with a two bucket wash and three foams. For the initial foam i used McGuires hyper wash i then pressure washed it and did two foamings with adams car wash. The reason for the megs hyper wash is because adams soap doesnt cut the dirt and grime because its PH Balanced. I wanted to ensure there wasnt anything on the paint before i touched it with the Wool Wash Mitt. The paint is near perfect and wanted to prove to my self that my method is good (self test) I then used the master blaster to blow the water off the paint.
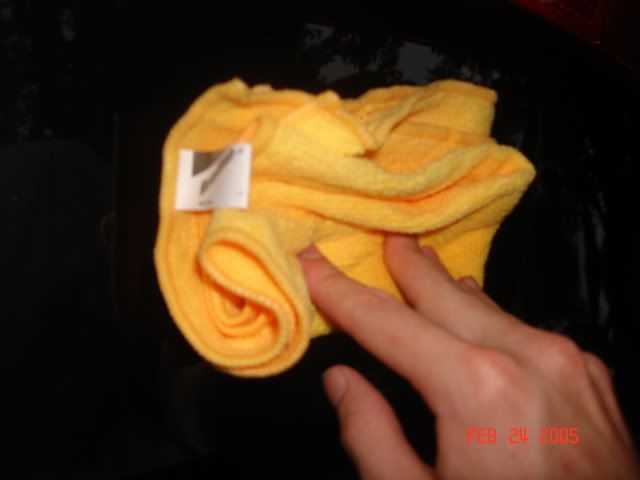
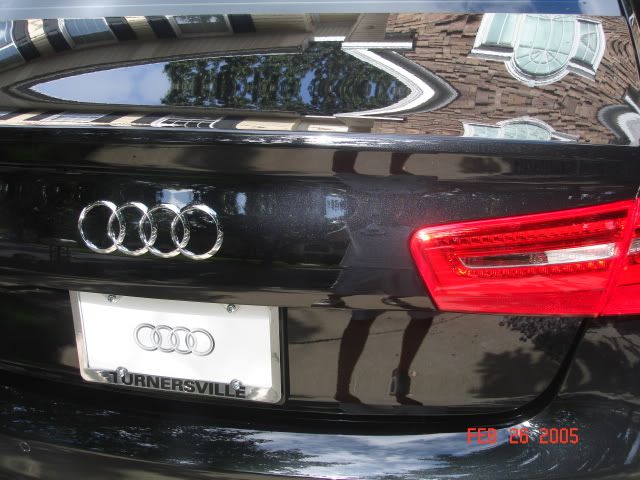
My methad proved right as there were zero swirls/scratches put in by me. I then got to work De-badging her. I found that using turtle wax bug and tar remover provides ridiculous lubrication for the fishing line and does not induce scratches. I Wash the area with soap and then used 3m adhesive remover and a Autozone microfiber. I found out the hard way if you spray the adhesive remover and it scatters and hits any plastic it is near ruined. Spray the 3M adhesive remover on the cheap MF (saturate it) and hold it over top the adhesive. Keep spraying it on the MF and place it over top for 20 or so seconds (you want to keep doing this at least 6 times) grab another Cheap MF and lightly spray the towel and begin **GENTLY rubbing the adhesive. you will see it start disintegrating, fold the MF and spray a little bit on and continue the process until the adhesive is removed. Once removed wash the area with soap and dry. your done and have a scratch free area where you were working
I have de-badged 9 or so cars and am near a pro at it. This one was easy as the car is brand new and the adhesive didnt have time to "cure" It took me a total of 30 minutes from start to finish. Cars that have the badges on there for years you can be looking at a 1-2 hour job and 3M Adhesive remover is a MUST.
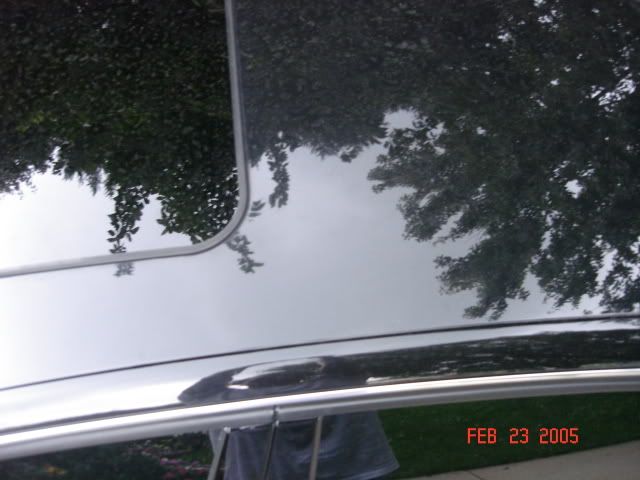
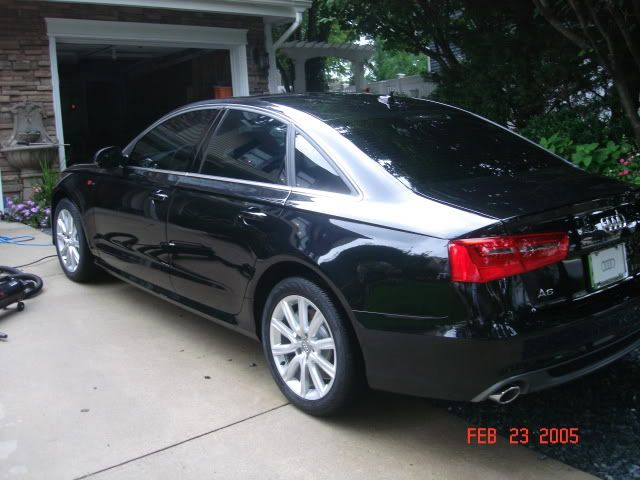
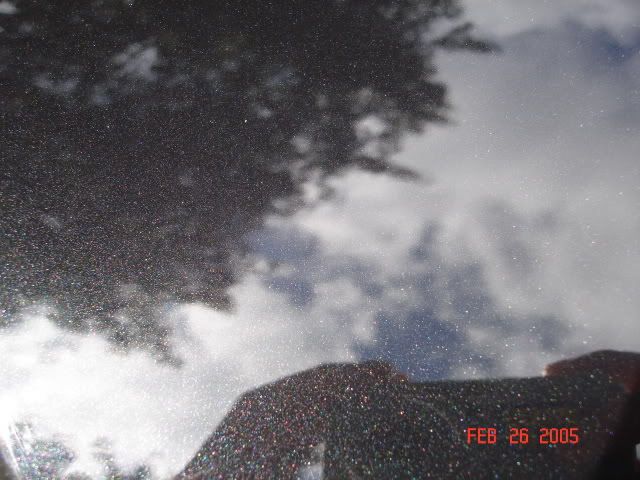
I then pulled it in the garage and got to work. I looked it over under the lights and there are zero swirls in the finish. There was a scratch in the roof the dealer had placed in when they washed it off the truck and some marring when the salesmen rubbed it while being dirty. I clayed the roof and hit it with one quick pass of adams fine machine polish. I wiped the area and the scratch/marring was removed 100% after that i took a waterless wash towell and sprayed 70% IPA alchohol to strip the finish of any wax. I was sure to find scratches/swirls underneith from any filler wax they used but i was totally shocked to see the exact perfect finish underneath. After that I hit the car with Revive Polish just to make sure any wax I had left behind was removed.
I then used adams machine super sealant to seal her from any acidic droppings (mostly bird bombs). once i allowed the sealant to cure i hit it with some brilliant glaze and finally Adams American Paste wax.
* i do not work for adams, i have been a car cleaning enthusiest for years and have been through it all. turtle wax, megs, ice, mothers, autoglym, griots, menzerna and now finally Adams Polishes. The stuff is absolutely amaizing!!! unfortunately it was over cast the day i took the before shots and the sun was going in and out today when i pulled her out after 2 days of rain. Also, my DSLR took a dump so im stuck using my P&S camera which is crap. Tje ics really doesnt do my work or this paint justice. Once i get it working ill snap some new shots and post them
Product used:
Craftsman 2600PSI pressure washer rinsing with 40 degree fan nozzle.
Italian Made foam gun
Sonax Wheel Cleaner
Adams All purpose Cleaner
McGuires hyper wash for initial foam
Adams Murana Whool wash mit
Adams Car wash in bucket/ 2 foamings
Adams Car was buckets (2 for 2 bucket method)
Master Blaster Air force dryer
Turtle Wax bug&tar remover (for de-badging)
3M Adhesive remover
Fishing Line
Adams Detail Spray
Adams Clay
Adams Fine Machine Polish
Adams Revive Polish
Adams Machine Super Sealant
Adams Brilliant Glaze
Adams Americana Past Wax
Adams Super VRT (tire wet)
Adams Glass Cleaner
Adams Glass Sealant
Adams Waterlesh Wash towel
Adams Single soft microfiver towels (6 to wipe polishes & waxes off)
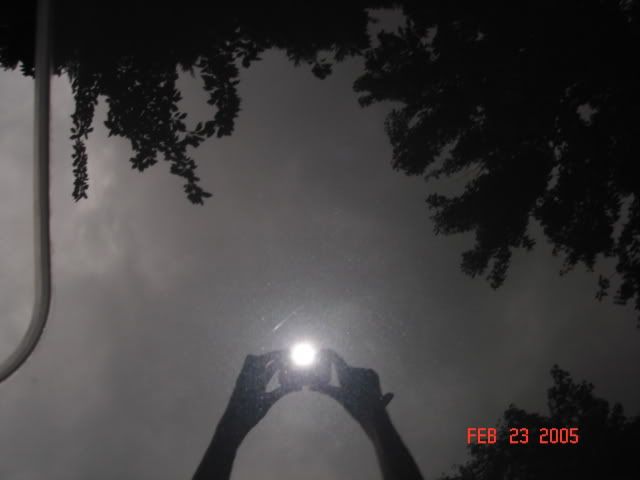
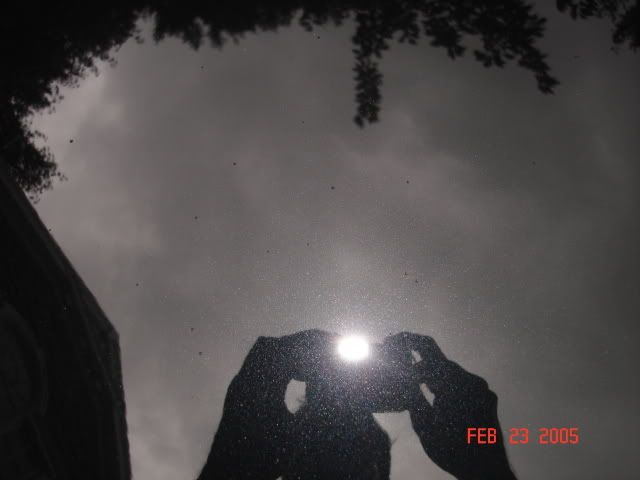
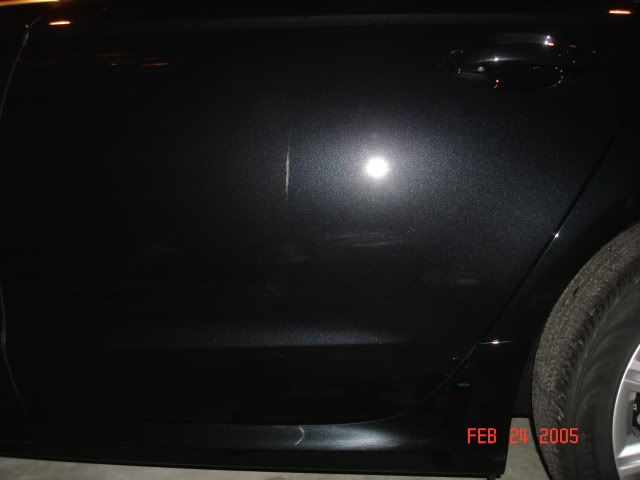
You can really see the scratch in one of the pics.
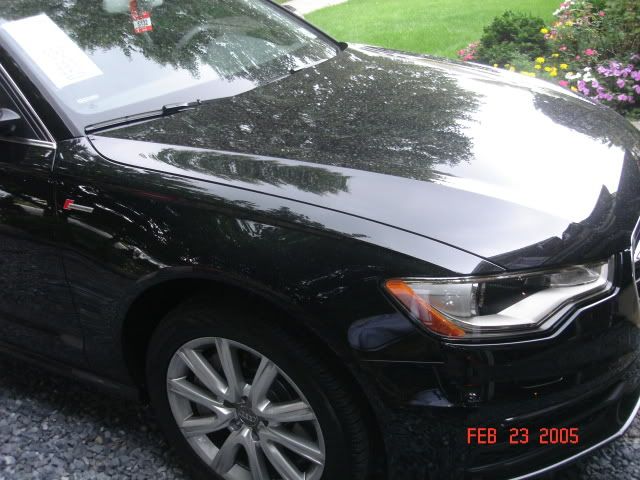
Roof where the scratch is
Rinsed with pressure washer, Zero scrubbing and effort:banana:
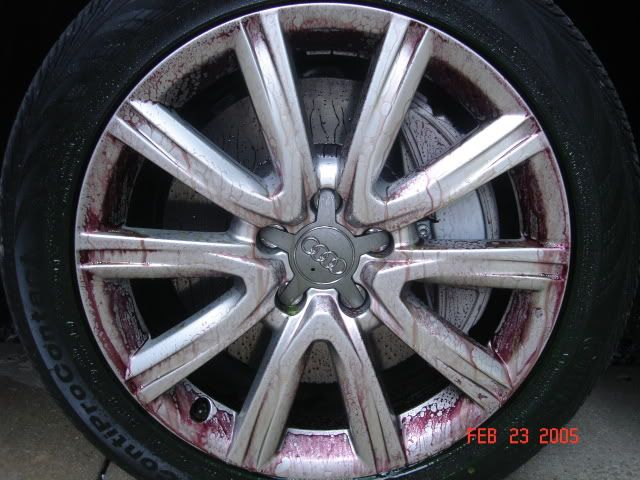
adams foam 5 minutes after initial foaming
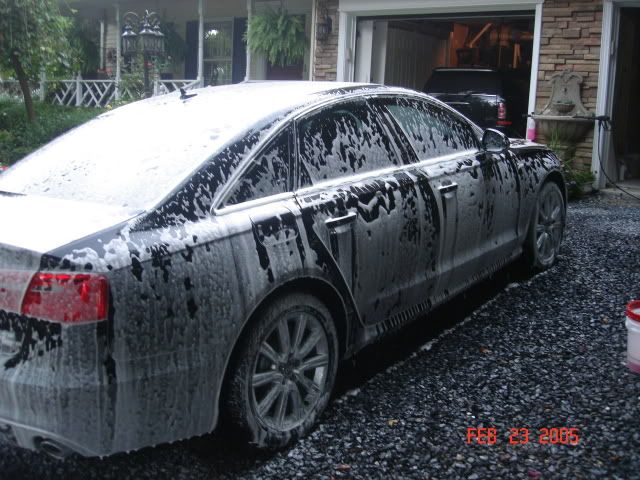
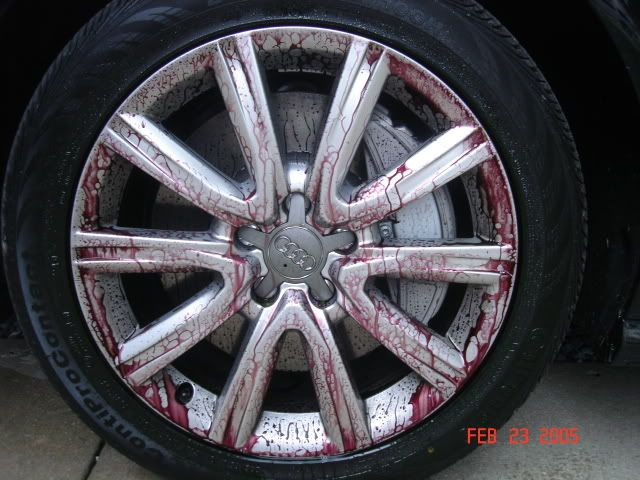
10 Minutes after
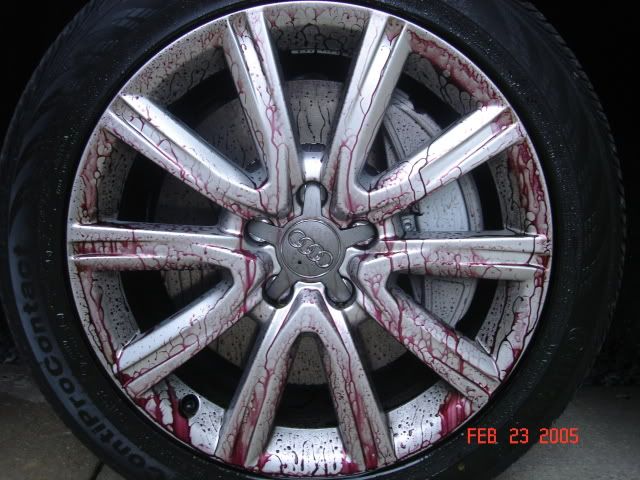
Pooling rinse method
Had to get the master blaster in the shot
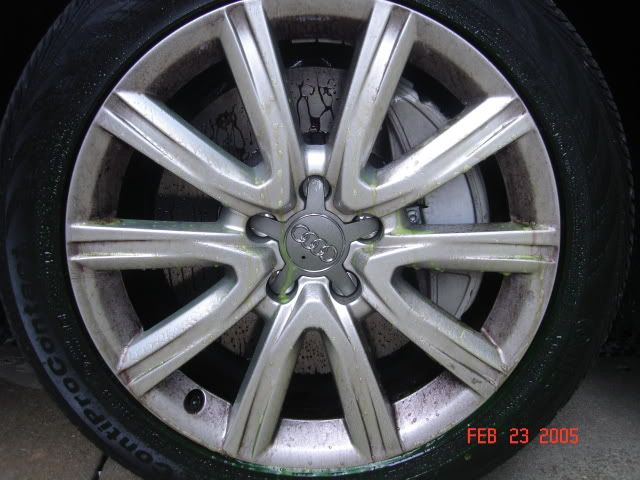
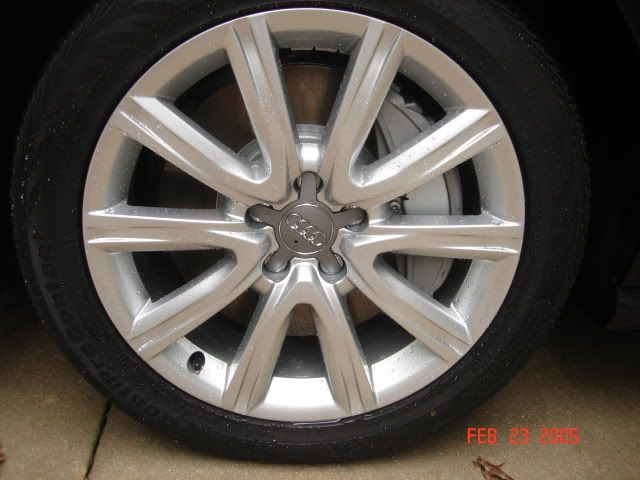
Dry Wheel


De-Badging materials
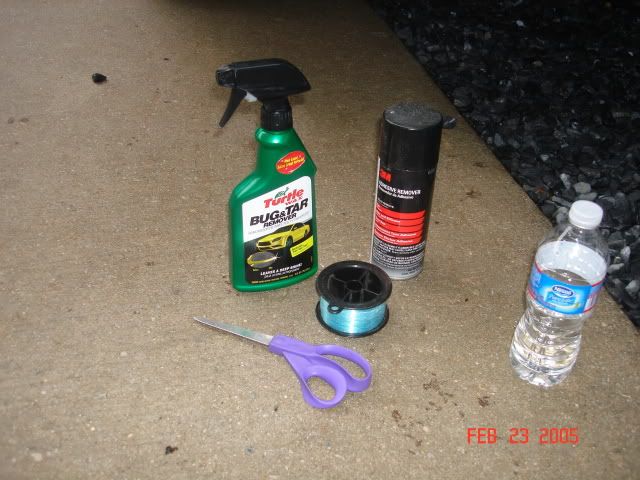
Bug & Tar Remover
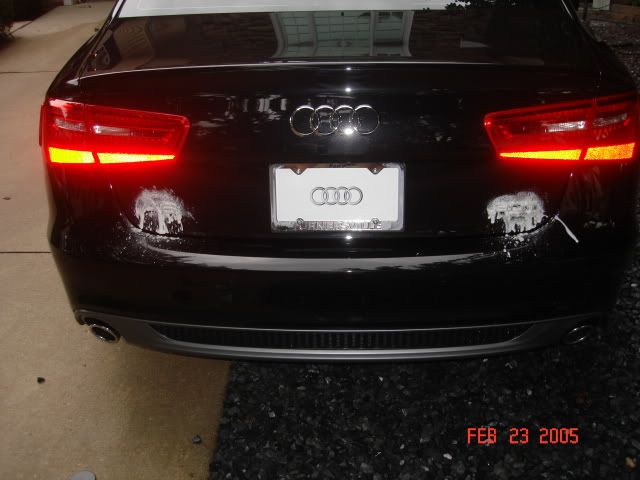
After removing the badge
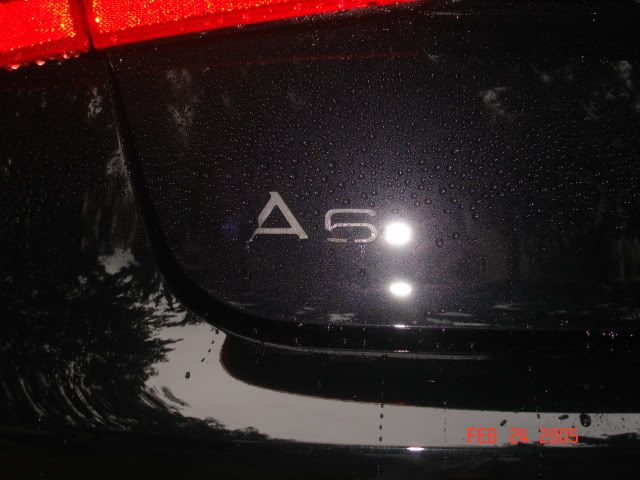
After 2 twenty second segments
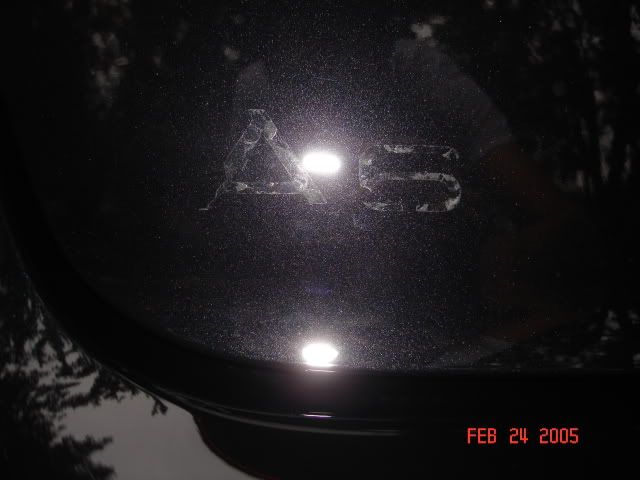
Gone, kinda lol
It got dark but i then washed it again to remove any strangling adhesive *****/3M Remover
The scratch really shows up
After Revive, after this shot i did a DS wipedown so the streak is gone. Im just showing the debth and clearity of the paint after Revive polish (paint cleanser)
Cant seal a german beauty without some german brew:jester:

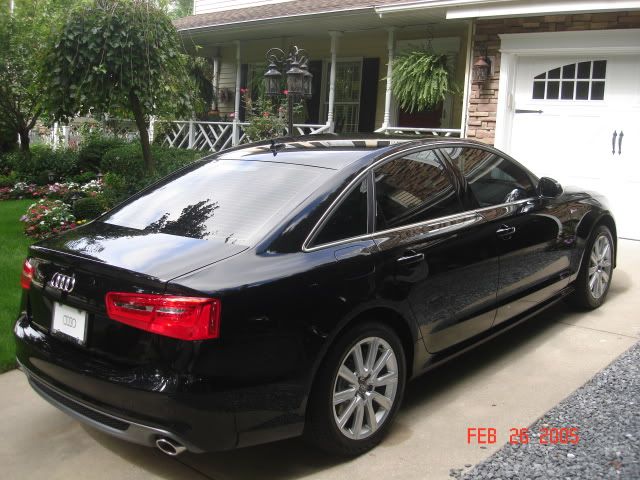
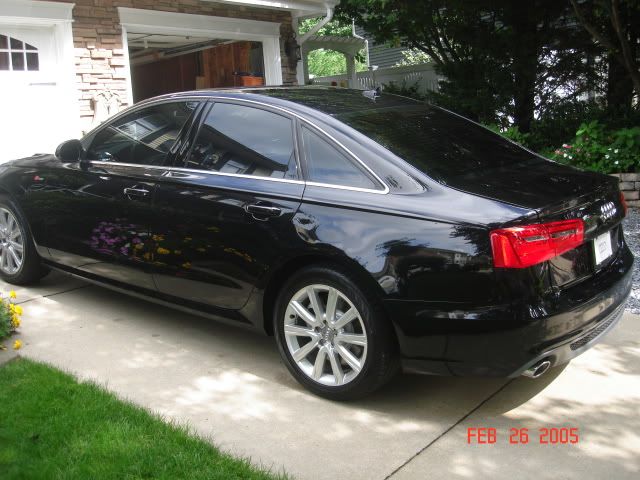
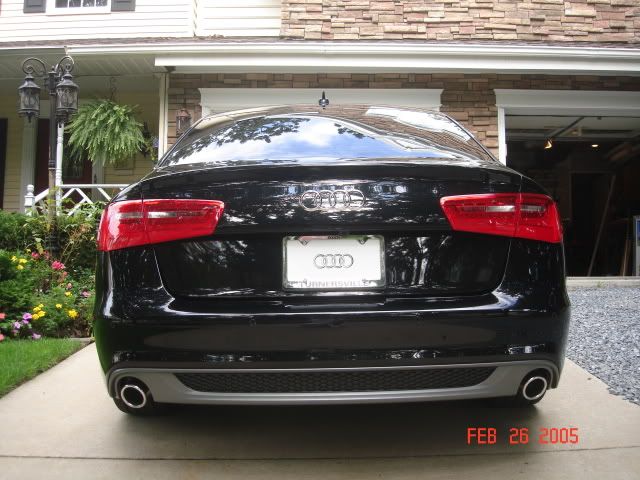
The final shots. my DSLR isnt working and my point and shoot is over/underexposing the pics.
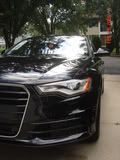
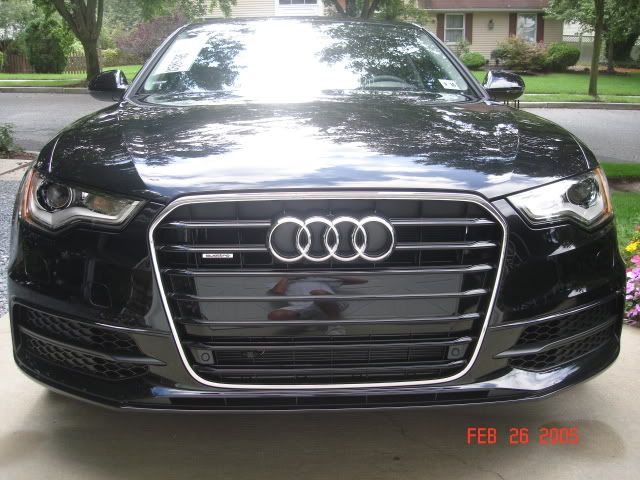
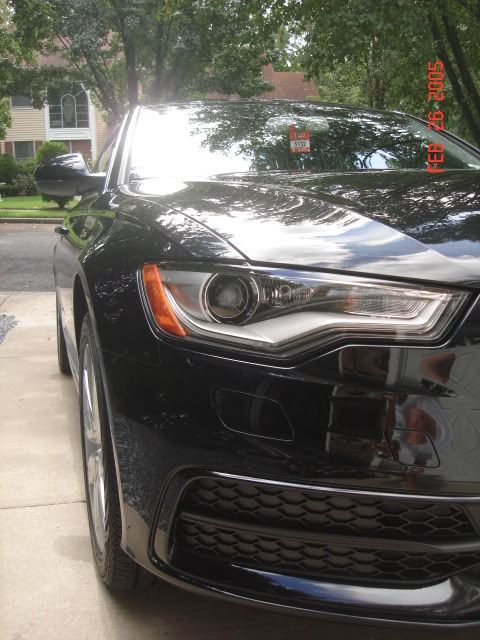
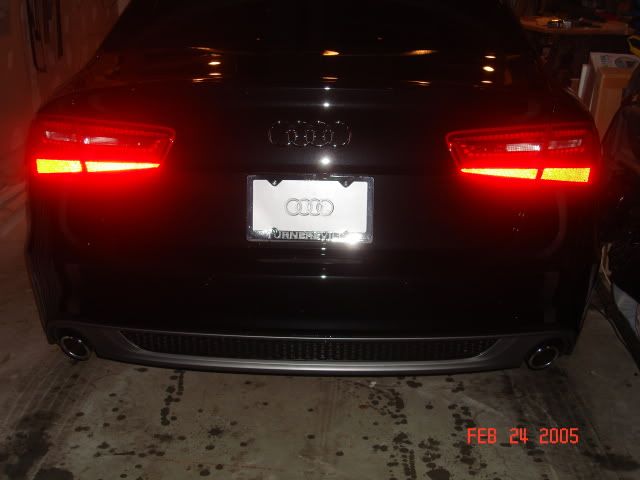
The scratch on the roof is totally gone!!! the sun is hitting it in this shot

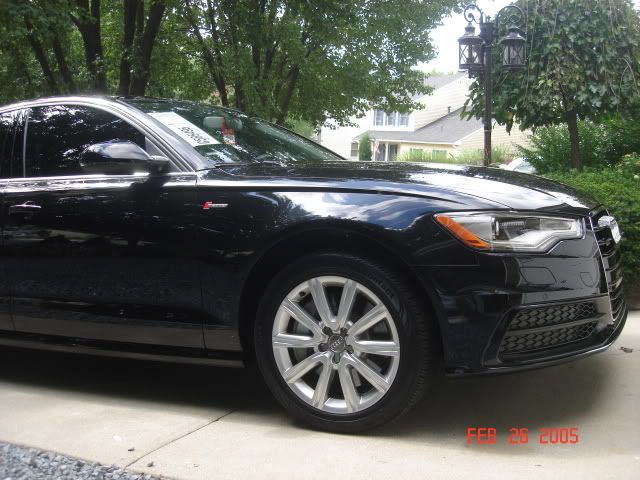
Hood
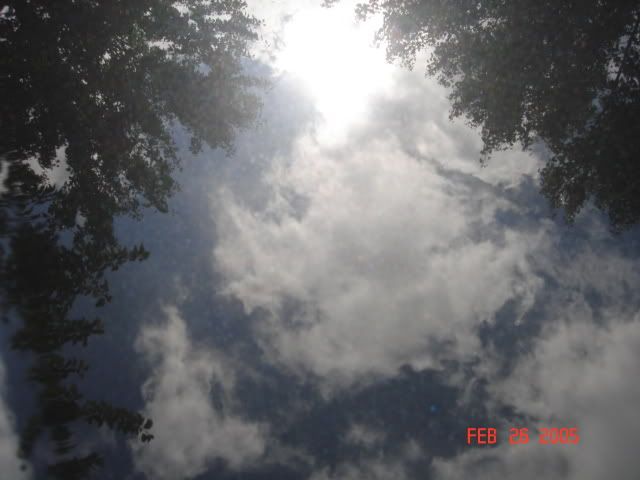
This last shot is the sun hitting it. Those are not streaks or swirls in the corner i just cant steady my hand enough
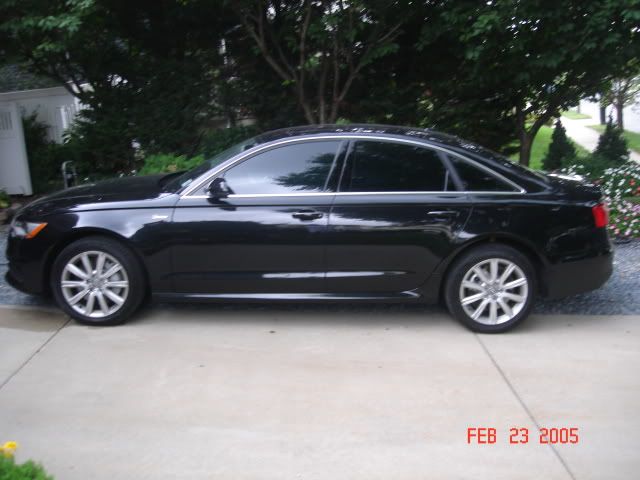
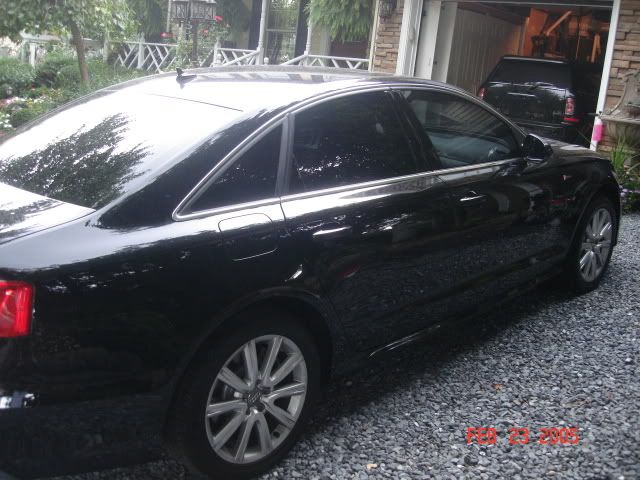
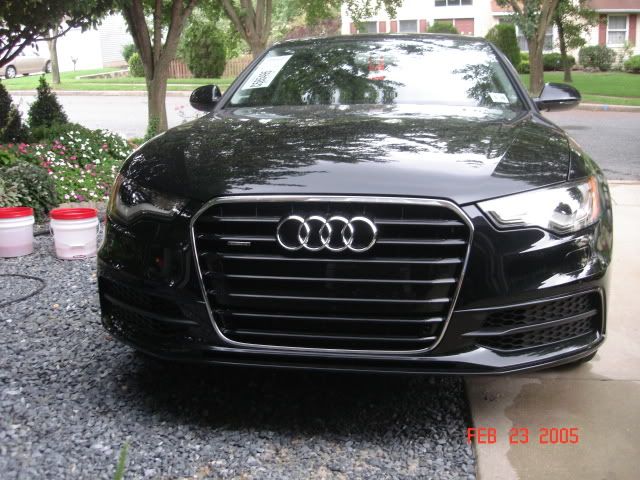
The black phantom pearl effect really is one of the most impressive metalic black paint i have ever seen. Usually im a "black" paint only guy but i fell in love with this at the dealership.
Enjoy, ill get some better shots once this rain ends!
Took delivery of this Beauty last Monday
. Traded in our 2010 Q5 premium plus for her. The dealer gave us a bloody good deal and my jaw about hit the ground when they came back with the number on the q5, of course i didnt show that and squeezed another 1500 out of them in the trade. i cannot believe how well the Q held its value lol. After i picked the Audi up from getting tinted i pulled it in the driveway and got to work. It started off with the wheels, used sonax full effect wheel cleaner. I then hit the tires with Adams All purpose cleaner to remove the dealers nasty tire wet. I then proceeded with a two bucket wash and three foams. For the initial foam i used McGuires hyper wash i then pressure washed it and did two foamings with adams car wash. The reason for the megs hyper wash is because adams soap doesnt cut the dirt and grime because its PH Balanced. I wanted to ensure there wasnt anything on the paint before i touched it with the Wool Wash Mitt. The paint is near perfect and wanted to prove to my self that my method is good (self test
) I then used the master blaster to blow the water off the paint.My methad proved right as there were zero swirls/scratches put in by me. I then got to work De-badging her. I found that using turtle wax bug and tar remover provides ridiculous lubrication for the fishing line and does not induce scratches. I Wash the area with soap and then used 3m adhesive remover and a Autozone microfiber. I found out the hard way if you spray the adhesive remover and it scatters and hits any plastic it is near ruined. Spray the 3M adhesive remover on the cheap MF (saturate it) and hold it over top the adhesive. Keep spraying it on the MF and place it over top for 20 or so seconds (you want to keep doing this at least 6 times) grab another Cheap MF and lightly spray the towel and begin **GENTLY rubbing the adhesive. you will see it start disintegrating, fold the MF and spray a little bit on and continue the process until the adhesive is removed. Once removed wash the area with soap and dry. your done and have a scratch free area where you were working
I have de-badged 9 or so cars and am near a pro at it. This one was easy as the car is brand new and the adhesive didnt have time to "cure" It took me a total of 30 minutes from start to finish. Cars that have the badges on there for years you can be looking at a 1-2 hour job and 3M Adhesive remover is a MUST.
I then pulled it in the garage and got to work. I looked it over under the lights and there are zero swirls in the finish. There was a scratch in the roof the dealer had placed in when they washed it off the truck and some marring when the salesmen rubbed it while being dirty. I clayed the roof and hit it with one quick pass of adams fine machine polish. I wiped the area and the scratch/marring was removed 100% after that i took a waterless wash towell and sprayed 70% IPA alchohol to strip the finish of any wax. I was sure to find scratches/swirls underneith from any filler wax they used but i was totally shocked to see the exact perfect finish underneath. After that I hit the car with Revive Polish just to make sure any wax I had left behind was removed.
I then used adams machine super sealant to seal her from any acidic droppings (mostly bird bombs). once i allowed the sealant to cure i hit it with some brilliant glaze and finally Adams American Paste wax.
* i do not work for adams, i have been a car cleaning enthusiest for years and have been through it all. turtle wax, megs, ice, mothers, autoglym, griots, menzerna and now finally Adams Polishes. The stuff is absolutely amaizing!!! unfortunately it was over cast the day i took the before shots and the sun was going in and out today when i pulled her out after 2 days of rain. Also, my DSLR took a dump so im stuck using my P&S camera which is crap. Tje ics really doesnt do my work or this paint justice. Once i get it working ill snap some new shots and post them
Product used:
Craftsman 2600PSI pressure washer rinsing with 40 degree fan nozzle.
Italian Made foam gun
Sonax Wheel Cleaner
Adams All purpose Cleaner
McGuires hyper wash for initial foam
Adams Murana Whool wash mit
Adams Car wash in bucket/ 2 foamings
Adams Car was buckets (2 for 2 bucket method)
Master Blaster Air force dryer
Turtle Wax bug&tar remover (for de-badging)
3M Adhesive remover
Fishing Line
Adams Detail Spray
Adams Clay
Adams Fine Machine Polish
Adams Revive Polish
Adams Machine Super Sealant
Adams Brilliant Glaze
Adams Americana Past Wax
Adams Super VRT (tire wet)
Adams Glass Cleaner
Adams Glass Sealant
Adams Waterlesh Wash towel
Adams Single soft microfiver towels (6 to wipe polishes & waxes off)
You can really see the scratch in one of the pics.
Roof where the scratch is
Rinsed with pressure washer, Zero scrubbing and effort:banana:
adams foam 5 minutes after initial foaming
10 Minutes after
Pooling rinse method
Had to get the master blaster in the shot
Dry Wheel
De-Badging materials
Bug & Tar Remover
After removing the badge
After 2 twenty second segments
Gone, kinda lol
It got dark but i then washed it again to remove any strangling adhesive *****/3M Remover
The scratch really shows up
After Revive, after this shot i did a DS wipedown so the streak is gone. Im just showing the debth and clearity of the paint after Revive polish (paint cleanser)
Cant seal a german beauty without some german brew:jester:
The final shots. my DSLR isnt working and my point and shoot is over/underexposing the pics.
The scratch on the roof is totally gone!!! the sun is hitting it in this shot
Hood
This last shot is the sun hitting it. Those are not streaks or swirls in the corner i just cant steady my hand enough
The black phantom pearl effect really is one of the most impressive metalic black paint i have ever seen. Usually im a "black" paint only guy but i fell in love with this at the dealership.
Enjoy, ill get some better shots once this rain ends!
 10-19-2011, 09:15 AM
#12
AudiWorld Member
Thread Starter
Join Date: Sep 2011
Location: South Jersey (Glassboro)
Posts: 207
Likes: 0
Received 1 Like
on
1 Post
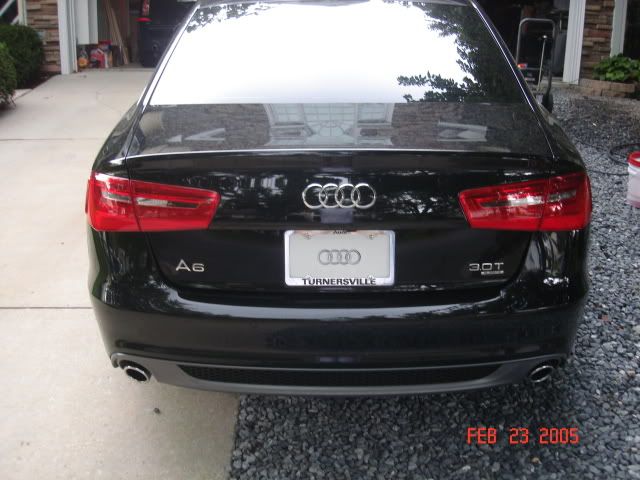
I love the supercharged badges on the sides just because it looks like it belongs and is subtle. it helps "break" up the side if you know what i mean.
I am thinking about replacing the red with a black one though.
10-19-2011, 10:43 AM
#13
AudiWorld Senior Member
The MB airforce dryer is also a very nice item to have. not only does it prevent swirls induced by drying (chamois are the worst for paint) but blows all the cracks and crevices so when you pull away your not stuck with all the hidden drips
Second is the airforce dryer. Yeah, they dry the car, but you're forcing water at 200 mph into areas that aren't designed to withstand that pressure. I'd rather have a swirl mark or two than water induced failures of electronics or other equipment.
JMO
10-20-2011, 08:09 AM
#14
AudiWorld Member
Join Date: Oct 2011
Posts: 55
Likes: 0
Received 0 Likes
on
0 Posts
How dark of a tint and what kind did you wind up getting? I just dropped my Phantom Black on Black A6 off for a tint, detail and full clearbra this morning. I decided to go with 35% 3M color safe film. With a black interior, I'm hoping it doesn't come out looking too dark.
10-20-2011, 08:33 AM
#15
Audiworld Junior Member

Join Date: Oct 2011
Location: Southern California
Posts: 58
Likes: 0
Received 0 Likes
on
0 Posts
How dark of a tint and what kind did you wind up getting? I just dropped my Phantom Black on Black A6 off for a tint, detail and full clearbra this morning. I decided to go with 35% 3M color safe film. With a black interior, I'm hoping it doesn't come out looking too dark.
Don't worry: If you went with 35% all around it won't look too dark, even taking into account the black interior.
Enjoy!
10-20-2011, 04:37 PM
#16
AudiWorld Member
Thread Starter
Join Date: Sep 2011
Location: South Jersey (Glassboro)
Posts: 207
Likes: 0
Received 1 Like
on
1 Post
How dark of a tint and what kind did you wind up getting? I just dropped my Phantom Black on Black A6 off for a tint, detail and full clearbra this morning. I decided to go with 35% 3M color safe film. With a black interior, I'm hoping it doesn't come out looking too dark.
BTW: i did 5% on the rear window and 20% on the sides. It looks alot darker then it really is because of the dark interior. IMO Audi's look out of place with anything darker then 15%, and this is coming from a guy that has 3 1/2 % on all my current/previous cars
 10-20-2011, 04:54 PM
#17
AudiWorld Member
Thread Starter
Join Date: Sep 2011
Location: South Jersey (Glassboro)
Posts: 207
Likes: 0
Received 1 Like
on
1 Post
Two issues with this. First is the comment about the chamois. I've used chamois' for 40 years and they work fine if you take care of them. I recently sold my 3 year old red Corvette and it didn't have a swirl mark anywhere.
Second is the airforce dryer. Yeah, they dry the car, but you're forcing water at 200 mph into areas that aren't designed to withstand that pressure. I'd rather have a swirl mark or two than water induced failures of electronics or other equipment.
JMO
Second is the airforce dryer. Yeah, they dry the car, but you're forcing water at 200 mph into areas that aren't designed to withstand that pressure. I'd rather have a swirl mark or two than water induced failures of electronics or other equipment.
JMO
I dont care WHO you are after washing your car dust settles and the chamois picks every bit of it up. Because its a "surface" type there is nowhere for the dust to go so into the paint it goes. A waffle weave, for lack of a better term will "Absorb" dust particles lessening the chance for inducing swirls.
The less you touch your paint with anything helps in preventing swirls, this includes a wash mit 70% of swirls are induced by drying.
As far as the masterblaster goes, maybe you have watched a video or read somewhere where an idiot was using it to dry an engine bay. Please elaborate where it is "forcing" water in, that is not meant to be? With a waxed surface the water simply flows off the paint. If what your saying is correct why is it i can blow water out of every nook and cranny (and follow it out)? if what your saying is true then technically the water is "disappearing" places which is simply not the case.
Vehicles today are designed to withstand car washes and the high pressure water nozzles and high velocity "Dryers" that force air much much faster then my measly 175mph MB. Manufactueres have an entire division dedicated to "sealing" cars from water. This isnt 1980's Chryslers/fords/GMS anymore
10-20-2011, 09:02 PM
#18
AudiWorld Member
Join Date: Oct 2011
Posts: 55
Likes: 0
Received 0 Likes
on
0 Posts
you did color stable? let me know if it looks "hazy/Dirty" This is the first time i went with the color stable as my Tint guy recommended it on the audi as it has a more OEM/Richer look. I do agree with him as when i have it side by side next to my mini the tint certainly looks much more impressive/oem. The only issue i have with it is it looks extremely "grainy" almost dirty. I have spoken to him and assures me this is completely normal. It was a shock to me because my other films (ive had over 7 cars tinted) have been perfectly clear. First time/probably the last time ill go with color stable tint.
I'll be crossing my fingers until I get the car back in a day or so.
10-26-2011, 08:27 AM
#20
AudiWorld Member
Thread Starter
Join Date: Sep 2011
Location: South Jersey (Glassboro)
Posts: 207
Likes: 0
Received 1 Like
on
1 Post
I'll definitely let you know if my results are similar. Now you have me a little worried. My installer is a high end shop here locally and they do a lot of $100k plus cars. They told me they now go 95% or more of the installs using color safe and customers really like it. I can't imagine they would if it looked hazy or dirty.
I'll be crossing my fingers until I get the car back in a day or so.
I'll be crossing my fingers until I get the car back in a day or so.
I really do regret getting color stable. Who cares what it looks from the outside I'm the one looking out.