When you click on links to various merchants on this site and make a purchase, this can result in this site earning a commission. Affiliate programs and affiliations include, but are not limited to, the eBay Partner Network.
I didn't do much yesterday but pulled the fuel rail for more room. However one of the o-ring gaskets was broken when I removed it. Small bit went down in the intake hole and I'll vacuum it out. I don't have a clue where to get those. I intend to change the bottom o-rings and those gaskets for all injectors.
I also realize that removing the heat shields from the bottom of the car is probably the bit I completely missed.....will try this way.
Long story short don't use metals to get rid of rust (wire brush) The microscopic bits of e.g. stainless steal may embed itself in the metal permitting corrosion to continue.
Just remove loose paint with those plastic trim removal tools.
Use the gel as an "abrasive" to the corrosion (black dirt like stuff)
Right now you need a quick fix. You just need to stop certain areas (areas near corrosion, paint bubbles) from becoming magnets for corrosion.
I am not paid to promote this gel, its is just unbelievably effective.
Ideally, the best way to deal with these valve covers is to have them powdered painted (special process of painting magnesium).
I have not had my valve covers powdered painted yet. ( I have been planning to)
From what I am seeing on the top of my corroded valve cover, that semi dry layer of gel seem to prevent new corrosion from forming.
An FYI to everyone who ascribes to, "It's normal. Don't do anything if the clacking goes away". OK, you got a nice looking A8. You take pride in keeping it clean and shiny. Maybe some aftermarket wheel. I't a beautiful sunny day and you're parked in front of an outdoor restaurant, ice cream shop or anywhere that there are dozens of people standing around, including some babes. You confidently strut your stuff up to you car. Not too many people notice you. Then you start the car and everyone looks, thinking, "What a lousy piece of junk"!
Yeah, it's embarrassing. That's why for several A8's I've owned, I used this procedure.
1. Find a reputable independent shop who is thoroughly familiar with the job
2. Open Wallet, extract money and give it to independent shop to "un-rattle" your car.
3. Feel justified in paying someone to do it and that you didn't screw it up yourself.
.
Updates: I tried to remove the heat shields from the bottom with no success. I am guessing the front clip needs to be off to do it. Right now The 2nd and 3rd valve cover bolts from the back on the bottom are not budging the 3rd one is rusted/stripped. Its hard to get in there to use extractor tools, really tight. While the space frame is not going to rot easily, everything else does unfortunately after 17 years of northern winters. Taking off the wheel well cloth liner has some plastic nuts on an aluminum thread. One snapped right off with the lightest bit of force.
I was also able to remove the spark plug seals from the other valve cover that is removed already. It required a puller and they just were so hard that taking them out destroyed them. They also were installed with some kind of sealant.
In stock I have a tin of Lepage Poly Super Strippa and I am not sure if it is safe for removing the paint off of the valve covers. I don't see much information about it but found a reference to cleaning up die cast models: https://www.diecastxchange.com/threa...harger.112418/. If anyone has ideas about this kind of product with the magnesium covers that would be helpful. Otherwise I'll have to buy something else (maybe the dielectric grease) or get them blasted/coated. Obviously trying to conserve costs.
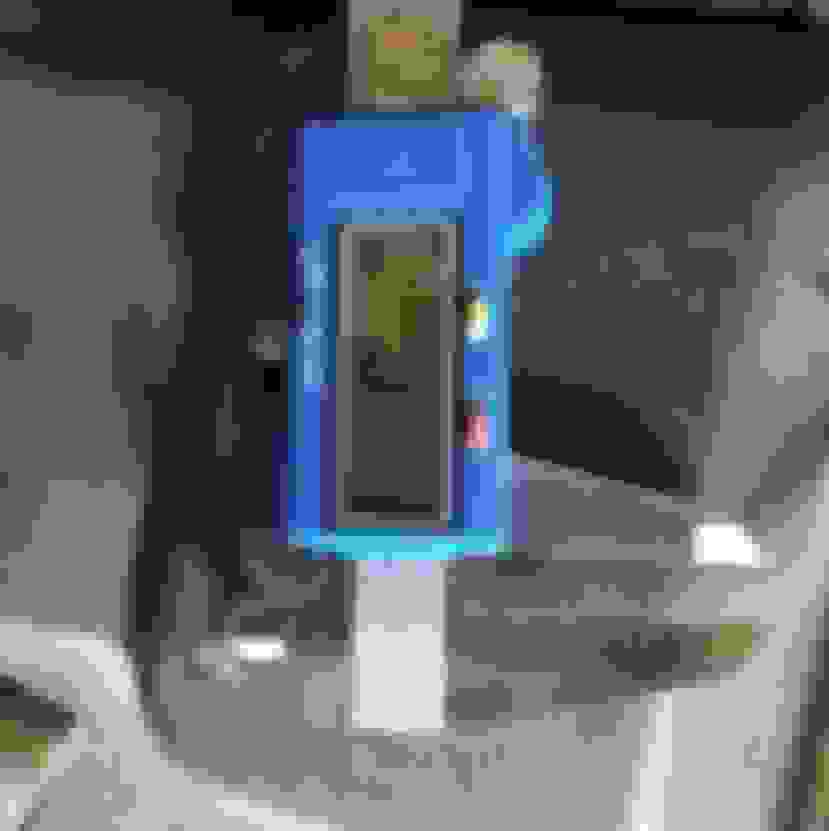
Injector o-ring dimensions as measured for anyone that wants to know. I still haven't found the red gasket/washer thingy yet for sale anywhere but these orings are readily sold everywhere. Can someone confirm if those are actually required?
I was able to use a cold chisel and tap those bolts until they started to turn and now the cover is off. The tensioner has no tension on this side at the moment. Tomorrow I'll take out the spark plugs and turn the engine over by hand and watch the behavior of the tensioners. I can see some slight wear in the shoes.
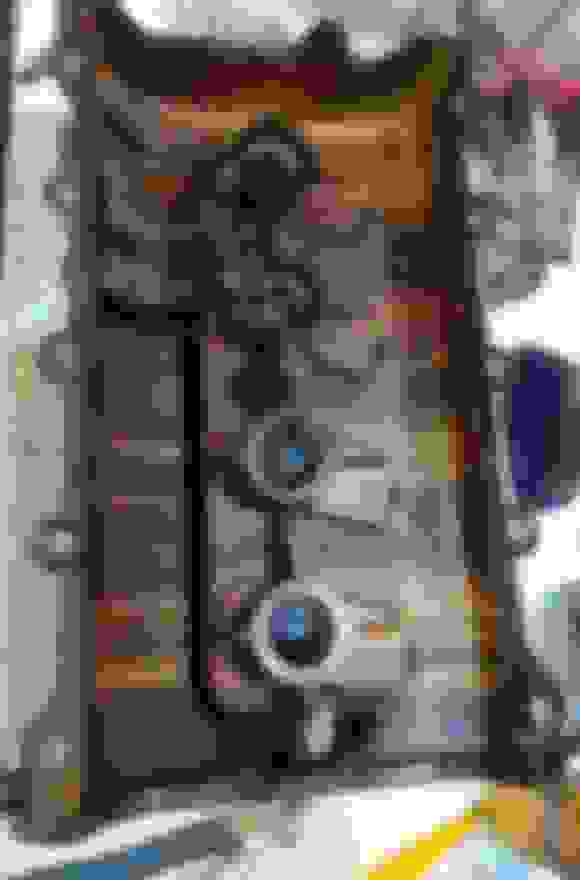
This side valve cover looks in better shape and isn't flaking like the other side. But the gasket was wet almost across the entire bottom side. as well as other areas. This one also had some kind of sealant between the cover and gasket and on the spark plug well seals. The 2 long bolts would not easily come out of the cover and were stuck due to corrosion.
Next steps:
Try to remove the coil pack harness (I need to research how) because it should give a bunch of room when reinstalling
Figure out how to clean up the covers (sandblasting/chemical stripper/etc) and repaint them
Updates: I tried to remove the heat shields from the bottom with no success. I am guessing the front clip needs to be off to do it. Right now The 2nd and 3rd valve cover bolts from the back on the bottom are not budging the 3rd one is rusted/stripped. Its hard to get in there to use extractor tools, really tight. While the space frame is not going to rot easily, everything else does unfortunately after 17 years of northern winters. Taking off the wheel well cloth liner has some plastic nuts on an aluminum thread. One snapped right off with the lightest bit of force.
Take your time removing those shields. I was so worried about those corner screws that I even bought special tools to make sure I can handle them.
But once I removed those aluminum shield covers, you can easily insert your whole hand with whatever tool you need to remove those corner bolts.
You may be having a hard time pulling it out because of the rear heat shield.
1. The rear heat shield shares a bolt with the front heat shield.
2. (on the one shared nut)The Rear shield is on top of the front shield. You need to push that aluminum as close to towards the engine as possible.
3. That shield behaves like a net to a protruding screw it easily snags.
I just struggled with it, I did contemplate on inserting a semi-stiff plastic liner to help slide out that heat shield. nut for the protruding screws This is the front right beside the filter. see the dirt from the oil. Bottom right hole. tucked behind the shield behind the firewall.
Audi only sells the o-rings..
Thanks for measuring the o-rings.
The more accurate way to measure is by measuring the diameter at the fuel injector.
I have come across those plastic locking things are called "Printle caps". You can get the whole kit from amazon sold by "uremco" or ebay.
I believe the whole kit is called fuel injector seal kit. Here is the ebay item # eBay item number: 202659218821
I was able to use a cold chisel and tap those bolts until they started to turn and now the cover is off. The tensioner has no tension on this side at the moment. Tomorrow I'll take out the spark plugs and turn the engine over by hand and watch the behavior of the tensioners. I can see some slight wear in the shoes.
This side valve cover looks in better shape and isn't flaking like the other side. But the gasket was wet almost across the entire bottom side. as well as other areas. This one also had some kind of sealant between the cover and gasket and on the spark plug well seals. The 2 long bolts would not easily come out of the cover and were stuck due to corrosion.
Next steps:
Try to remove the coil pack harness (I need to research how) because it should give a bunch of room when reinstalling
Figure out how to clean up the covers (sandblasting/chemical stripper/etc) and repaint them
Get the timing marks lined up and mark everything
Replace tensioners
From what I see , it may not be necessary to fix and release the belts , and fixing the pulleys and the crankshaft is enough , if it is possible to change the tensioner only by lifting the camshaft that is not attached to the pulley of the distribution, am I right? it would be a great advantage
Valve covers have been sent for sandblasting and I'll get them back this week. Decided to take that route vs a chemical remover. I was also able to move the coil pack harnes by disconnecting the cables at the ac compressor on the drivers side and the engine mount/alternator on the passengers side. Its pretty obvious once you trace the wires where they are connected. Tons more room by releasing the connectors and moving the harness
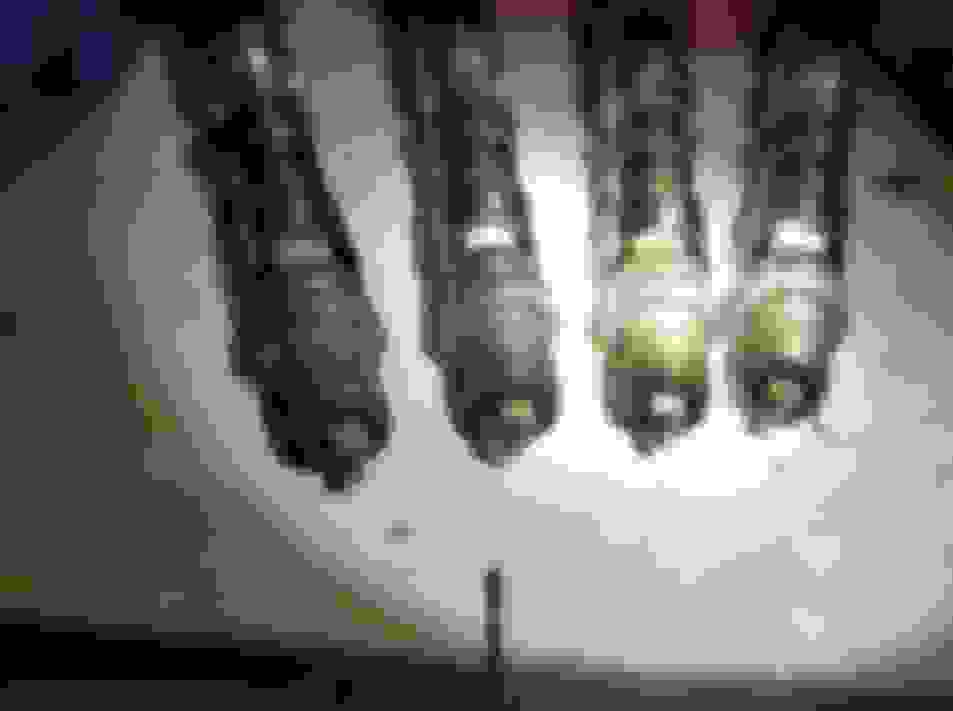
These are plugs 1-4 from top to bottom (passenger side)
Cylinders 5-8 from left to right (drivers side). They look normal but a bit lean. I am thinking I have a slight manifold leak and there is a bunch of crud I can see in the valley. I ordered the gaskets to be safe.
This is not fun taking off the drivers side. I don't think removing the intake side cam alone is enough to get it out. The metal back timing cover seems to be in the way to be able to maneuver it out. Passengers side looks a lot less difficult. The arrow shows that the bottom is nested in there and needs to move upward first to clear the shield before coming out. I cant get the cam completely out either. This may require removing the exhaust side unfortunately. Not happy if that is the case so I'll sleep on it and decide what to do. The rear cap bolts on the exhaust side are not easy to get to and I used the hole in the heatshield I made to remove the valve cover bolts again to get it done.
The crankshaft end cap at the end had RTV in the groove where the arrow is. This was changed some time ago when some transmission work was done.
I'm not spending a lot of time actually doing the work, hour here and there but it is bigger than I thought. Anyone doing this should take their time and do it properly.
Another thing to be aware of is that the Spectra Premium VTS1242 or VTS1241 tensioners do not work due to a grove that runs through the area where the valve cover gasket sits. So avoid those even though they are a part number match. Even if you fill that groove with RTV, I would guess that leaks would occur pretty quickly. Seems this application may be for specific motors but not BFM
 06-02-2022, 07:32 AM