When you click on links to various merchants on this site and make a purchase, this can result in this site earning a commission. Affiliate programs and affiliations include, but are not limited to, the eBay Partner Network.
After way too long I finally had time to get to the maintenance I had been meaning to do on my CEJA (non-cylinder deactivation FSI) W12. This included filters, fluids, lubricating hinges and treating all the rubber seals, etc. it also included spark plugs. while the intake was off to access the plugs I wanted to take a look at the valves to see if there was any appreciable carbon build-up. The car runs nicely so I wasn�t expecting much. But what I found was... wow... so much build-up!
When I clean RS 4s, RS 5s, V10 S8s and I see this kind of build-up there are definitely symptoms and likely misfiring/MIL.
I decided that maybe others would appreciate this information as prices come down and owners begins DIY-ing so I�m going to show the process. I only decided to document after I began so these three pics are only the valves that are open, the 9 other ports have the first stage of chemical cleaner in them already, some of the other valves were a decent amount worse.
I�ll wrap this up over the next couple days and show how to remove the oil separator, intake plenums, change spark plugs and clean the valve chemically. (I do not have a walnut shell blaster otherwise I would likely go that route with so many valves to clean)
So begins the saga that is carbon cleaning 24 intake valves. So far I have completed 8 and I�m averaging 40-45 minutes per valve making this as easy 15 hour endeavor. For those that have never experienced carbon buildup in person once it bakes onto the valves and cooks there for long periods of time it gets VERY hard. Like rock hard. There are two methods for cleaning: mechanical (walnut shell blasting is the favorite mechanical method) and chemical. The equipment to make mechanical cleaning possible is quite expensive and then specific attachments are needed for each head. For this reason I do not have a walnut shell blaster and I will be showing how the chemical method works. Full disclosure: the chemicals work VERY well at softening the carbon, however, it takes a lot of manual mechanical cleaning. The cleaning portion pertains to every FSI motor and essentially all other direct injected gasoline engines.
Anyway, enough intro. Let�s begin.
Tools needed
-7mm socket with ratchet or wrench
-10mm deep socket
-T30 screwdriver or socket with ratchet and extension, at least 2-3� long
-clamp removal pliers or channel locks/vice grips
-long flathead screwdriver
Parts & supplies needed
-intake manifold gaskets
07P.133.227.A (x6)
07P.133.227.B (x6)
-spark plugs 101.905.622.A (you have the intake plenum off, you might as well do spark plugs. Or perhaps you took the intake plenum off to do spark plugs and decided to carbon clean, here�s the correct part number. It belongs only to the D4 W12 and the 3.6L Cayenne. That�s it!)
-lots of shop rags
-brake parts cleaner
-maf cleaner
-BG 2 part gasoline direct injection cleaner
-small brass wire brushes
-wooden kabob skewers
-metal pipe cleaners
Before anything get the engine real nice and hot. Full operating temp, oil temp not just coolant. We want heat to help activate the chemicals.
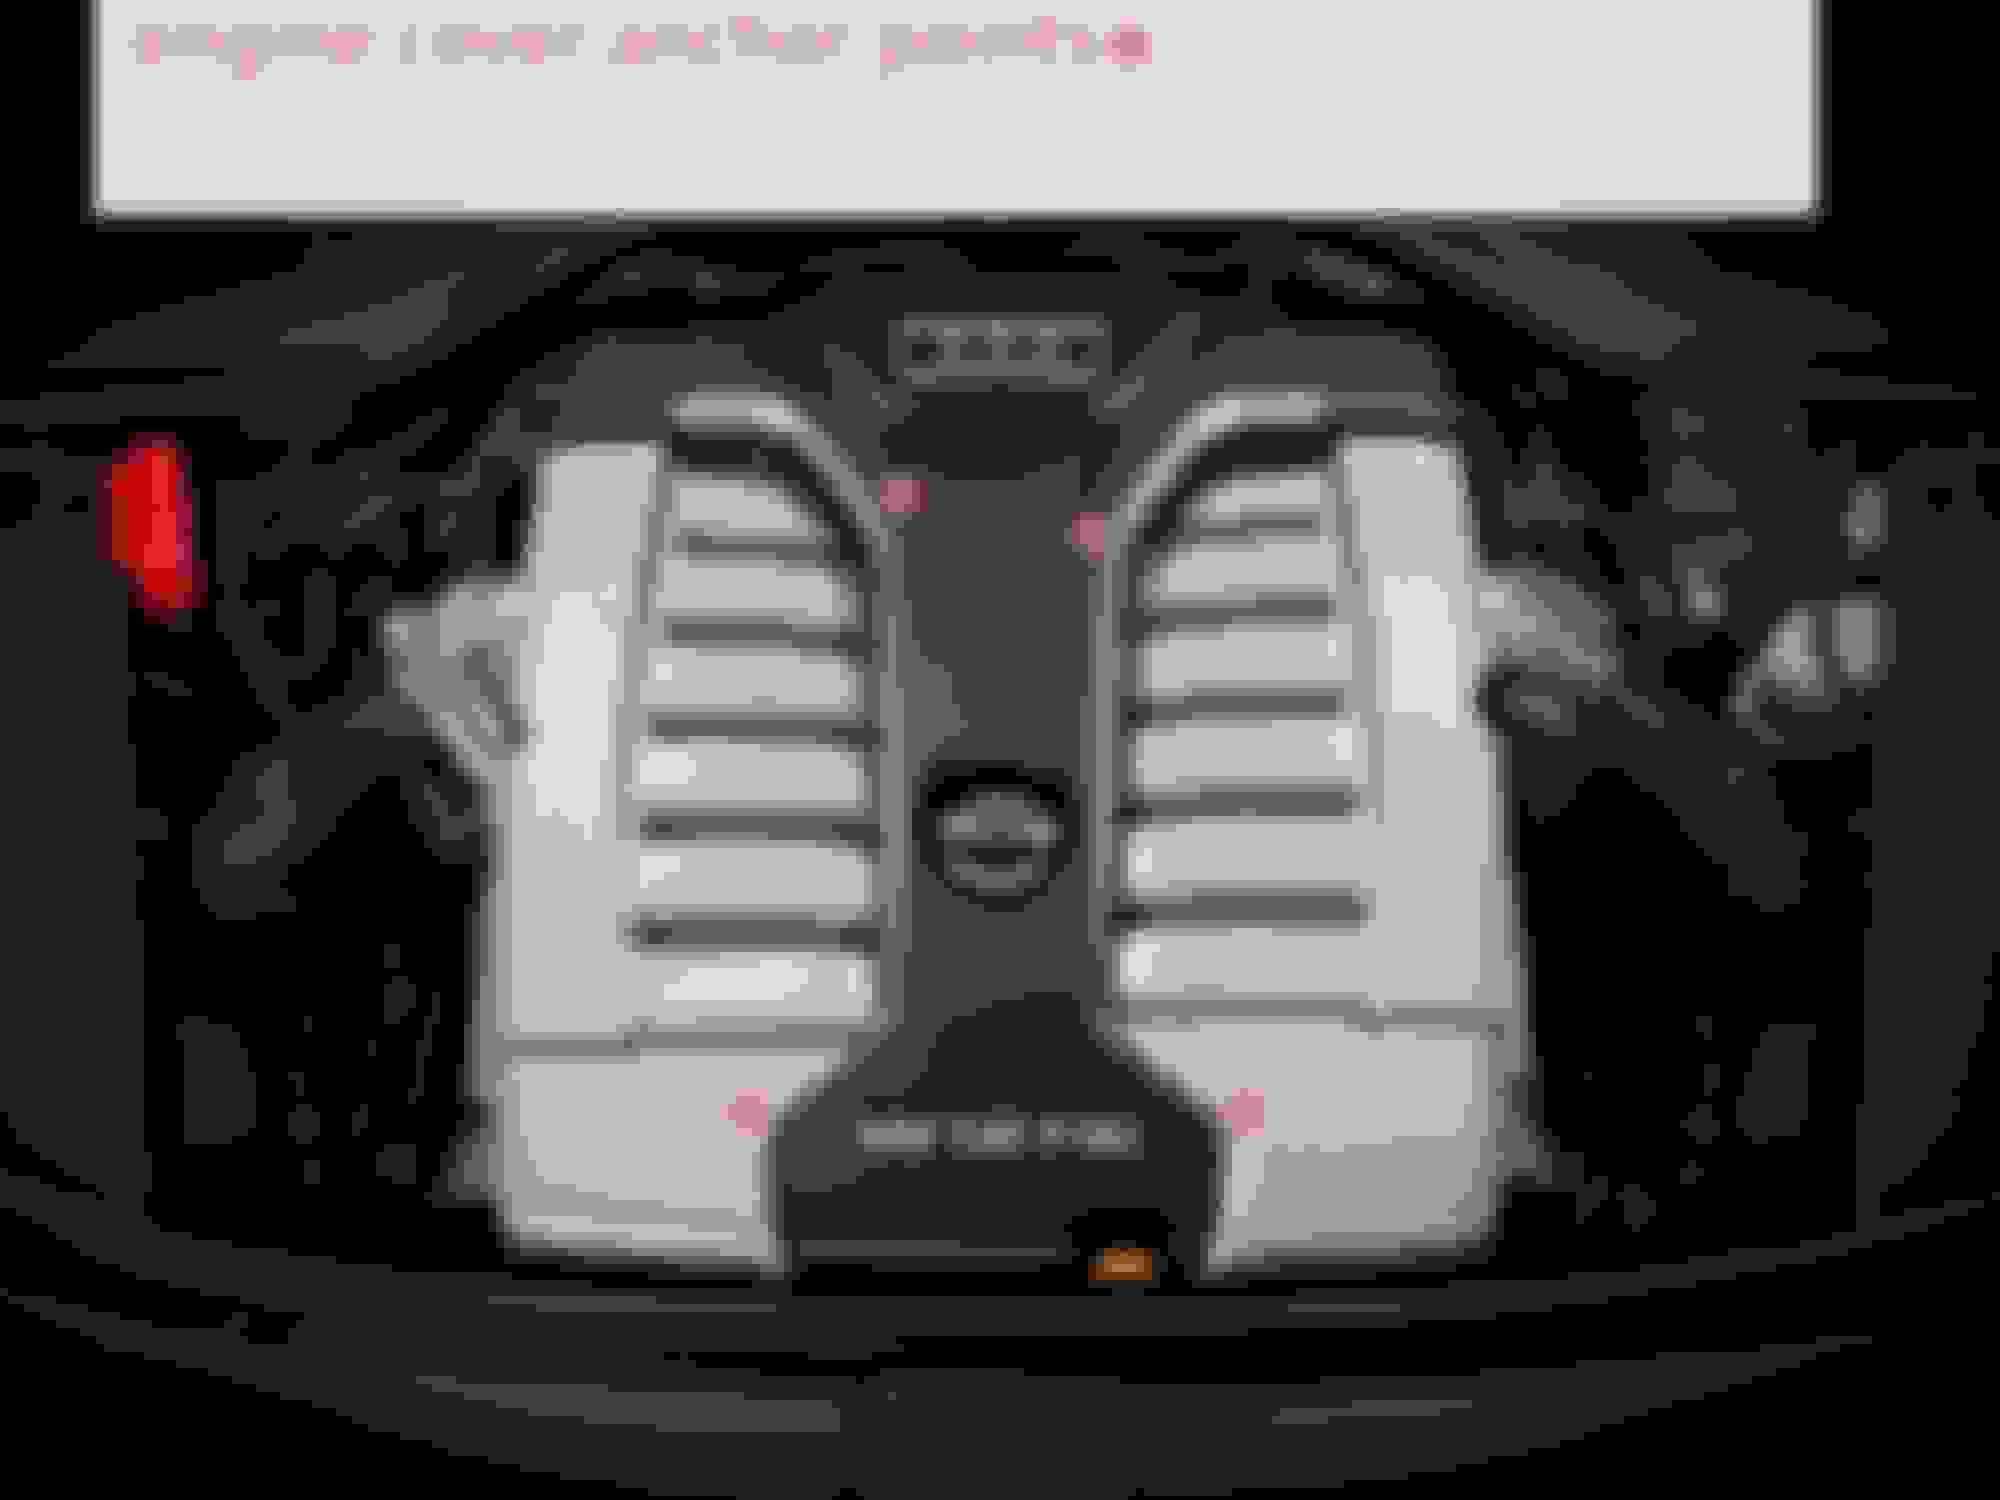
To get to the intake ports the engine cover, intake plenum- with throttle bodies, oil separator and a couple hoses need to be removed.
The engine cover is held on by rubber grommets in the cover to plastic posts on the engine. Tug upward on the cover beginning in the back and then the front.
Next remove the oil separator. Begin by disconnecting the two hoses at the front of the separator completely, these are the standard squeeze-the-sides-and-pull style. Then remove the hose on the other end of the separator only at the separator side leaving it attached to the head on the other side. The separator is held in place by four 10mm bolts. Two of them are integrated to the posts that hold the engine cover in place. Once these bolts are removed and hoses disconnected simple remove the separator and set it aside.
Now we will disconnect both throttle bodies from the air boxes. We will leave the boxes and it is your choice whether to leave the accordion hoses or leave them attached to the air boxes. Loosen the worm clamps of the accordion hoses at the throttle bodies with your 7mm wrench or socket, use your hose clamp tool or channels locks or vice grips to remove the clamps on the vacuum lines leading into the throttle bodies and disconnect the electrical connectors (hint for removing this still of connector; you want to press the release lever and first push the connector inward and then pull out. When you push in often times you will hear a disengagement click. If you are completely removing the accordion hoses to make lifting the intake plenums off just a little bit easier you need to remove on more line entering the accordion hose on the passenger side. Being mindful of the plastic elbow�s fragility simply pull the rubber line off.
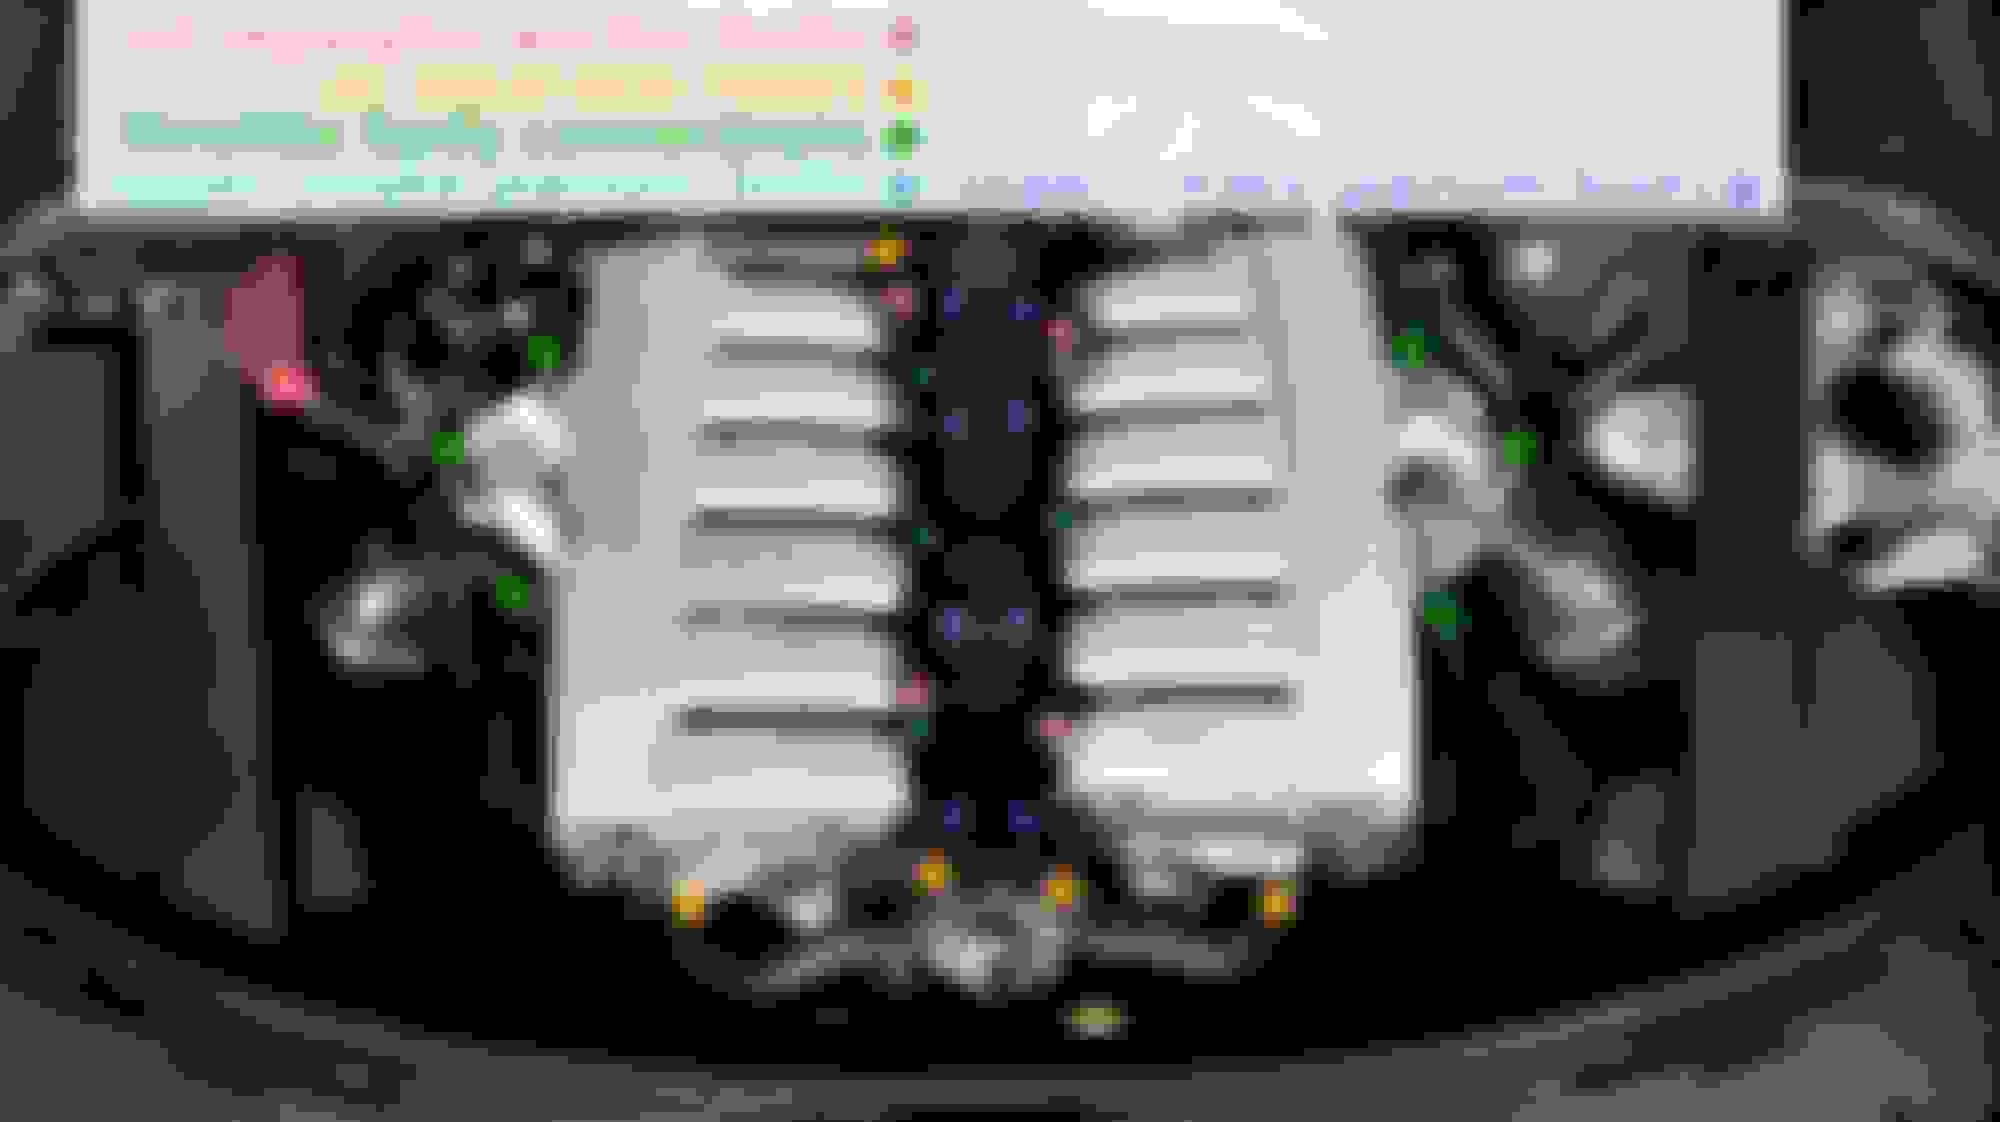
The only things remaining holding the plenums to the head are 7 T30 bolts on each side. 3 are on top and readily noticeable on each side, the 4 others per side are lower. See second picture for a better look. Once removed the plenums can lifted out of place. They are magnesium and very light. They may stick just a little bit to the head but will come off with just a little gentle tugging.
Now we have a great look at the intake ports. Yeesh. First step is to divvy up the part 1 cleaner into all of the CLOSED valves. You don�t want to pour this stuff directly into the cylinder, it would be a waste and you will likely want to clean it out before trying to start the car. So just make sure you are starting only with closed valves. 2 or 3 cylinders will be open at a time depending on the crank rotation. Remember to save some part 1 cleaner for the open valves that you will close and clean later on. If you can let part 1 soak over night then do it, it will only help. Otherwise let it sit for at least 30 minutes.
__________
I�m out of time for now, I will update this later on. Here is the finished result for one port. Not perfect but I can only spend so much time. I plan on making this part of regular maintenance and it will stay clean and get better and better with time.
Last edited by 2turbos4rings; 08-09-2020 at 09:42 AM.
D4, my D3 W12- being port injected- does not need cleaning as the fuel spray keeps the intake ports washed clean. I thought perhaps there would be a little bit but definitely not this much buildup.
To be honest I am quite happy to find this because I�m quite happy with the way the car drove and idled. I�m easily going to get some good horsepower back.
D4 - right, I figured. It was running good before, not noticeable. Shows the W12 was built to run, breaths well enough to get through most conditions. Would love to compare with the newer version W12, see if Audi addressed this. Awesome post!
 08-05-2020, 04:17 PM