55K Service DIY
 02-18-2013, 08:26 PM
#1
AudiWorld Member
Thread Starter

Join Date: Feb 2010
Posts: 201
Likes: 0
Received 0 Likes
on
0 Posts
So I just completed my 55K service and wanted to share some tips of how I went about completing it. Some members have already posted DIY instructions for components of the 55K service so I won't replicate those.
Oil and Filter Change: https://www.audiworld.com/forums/sho...2800411&page=2 Thanks to rs4-380
Cabin pollen filter change: https://www.audiworld.com/forums/sho...+filter&page=2 This is an A4 DIY but is the same for the Q5. Thanks to Prime Time
Spark Plugs and Engine Air Filter:
There are other threads for 3.2 engines in other cars that were helpful in attacking these tasks, but the Q5 presented its own challenges. To do the spark plugs actually required moving the air filter housing so I'll talk about these two simultaneously. For the air filter housing first remove the seven screws using a torx bit. Additionally, remove the metal clips that attach the large air hose to the air filter housing. With a bit of work this will remove the top of the air filter housing and the engine air filter.
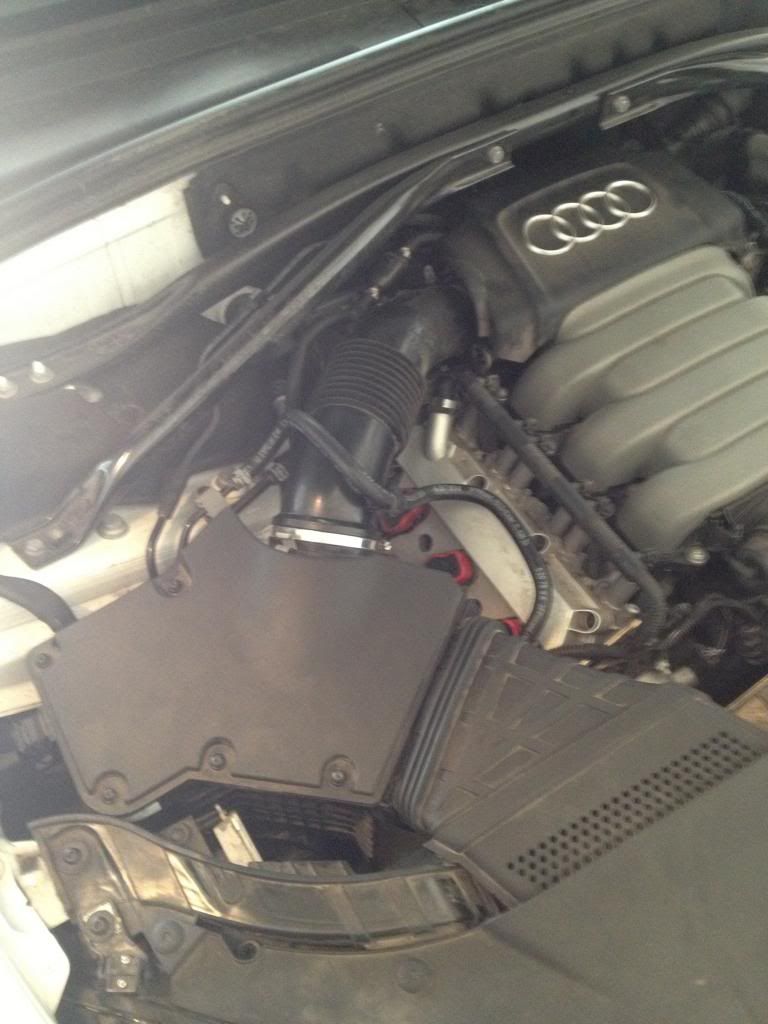
The air filter itself is easy to replace and only has two small screws holding it place. After the filter was replaced I set it aside till I completed the spark plug replacement.

The lower air filter housing needed to be shifted to allow access to the spark plugs and ignition coils. To do this I released two clips holding the plastic air intake duct to the air filter housing and also pulled up on the air filter housing to release two rubber mounts that hold the air filter housing in place. With a bit of massaging, the air intake duct will come off allowing the air filter housing to be shifted appropriately to gain access to the ignition coils.
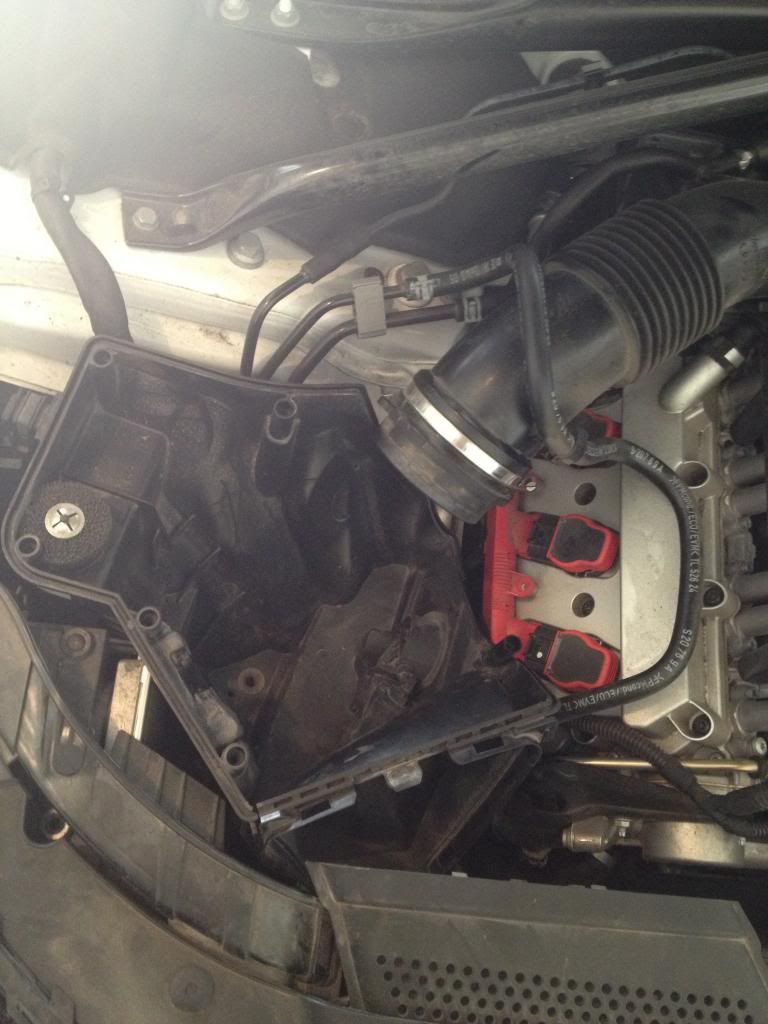
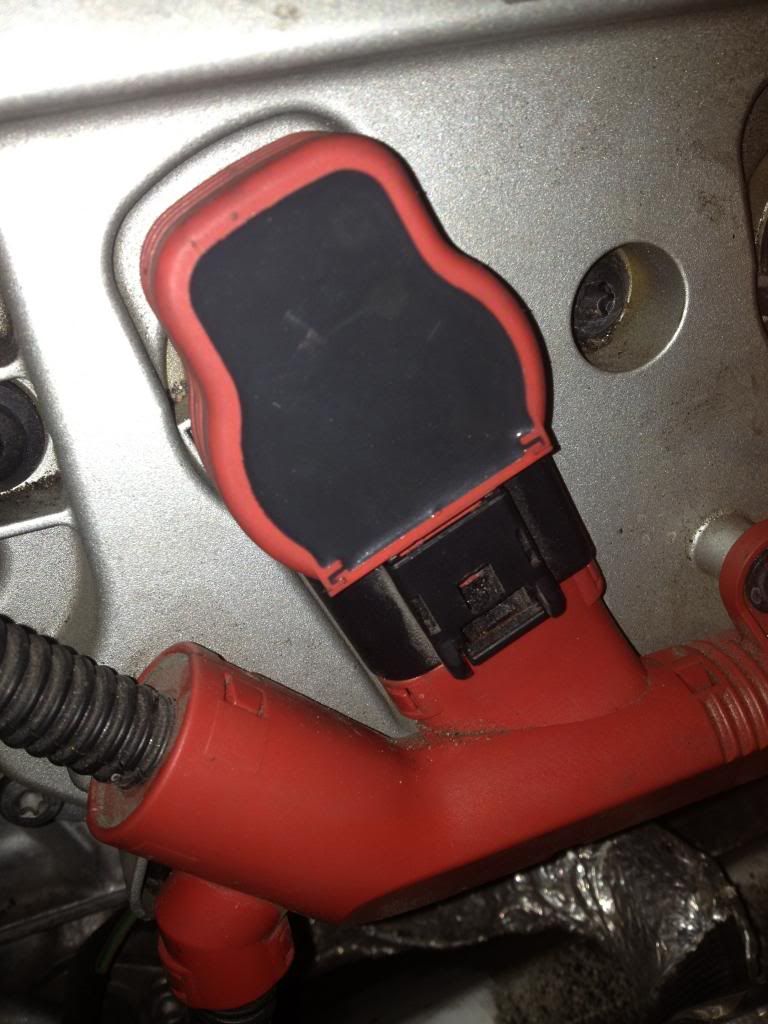
To release the harness from the 3 ignition coils first I unscrewed the two small hex screws, then, I used a small flathead screw driver to release the small clips holding the harness in place. There was an audible click when the clip released and then with gentle even pressure on the entire harness, the harness slides free of the three coils. To remove the coil apply even upward pressure with your hands to slide the coils out. Now you have access to the spark plugs. Using a long 5/8 or 16mm spark plug socket you can release the old spark plug from the chamber. I then replaced the spark plug and torqued them to 22ft-lbs.
The three coils/spark plugs on the passenger side were relatively easy to replace with the air filter housing free. After completing the spark plugs on this side, I reattached the harness. Make sure each clip makes an audile "click". I then reassembled the air filter housing. This was a bit of a puzzle and I found it best to first attach the top of the filter housing with the air filter. Then I reattached the air intake duct. At this point the two rubber mounts are still free, and with them free I reattached the large hose. Reattaching the hose proved to be a large pain that took some time and force. Once the two metal clips were reattached I then pushed the rubber mounts back onto the frame of the car.
One side done.
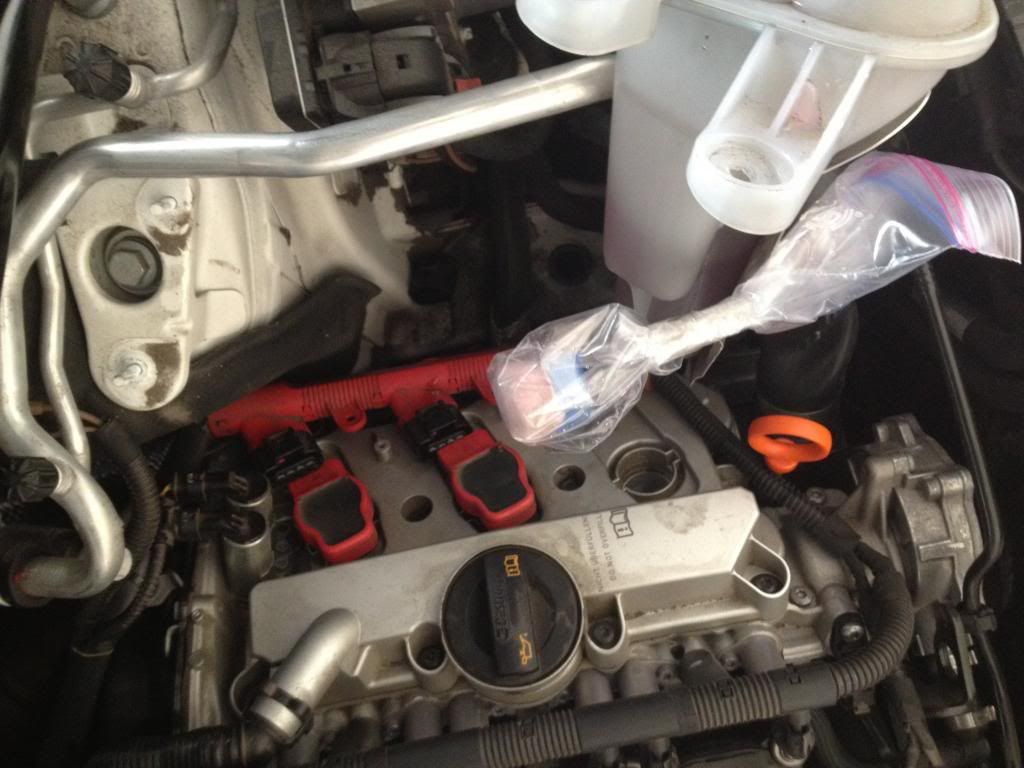
The driver side proved challenging as well. I removed the coil harness the same as before. I found that it was easiest to remove the farthest forward coil first before doing anything else, but to gain access to its spark plug, the coolant reservoir needed to be shifted.
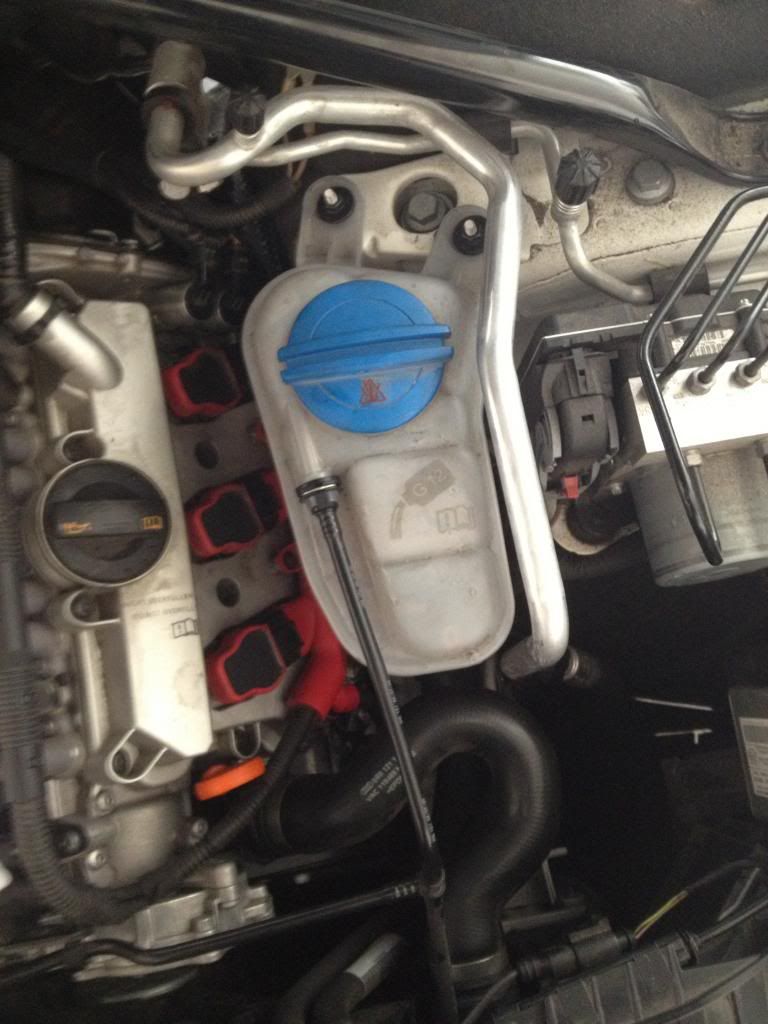
To do this I removed the two bolts holding the coolant reservoir to the frame at the back. Then it was necessary to remove the small black hose on top of the coolant reservoir by lifting the silver clip on it and then pulling it off. This hose will continue to slowly leak coolant so I wrapped it to contain the mess. Next, the rigid aluminium line that runs on the outboard side of the coolant tank needed to be adjusted. There was a single nut holding the coolant line to the frame near the front left of the engine compartment.
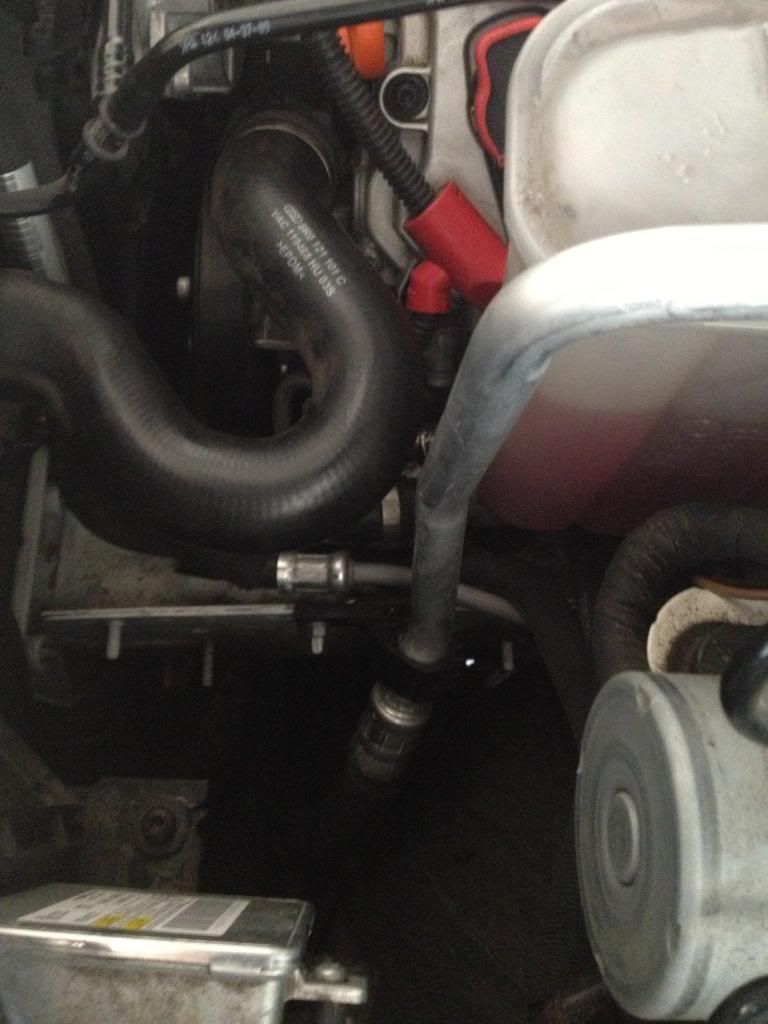
With the coolant reservoir loose I gently wedged it between the aluminium line and the rubber "s" hose. This allowed enough room to access the spark plugs.
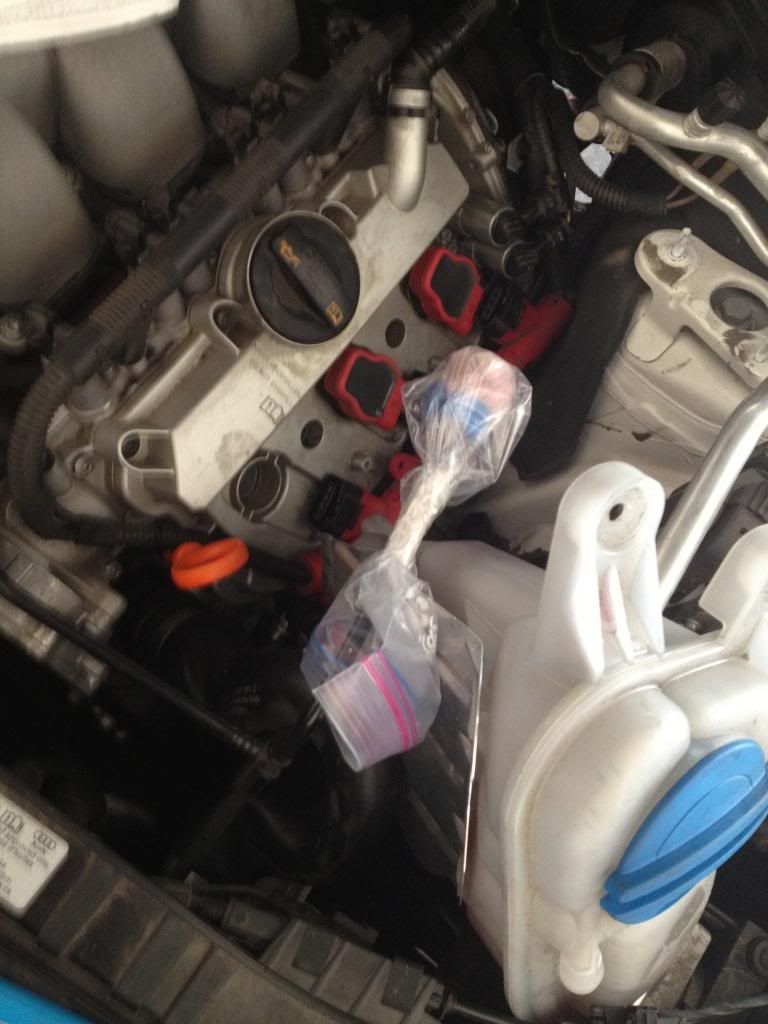
The spark plugs were replaced same as before, then the harnesses reattached, then the coolant reservoir replaced in reverse order. There was some coolant loss during this process but I had extra to replace it with. Overall, this process took a few hours as this was my first time going at it. When I was researching replacing spark plugs no one had seemed to attempt it on a 3.2 Q5 so I hope my experience helps others. I'm not a professional mechanic so take what I say with a grain of salt. I was able to successfully complete the service and the engine is running smoothly.
Oil and Filter Change: https://www.audiworld.com/forums/sho...2800411&page=2 Thanks to rs4-380
Cabin pollen filter change: https://www.audiworld.com/forums/sho...+filter&page=2 This is an A4 DIY but is the same for the Q5. Thanks to Prime Time
Spark Plugs and Engine Air Filter:
There are other threads for 3.2 engines in other cars that were helpful in attacking these tasks, but the Q5 presented its own challenges. To do the spark plugs actually required moving the air filter housing so I'll talk about these two simultaneously. For the air filter housing first remove the seven screws using a torx bit. Additionally, remove the metal clips that attach the large air hose to the air filter housing. With a bit of work this will remove the top of the air filter housing and the engine air filter.
The air filter itself is easy to replace and only has two small screws holding it place. After the filter was replaced I set it aside till I completed the spark plug replacement.
The lower air filter housing needed to be shifted to allow access to the spark plugs and ignition coils. To do this I released two clips holding the plastic air intake duct to the air filter housing and also pulled up on the air filter housing to release two rubber mounts that hold the air filter housing in place. With a bit of massaging, the air intake duct will come off allowing the air filter housing to be shifted appropriately to gain access to the ignition coils.
To release the harness from the 3 ignition coils first I unscrewed the two small hex screws, then, I used a small flathead screw driver to release the small clips holding the harness in place. There was an audible click when the clip released and then with gentle even pressure on the entire harness, the harness slides free of the three coils. To remove the coil apply even upward pressure with your hands to slide the coils out. Now you have access to the spark plugs. Using a long 5/8 or 16mm spark plug socket you can release the old spark plug from the chamber. I then replaced the spark plug and torqued them to 22ft-lbs.
The three coils/spark plugs on the passenger side were relatively easy to replace with the air filter housing free. After completing the spark plugs on this side, I reattached the harness. Make sure each clip makes an audile "click". I then reassembled the air filter housing. This was a bit of a puzzle and I found it best to first attach the top of the filter housing with the air filter. Then I reattached the air intake duct. At this point the two rubber mounts are still free, and with them free I reattached the large hose. Reattaching the hose proved to be a large pain that took some time and force. Once the two metal clips were reattached I then pushed the rubber mounts back onto the frame of the car.
One side done.
The driver side proved challenging as well. I removed the coil harness the same as before. I found that it was easiest to remove the farthest forward coil first before doing anything else, but to gain access to its spark plug, the coolant reservoir needed to be shifted.
To do this I removed the two bolts holding the coolant reservoir to the frame at the back. Then it was necessary to remove the small black hose on top of the coolant reservoir by lifting the silver clip on it and then pulling it off. This hose will continue to slowly leak coolant so I wrapped it to contain the mess. Next, the rigid aluminium line that runs on the outboard side of the coolant tank needed to be adjusted. There was a single nut holding the coolant line to the frame near the front left of the engine compartment.
With the coolant reservoir loose I gently wedged it between the aluminium line and the rubber "s" hose. This allowed enough room to access the spark plugs.
The spark plugs were replaced same as before, then the harnesses reattached, then the coolant reservoir replaced in reverse order. There was some coolant loss during this process but I had extra to replace it with. Overall, this process took a few hours as this was my first time going at it. When I was researching replacing spark plugs no one had seemed to attempt it on a 3.2 Q5 so I hope my experience helps others. I'm not a professional mechanic so take what I say with a grain of salt. I was able to successfully complete the service and the engine is running smoothly.
 02-18-2013, 10:21 PM
#2
AudiWorld Member

Join Date: Nov 2012
Location: Bay Area
Posts: 199
Likes: 0
Received 0 Likes
on
0 Posts
great write up! Thanks! I did mine a couple weekends ago too. Was a snap. But I didn't have to remove as much on the driver side. All I did was take the 2 nuts off that held the coolant reservoir in place and it had enough wiggle room to get the plugs changed by holding it back with my free hand to create the space needed.
Also those little clips that you have to 'release' snap pretty easy. I broke one of them with just my finger, they don't take much to release. But if you do brake one, its not that big of a deal. All mine did was expose the plastic 'latch' that holds the plug in place, it still latches with no issues.
Also those little clips that you have to 'release' snap pretty easy. I broke one of them with just my finger, they don't take much to release. But if you do brake one, its not that big of a deal. All mine did was expose the plastic 'latch' that holds the plug in place, it still latches with no issues.
02-19-2013, 11:14 AM
#3
Audiworld Junior Member

Join Date: Sep 2012
Location: Princeton NJ
Posts: 82
Likes: 0
Received 0 Likes
on
0 Posts
Wow, i really thought Audi's would require a lot more to service at that millage. Good to hear!
And 32% less spark plug to change on the 2.0T ;-)
Sure there's not some bolt checking as well? Even Japanese cars require some drivetrain bolts to be checked at that millage.
And 32% less spark plug to change on the 2.0T ;-)
Sure there's not some bolt checking as well? Even Japanese cars require some drivetrain bolts to be checked at that millage.
02-19-2013, 11:36 AM
#4
AudiWorld Member
Thread Starter
Join Date: Feb 2010
Posts: 201
Likes: 0
Received 0 Likes
on
0 Posts
Wow, i really thought Audi's would require a lot more to service at that millage. Good to hear!
And 32% less spark plug to change on the 2.0T ;-)
Sure there's not some bolt checking as well? Even Japanese cars require some drivetrain bolts to be checked at that millage.
And 32% less spark plug to change on the 2.0T ;-)
Sure there's not some bolt checking as well? Even Japanese cars require some drivetrain bolts to be checked at that millage.
http://microsites.audiusa.com/ngw/11...rt_2010_J2.pdf

Thread
Thread Starter
Forum
Replies
Last Post
hunterrr
A4 (B6 Platform) Discussion
1
06-30-2006 10:27 AM
cpayne
S4 / RS4 (B5 Platform) Discussion
8
06-04-2002 03:47 PM