Fuel door actuator replacement?
 10-13-2013, 12:18 PM
#1
AudiWorld Member
Thread Starter

Join Date: Oct 2012
Posts: 82
Likes: 0
Received 0 Likes
on
0 Posts
Ok so I have the part- but I have to confess- I have no idea how to remove the fuel door and housing on the Q5 to get at the thing.
There's one torx screw underneath the actuator pin, but other than that I see nothing...
Can someone tell me how to pop that guy out?
Thanks!
There's one torx screw underneath the actuator pin, but other than that I see nothing...
Can someone tell me how to pop that guy out?
Thanks!


 10-19-2013, 01:17 PM
#4
AudiWorld Member
Thread Starter
Join Date: Oct 2012
Posts: 82
Likes: 0
Received 0 Likes
on
0 Posts
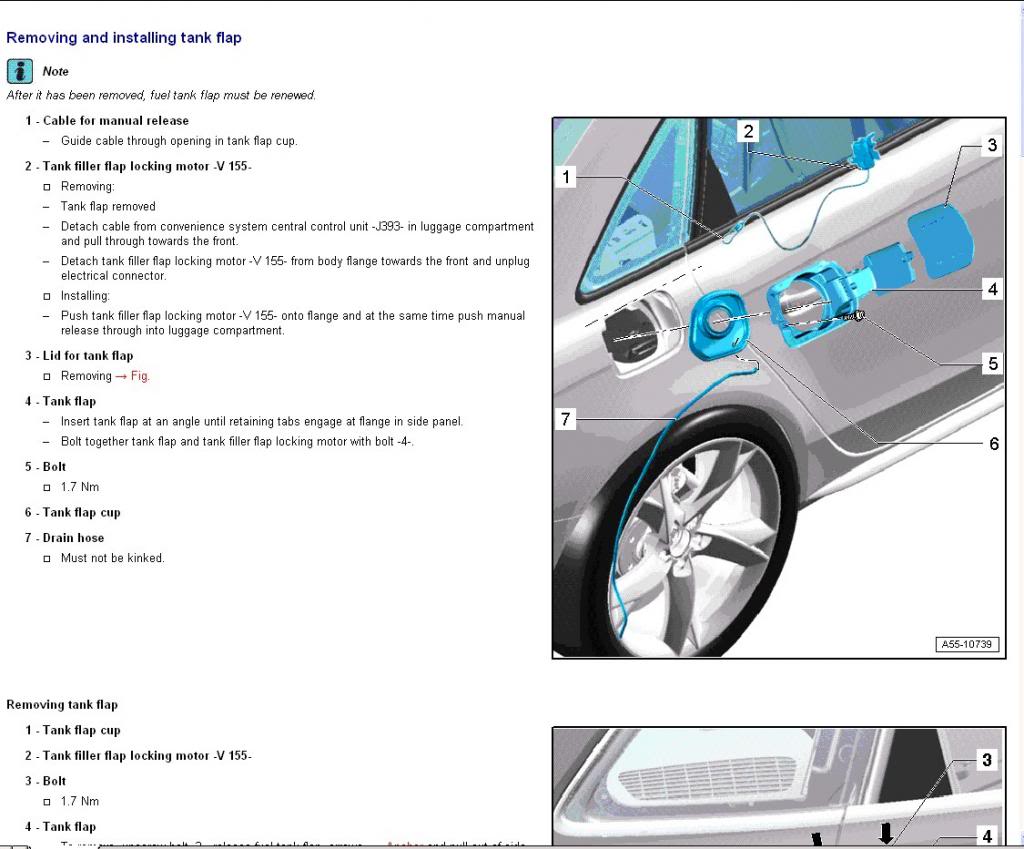
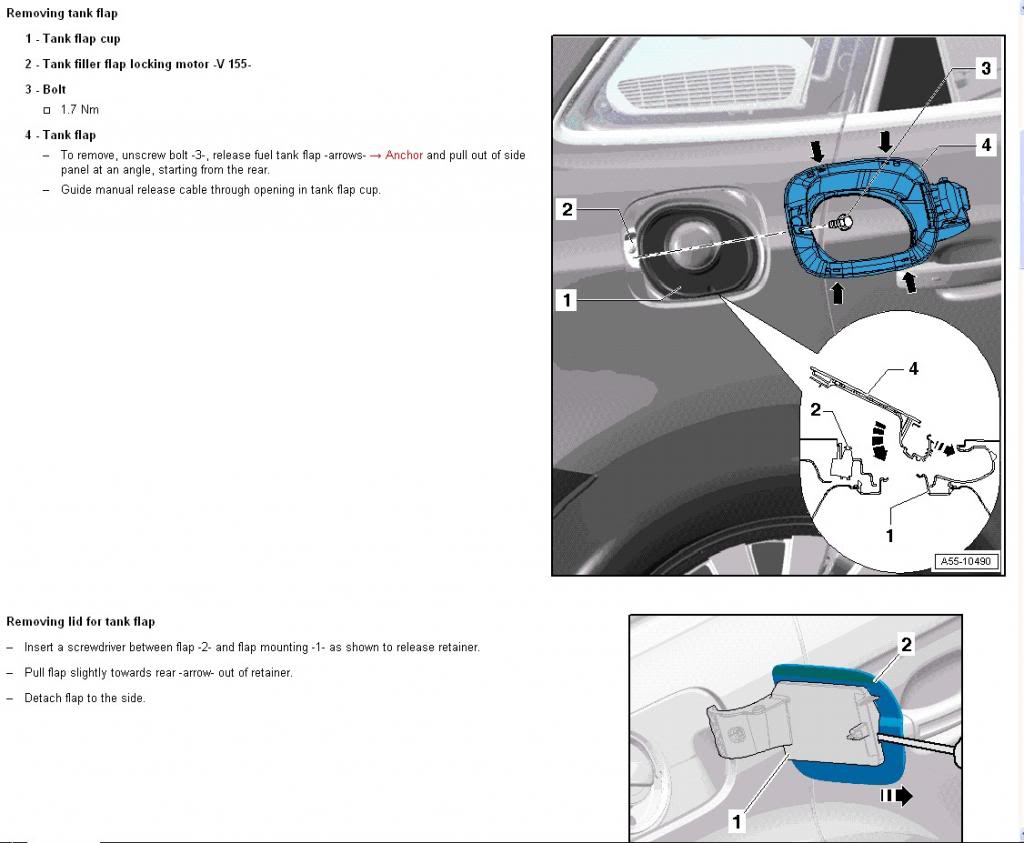
Done! The fuel flap is a bit of a pain to remove- you need a flathead screwdriver in the little slots and have to push with some force to unseat the anchor. Worked best to do this while pulling gently on the fuel door and being careful not to scratch the paint.
But it worked and once that door flap was off took about 30s to replace the actuator.
Thanks for the diagram, that was key!
But it worked and once that door flap was off took about 30s to replace the actuator.
Thanks for the diagram, that was key!
12-11-2015, 12:58 PM
#5
AudiWorld Newcomer

Join Date: Mar 2006
Posts: 2
Likes: 0
Received 0 Likes
on
0 Posts
Hi everyone.... Having a really hard time removing the fuel tank flap / anchor points... Has anyone done this without breaking the darn thing? I'm about to just rip it apart and buy a new one! All just to replace the gas door actuator!! [/endminirant]
 08-12-2017, 06:00 PM
#7
Trending Topics
04-11-2018, 09:32 PM
#8
AudiWorld Super User
I used WD40 to repair the actuator. There is an opening (recess) at the back of the actuator.
however the mechanism itself has white lithium grease. This would be a better lubricant to use rather than wd40. Had to break the actuator mechanism to find out, 6 months after.
however the mechanism itself has white lithium grease. This would be a better lubricant to use rather than wd40. Had to break the actuator mechanism to find out, 6 months after.
Last edited by apoelistas; 03-10-2019 at 10:47 PM.
03-10-2019, 05:45 PM
#9
AudiWorld Newcomer

Join Date: Mar 2019
Posts: 2
Likes: 0
Received 0 Likes
on
0 Posts
I had a lot of success with a metal trim removal tool. It had a curved head (like most of them do). I was able to wedge it under the small gasket on the lower rear side. I was able to pull up and pop out that section, then moved the tool towards the front until I disconnected the entire bottom section. I then worked the tool toward the back going around the actuator itself and up towards the top I was able to get one good pull in and then it all came out really easily. The whole thing took less than 10 minutes even when I was being careful and timid. Best of all, no holes. When I slid it back in, it was good as new.
Again, what worked for me:
- Curved metal trim tool
- Start on the bottom towards the rear of the car to undo the 1st tab
- Move towards the front to free the entire bottom
- Move to the back, up and around the actuator until you get the top out
