Shifter & Door Sill mods
 06-21-2012, 12:12 PM
#1
AudiWorld Senior Member
Thread Starter
Join Date: Jun 2011
Location: Huntington/Charleston, WV
Posts: 1,364
Likes: 0
Received 1 Like
on
1 Post
Got my S-line door sills on today. They look great.
Pics to come.
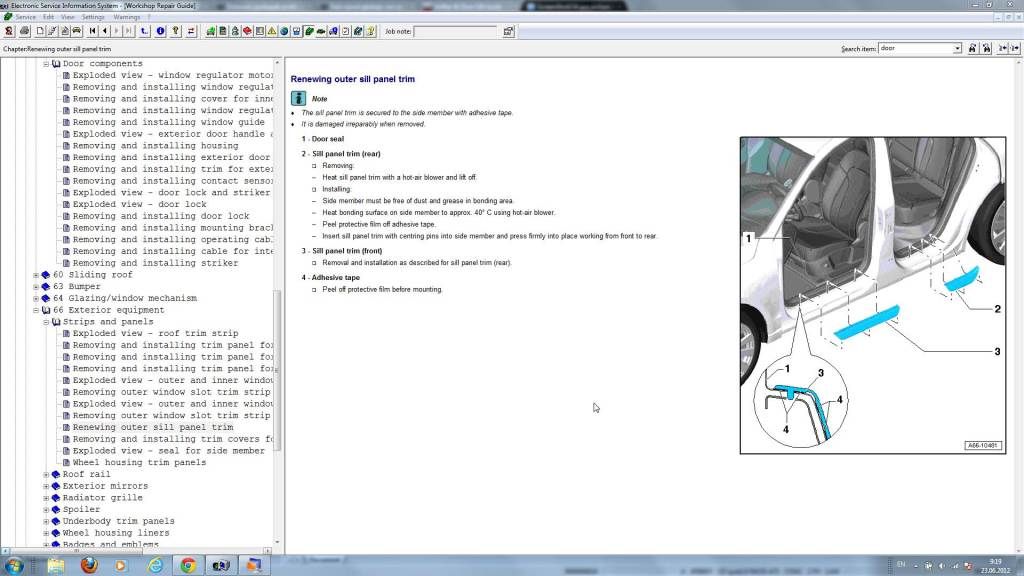
S-tronic shifter conversion is a work in progress. Took multiple photos of the process along the way. Currently I have twisted the plastic pin and am able to get the shifter all the way down to the bottom seat. I am able to run through all the gears, but have the common problem most have had of having the shift lever stay engaged.
Had to leave for the evening (going to the Pirates-Twins game), but will attempt to reheat and adjust to a more accurate 90 degrees tomorrow morning. I can tell it's a bit off. I have filed and sanded, but can tell I need to adust just a bit more.
Side note: the new leather boot I ordered didn't fit, so I had to take out all the staples and swap the leather onto the old plastic frame and restaple... So that was fun.
Once I get back from my NJ trip, I'll organize all the pics and (hopefully have a working shifter by then).
Update tomorrow.
Pics to come.
S-tronic shifter conversion is a work in progress. Took multiple photos of the process along the way. Currently I have twisted the plastic pin and am able to get the shifter all the way down to the bottom seat. I am able to run through all the gears, but have the common problem most have had of having the shift lever stay engaged.
Had to leave for the evening (going to the Pirates-Twins game), but will attempt to reheat and adjust to a more accurate 90 degrees tomorrow morning. I can tell it's a bit off. I have filed and sanded, but can tell I need to adust just a bit more.
Side note: the new leather boot I ordered didn't fit, so I had to take out all the staples and swap the leather onto the old plastic frame and restaple... So that was fun.
Once I get back from my NJ trip, I'll organize all the pics and (hopefully have a working shifter by then).
Update tomorrow.

 06-22-2012, 08:41 AM
#3
AudiWorld Senior Member
Thread Starter
Join Date: Jun 2011
Location: Huntington/Charleston, WV
Posts: 1,364
Likes: 0
Received 1 Like
on
1 Post
Straightened the pin up this morning. Everything looks really straight (90 deg) and even (from top down). Shifter sits completely down with ease, but the pin still stays stuck in the "in" position.
We have tried everything, filing, trying to check it with some sort of indicator. Tried marking it, markered it dark and applied talc, applied lubricant grease... All in an attempt to see where that damn pin is hitting heavy when pressed.
Thanks goodness we fabricated a device to pop that shift pin back out because I've had to use it almost 10 times.
So at this point it's still stuck in place. Going to work on it some more in a bit.
I think it's hitting on the top, but I really have no idea. I may be driving around with my shifter ways pressed in.
Really tough mod.
06-22-2012, 08:52 AM
#4

Straightened the pin up this morning. Everything looks really straight (90 deg) and even (from top down). Shifter sits completely down with ease, but the pin still stays stuck in the "in" position.
We have tried everything, filing, trying to check it with some sort of indicator. Tried marking it, markered it dark and applied talc, applied lubricant grease... All in an attempt to see where that damn pin is hitting heavy when pressed.
Thanks goodness we fabricated a device to pop that shift pin back out because I've had to use it almost 10 times.
So at this point it's still stuck in place. Going to work on it some more in a bit.
I think it's hitting on the top, but I really have no idea. I may be driving around with my shifter ways pressed in.
Really tough mod.
We have tried everything, filing, trying to check it with some sort of indicator. Tried marking it, markered it dark and applied talc, applied lubricant grease... All in an attempt to see where that damn pin is hitting heavy when pressed.
Thanks goodness we fabricated a device to pop that shift pin back out because I've had to use it almost 10 times.
So at this point it's still stuck in place. Going to work on it some more in a bit.
I think it's hitting on the top, but I really have no idea. I may be driving around with my shifter ways pressed in.
Really tough mod.
06-22-2012, 10:24 AM
#5
AudiWorld Senior Member
Thread Starter
Join Date: Jun 2011
Location: Huntington/Charleston, WV
Posts: 1,364
Likes: 0
Received 1 Like
on
1 Post
Finally! You have to reaaaaalllly smooth the outside down and lubriplate the **** of it.
I prob trimmed the inside too much, but it works smooth now.
Pics to come once I gey back from my trip. Prob be up Tuesday night.
I prob trimmed the inside too much, but it works smooth now.
Pics to come once I gey back from my trip. Prob be up Tuesday night.
06-22-2012, 11:05 AM
#6
AudiWorld Senior Member
Thread Starter
Join Date: Jun 2011
Location: Huntington/Charleston, WV
Posts: 1,364
Likes: 0
Received 1 Like
on
1 Post
I'm not home, so I'm on my mobile. Just uploaded some pics to photobucket app. Will see if I can link from my phone.
Before the final sanding that got it to fit. Once it was on, I didn't want to take back off.
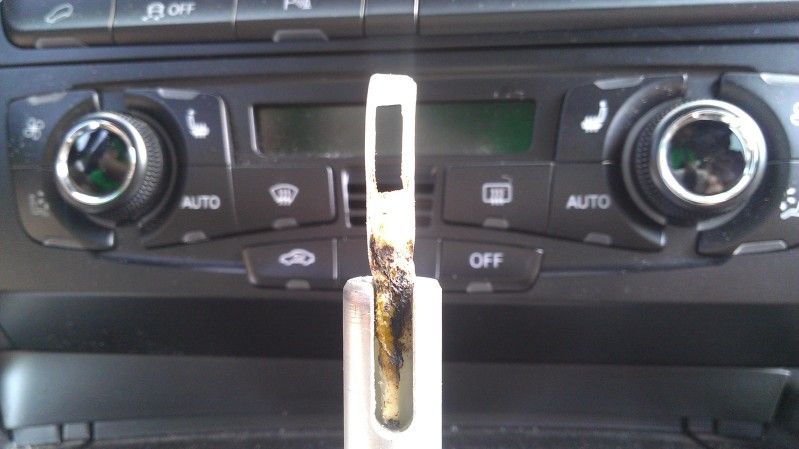
New clamp
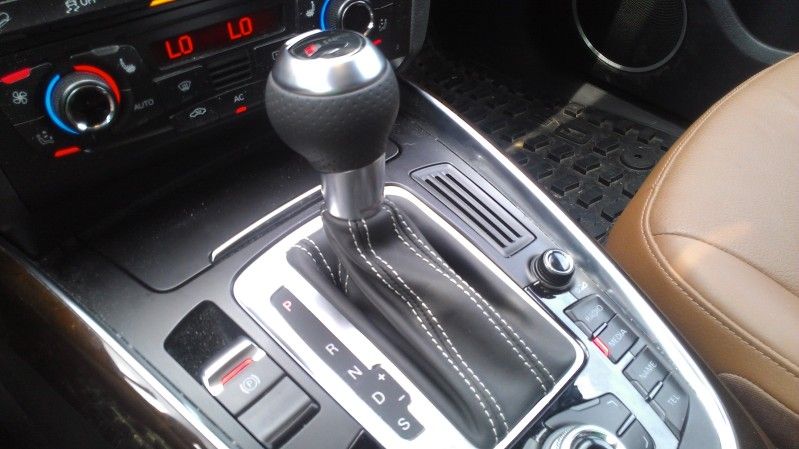
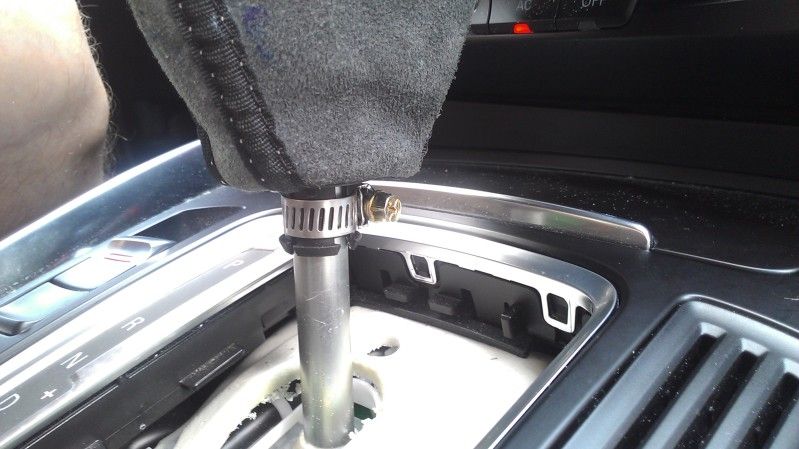
New shifter in place ... Working perfectly finally
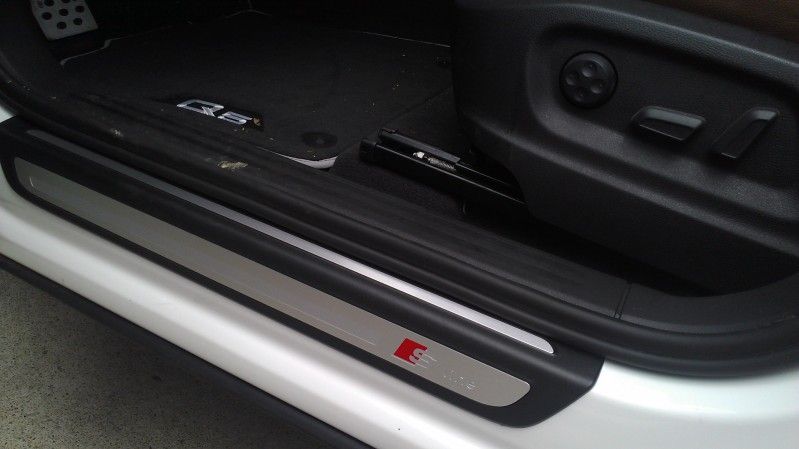
New S-line door sills
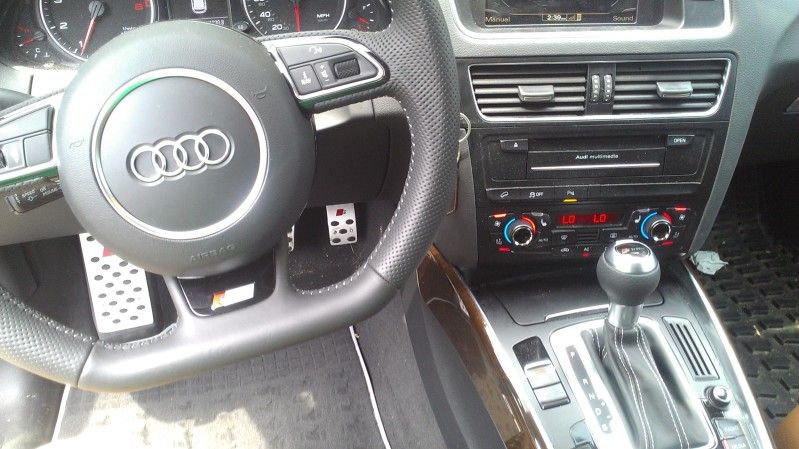
Steering wheel & shifter
More to come once I get home and organize them.
Before the final sanding that got it to fit. Once it was on, I didn't want to take back off.
New clamp
New shifter in place ... Working perfectly finally
New S-line door sills
Steering wheel & shifter
More to come once I get home and organize them.
Trending Topics
06-22-2012, 01:55 PM
#8
Audiworld Junior Member

Join Date: Aug 2011
Posts: 12
Likes: 0
Received 0 Likes
on
0 Posts
I'm not home, so I'm on my mobile. Just uploaded some pics to photobucket app. Will see if I can link from my phone.
Before the final sanding that got it to fit. Once it was on, I didn't want to take back off.
New clamp
New shifter in place ... Working perfectly finally
New S-line door sills
Steering wheel & shifter
More to come once I get home and organize them.
Before the final sanding that got it to fit. Once it was on, I didn't want to take back off.
New clamp
New shifter in place ... Working perfectly finally
New S-line door sills
Steering wheel & shifter
More to come once I get home and organize them.
06-22-2012, 07:30 PM
#9
AudiWorld Senior Member
Thread Starter
Join Date: Jun 2011
Location: Huntington/Charleston, WV
Posts: 1,364
Likes: 0
Received 1 Like
on
1 Post
Frost, the shifter is smooth as factory. I read pages and pages of people doing this mod. Many had the issue of the shifter pin sticking in place. Their solutions were to ream out the inside, top and bottom. I did that, probably too much on those recommendations. That is not what the problem is. If you get it relatively straight in all dimensions the reason it sticks is the area of plastic that sits inside the metal housing. When you twist, by nature it jumbles it up on the side. It fits easily in the metal housing surround but when you add the shifter and compress the trigger it pulls that much plastic up inside the plastic housing inside the shifter and it sticks. The reason I wasn't getting any markings was because I didn't mark that low down the plastic rod. As soon as we lifted up the white plastic rod and sanded it smooth, it popped right in and ran thru the gears like butter. I hate that I took so much off the plastic sidewalls, but as thin as they are that plastic piece is stable and hard. It really doesn't use much force to move it. So advice: sand and round off below the metal housing!
Alvin, no I dont, but they are easy. If you get new ones, you'll see exactly where the tape and tabs are on the old ones. We used 3 wood shims, moving from one corner inward popping loose the bottom adhesive strip. The rest peels out. The back ones have 3 pins, the 3rd one toward the back is a one-time use and will break off when you take the old ones off. Thats not a huge issue tho. After cleaning (the hardest part), seat the entire top adhesive strip while lining up the tabs/holes. Then seat it all the way down while stripping out the bottom adhesive backing (its made to strip out easily). Then just make sure it's seated really well.
Hope that helps.