Audi Q5: How to Replace Ball Joints and Control Arms
The complex, multi-link front suspension of the Audi Q5 allows this small SUV to have the ride and handling of a luxury sports sedan, but it does require periodic maintenance to keep it operating properly.
This article applies to the Audi Q5 (2009-2015).
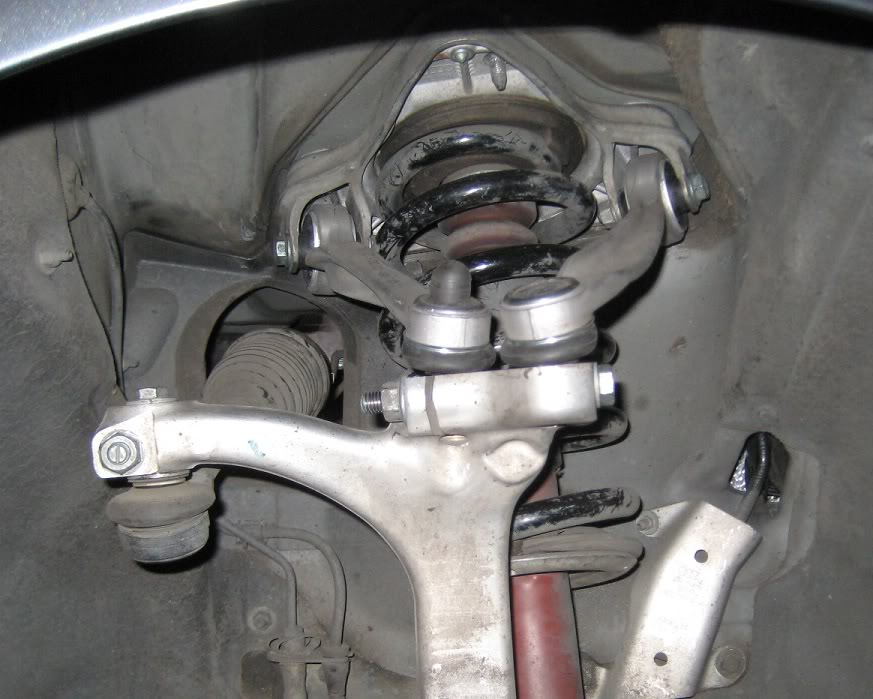
Your vehicle's suspension is comprised of many different components. This includes everything from shock absorbers, springs, control arms, tie rods, axles, ball joints, sway bars and all the related bushings. Control arms in particular can be thought of as the ankles to a pro athlete, with a bushing on one end and a ball joint on the other. Like an ankle, a worn out bushing or ball joint can affect your vehicle's handling, stability and also the comfort of the ride. Many vehicles have the ball joints as separate, easily replaceable components, but in the case of the 2009-15 Audi Q5, it is an integrated unit. Luckily, since Audis need these arms replaced with some regularity, lower priced kits are now available with all the upper and lower control arms at a lower price.

Materials Needed
- Impact/air gun
- Breaker bar with extension
- Hydraulic Jack with Jack stands
- Socket and ratchet set
- Various metric wrenches
- Mallet
- Long flat tip screw driver/chisel
- WD-40 or PB Blaster
- Torque wrench
Step 1 – Jack the vehicle
Before you can address these components, you'll need to jack up the vehicle on level ground and take the wheels off.
- Loosen wheel bolts with a breaker bar or tire iron.
- Jack the vehicle up and secure with jack stands.
- Remove the wheel on the side you will be working on first.
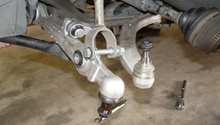
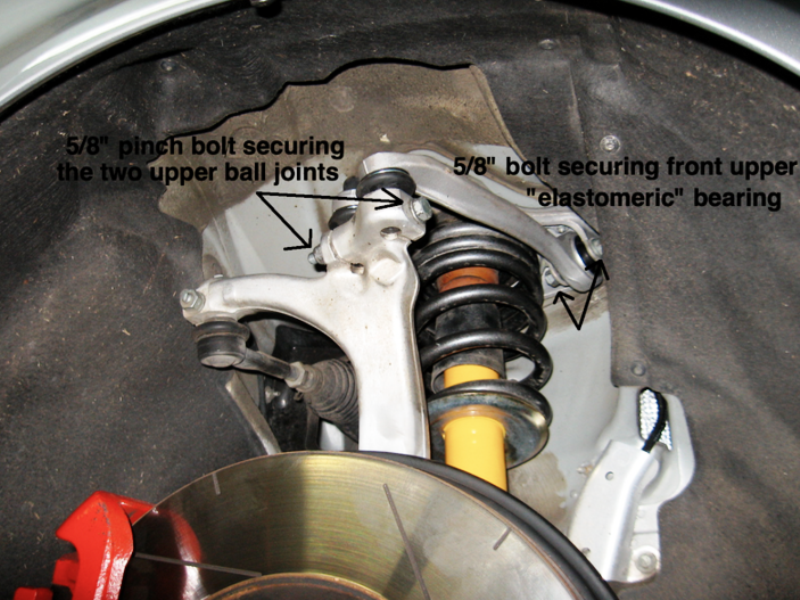
Step 2 – Remove pinch bolt
There is a long 16mm/5/8" bolt that pinches the ball joint and holds it securely to the steering knuckle.
- Use open ended wrench to remove nut.
- Use mallet and long screw driver/chisel to tap the bolt out.
Pro Tip
Spray the pinch bolt with WD-40 or PB Blaster, and let soak before you try to remove.
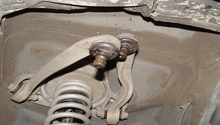
Step 3 – Remove lower strut bolt
To service the upper control arms more easily, the entire shock assembly will need to be removed. One large through bolt holds it to the lower control arm.
- Use breaker bar or impact gun to free the nut on large bolt.
- Use open ended wrench on bolt head while driving the nut off with impact gun or breaker bar.
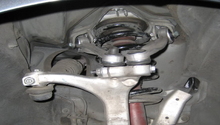
Step 4 – Remove upper strut mount bolts
Now that most of the components related to the upper control arms are loose/removed, the upper mounting bolts will need to also be removed.
- Open the hood of the vehicle.
- Remove weatherstrip along the edge.
- Remove any plastic covers or grommets.
- Locate the four bolts per side.
- Using an impact gun or breaker bar with extension, remove each bolt.
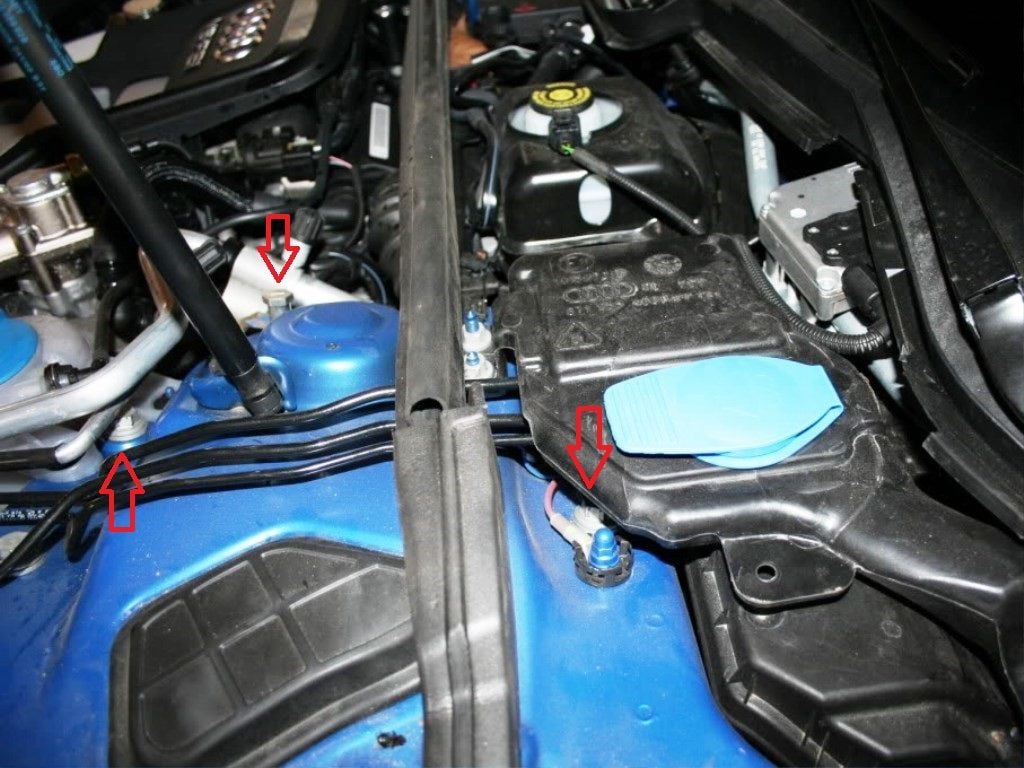
Figure 4. The red arrow points to three of the four bolts. (The other being hidden in the picture.) 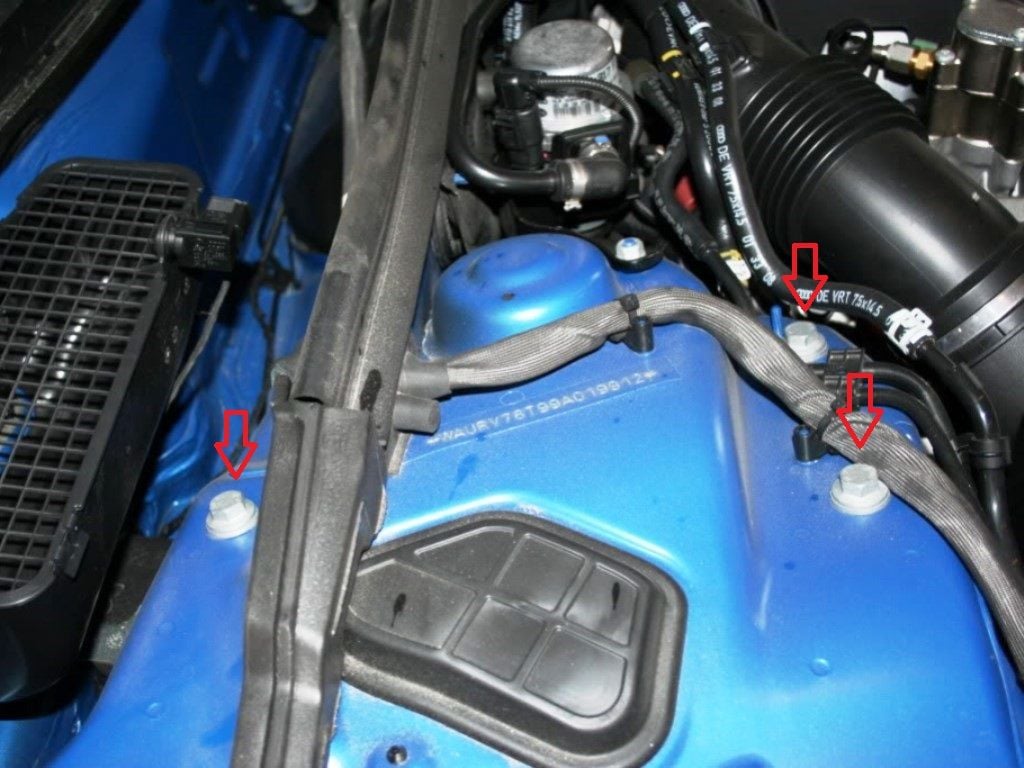
Figure 5. The passenger side is almost exactly the same, but the bolts are easier to get to.
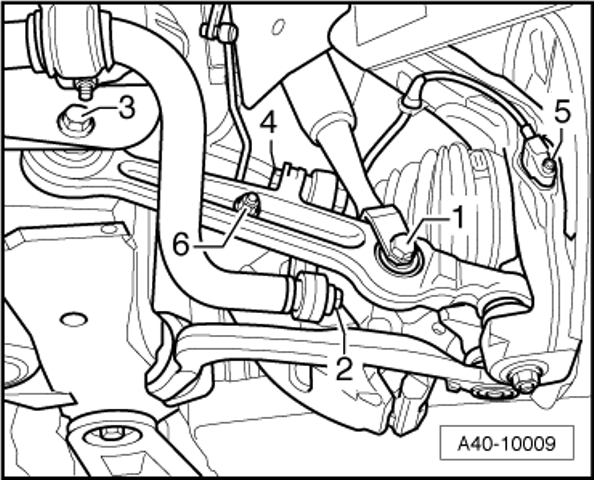
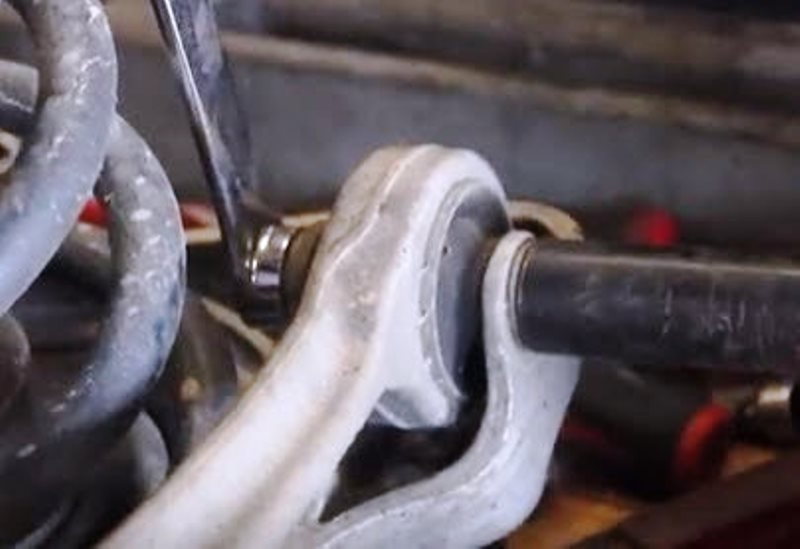
Step 5 – Remove upper control arms
Now that everything is free, the unit can be removed and swapped for the new components.
- Guide the entire shock and spring unit out from under the wheel well.
- Place assembly on a clean surface or work bench.
- Use socket and ratchet, as well as wrenches, to loosen the bolts holding the old upper control arm to the strut hat.
- You may need to use the impact gun and a wrench in order to break it free.
- Repeat for 2nd upper control arm.
Step 6 – Install new upper control arms
Once the old units have been removed from the strut assembly, you will be able to install the new units. Both sides of the control arms look identical but are labeled "L" for left and "R" for right. Make sure to position them accordingly.
- Align the upper control arm with the bolt hole.
- Slide bolt into the hole to secure and rotate arm to correct position.
- Secure the nut to the bolt and snug up, but don't tighten yet.
- Install the 2nd arm and make sure it is positioned correctly like the other arm.
- Insert bolt and snug up nut on it.
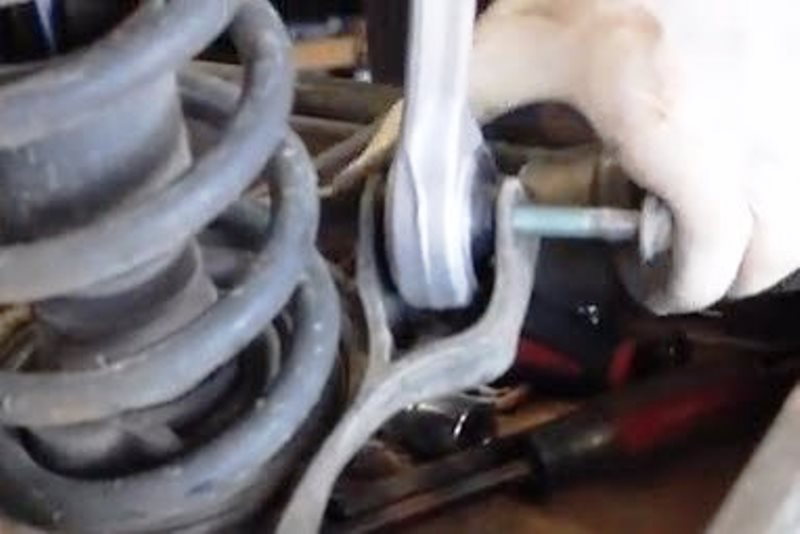
Figure 7. Bolt hole being lined up to new control arm. 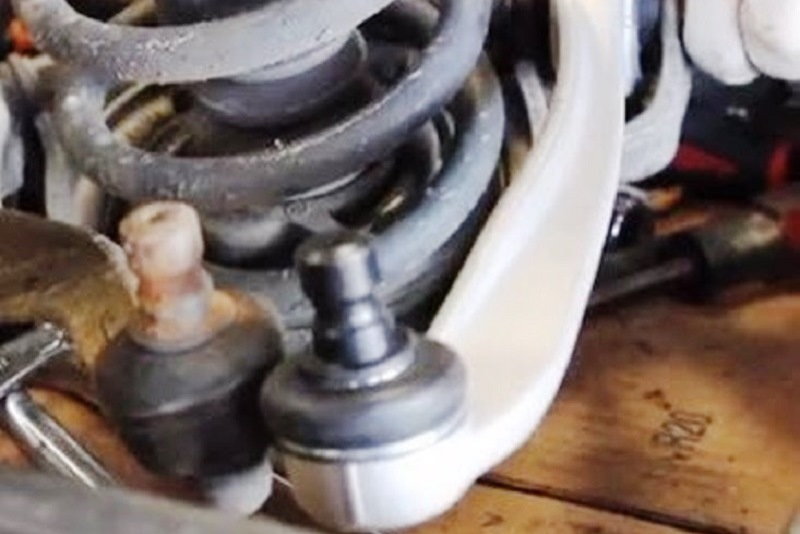
Figure 8. New control arm compared to warn rusty old arm.
Pro Tip
In order to prevent ruining the new bushings, only fully tighten the control arm bolts after the weight of the car is on the wheels again.
Step 7 – Reinstall strut assembly
Now that the new upper control arms are installed, it's time to put it all back together.
- Guide the unit under the wheel well and align with "guide pin."
- Back in the engine bay, ensure holes are lined up and reinstall upper strut bolts.
- Secure pinch bolt to join the upper control arms to the steering knuckle.
- Tighten opposite ends of the new control arm bolts closest to the strut hat.
- Guide lower shock mount to line up with bolt hole.
- Reinstall bolt and secure with nut on opposite end.
- Complete all steps for other side of the vehicle.
- Place jack under steering knuckle and lift until weight of vehicle compresses spring.
- Tighten all bolts to proper torque.
- Repeat for other side.
- Reinstall wheels and hand-tighten the bolts.
- Remove jack stands and lower vehicle.
- Reinstall weatherstrip and any plastic covers or grommets.
- Torque wheels to manufacturer specs.
- Close and secure the hood.
Pro Tip
The lower control arms are done in much the same way, only it is easier to get to the mounting bolts. However, you will need to use a ball joint separator to get them free from the steering knuckle..
Featured Video: Audi Control Arm Replacement
Related Discussion and Site
- Audi Q5 How To Replace Shocks - AudiWorld
- How to Replace Control Arms - BlauParts