|
Tech Article Title
|
Author
|
Date
|
|
Passport 8500 X50 Smartcord
Hardwire (A6) |
Boston Driver
|
2005 |
Disclaimer: I will start with the usual warning about working with electrical
stuff. You should disconnect the battery to avoid any risk of harming yourself
or your car. If you are uncomfortable with wiring or worried about doing any of
this, seek professional assistance with this installation.
I am basing much of an install on what I saw in the Tech Section for a
hardwire
install for an A4 (by Valentin Berechet). However, that location would be
difficult for an A6, since there is no small dash insert to remove and drill.
Any under the dash installation would require drilling into very expensive
parts, so I turned my attention elsewhere on the dash. I also sprang for the
Smartcord Hardwire Kit from Escort, got it for less than $30 from eBay. I did
not want to take apart the cig lighter Smartcord, because I want to use that in
my wife's truck for long trips.
Total time, including the photos, was around 3 hours. If you have never removed
the dash panel or the A-Pillar trim, expect to take a bit more time.
First, the teaser shot of the final result...

I originally thought that the install could possibly work in the dead button to
the right of the ESP (the one to the left is for the rear window power
sunshade). However, the button itself is too small for a simple install, and the
wiring tunnel behind the dead button is too narrow for the circuit board.
I never use the in-dash cup holder, for fear of beverage or condensation finding
a way into the radio or the climate control system. Rather than cutting that up,
I found the coin tray in the AudiWorld Classifieds for this install (part #
4BO941561C) for $20.

COIN TRAY DISASSEMBLY
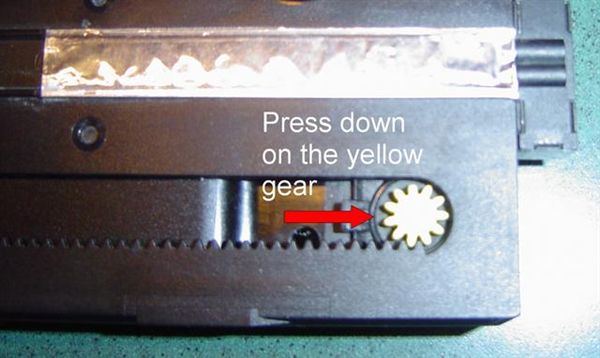
The first step is to disassemble the coin tray. First, with the coin tray
closed, remove the little yellow gear wheel by pressing down with a finger until
it releases through the hole on the top of the tray housing.

Then open the tray (watch out, with the gear removed, the tray snaps open pretty
fast!). From the underside, pull the tray housing away from the bottom of the
coin tray's retainer tab.

Remove the tray and set aside the spring and drum (I did not reinstall the
spring, since there is no need for the tray to spring open when it is pressed).
SMARTCORD DISASSEMBLY
You are now ready to make some modifications to the tray to install the circuit
board and wiring for the Smartcord. To do it right, take the Smartcord apart.
There is one screw on the underside holding it together.

Then, pull the two halves apart, and set aside the sticker for later use. TIP:
if you have some glossy surface to mount this on (like the stuff that comes with
stickers and labels), place the sticker there so you do not loose any of the
adhesive.
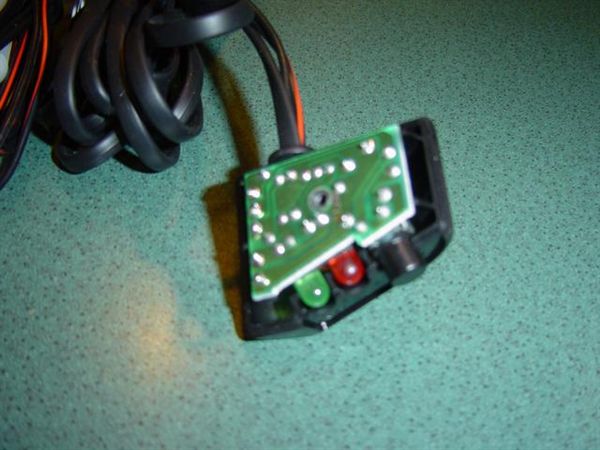
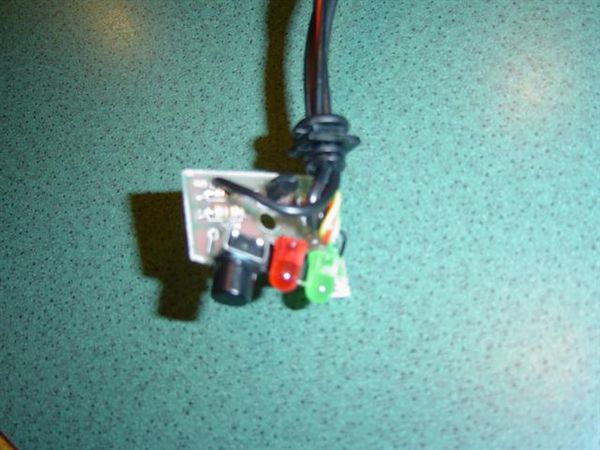
Remove the circuit board and wiring from the bottom half and set aside.
FACEPLATE MODIFICATION
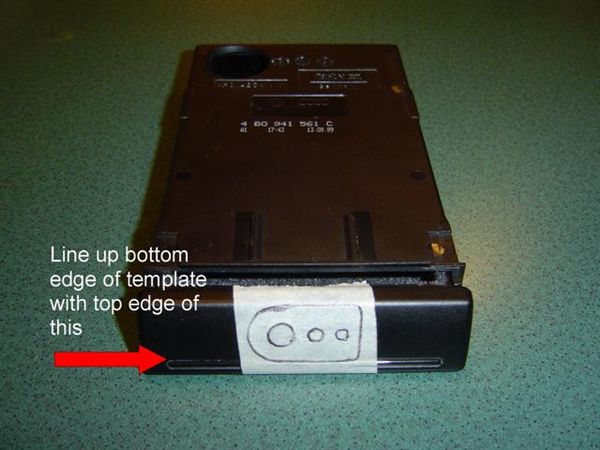
Draw a template of the holes in the sticker using masking tape. Place the
template on the faceplate of the coin tray, so the bottom edge of the Smartcord
sticker lines up with the top edge of the strip along the bottom of the
faceplate.
Next, remove the faceplate, which is held in with tabs on the top and the bottom
faceplate that rest in grooves along the top and bottom of the tray itself. Pull
up on the top edge of the faceplate, and tilt forward to remove the upper tab.
Then, push down the faceplate to remove from the bottom tabs.
Drill holes in the faceplate. Make sure you make the hole for the mute button a
bit larger than you think, and bevel the inside of the opening by rocking the
bit back and forth at different angles. I only had a 1/4" bit, but I used the
drill bit like a router to enlarge the hole and to bevel the inside of the hole.

[1] [2] [3]
|