| Tech Article Title |
Author |
Date
|
| C4 A6 Audio System Installation |
A6AvantErik |
2007 |
After STFA for hours on end trying to figure out a way to rewire my bose delta with a new head unit(HU) and new speakers.
Email me: erik.kong@uconn.edu for any more questions.
In order to complete this the correct way, you will need to re-wire all
speakers that you plan on installing. All speakers are pre-amped, the
front two speakers amp'd right behind the speaker, and the back door
speakers are amp'd in the trunk with the bose sub box.
The hardest part of this install I would say is taking the time to run
wires the right way, and fitting speakers into the front door.
I chose to use 5.25" speakers all the way around, so I needed to
retrofit my own housing into the front doors(not THAT hard, as I will
explain later).
Lets start it off and I'll explain more as I show the pictures.
Starting off, removing the door(I'd do the drivers door last, as that
is the hardest because of the master window switches and memory
switches) (front door=5 screws) (Back door=4):
First two screws to remove:
At the two ends of the door, you will find two screws, remove those.


The third and fourth screw can be found under the handle that you use to pull the door closed.

Remove the door handle cover by using a small flathead screw driver on
the underside of the handle and prying up a bit. You should feel two
clips unlock themselves; pull.
This will reveal the two screws at the top and bottom of the door
handle fixture. The second one in the yellow arrow is set deeper in, so
use a long phillips screwdriver to remove this. Once you remove both
screws, remove the handle assembly.
Once this is done, there will be one more screw located under the door latch:
First, to get to it, remove this piece:

This is the piece under the door handle that you just removed.
Next, now that you have a gap with the piece you just removed, push the
door latch forward (yellow arrows) and push the chestnut trim backwards
(red arrow) They will slide a bit, and the door latch should be able to
pop forward, up, and out.
There will be two things holding the door latch in place: the window switch wires, and the cable that releases the door.

Unclip the window switch from behind (blue arrows) and lift the whole
door handle assembly up to reveal the last screw (aqua arrow). This
screw is kinda hidden behind the leather, so just use the phillips
screw driver to remove this. Be careful not to drop the screw when
pulling it out!
This next part is to your discretion:
Since the width of the door latch assembly does not fit through the
small opening that the door release cable is fed through, I decided to
remove a piece of the plastic(snapping it off) so that the whole
assembly can fit through. You can try to unlatch the cable from the
assembly if you want, but I didn't want to bother with this: so this is
what I did:

Where the red dots are, I used pliers to break off so that it would
open up the hole on the right more to make the width of the blue lines
to fit through. This does not affect the strength of the door in any
way, but its up to you.
Once you get this part through, use a little strength and lift the door
straight up, the clips should slide off of the door frame, and pop
right off.
One last thing to disconnect is the speaker wire, which you can either
snip or carefully remove if you are planning on replacing it later on;
I removed them carefully.
You'll be left with something like this:


Next; removing the bose speaker from the front doors:

Pretty simple here: just remove the screws that surroud the large
casing here. The whole casing is part of the bose system, which
includes the housing, and the preamp.
While under the door panel, I decided to apply some sound deadening material under there to the door frame: dynamat

The speaker cover can be removed with 3 simple screws from the outside
of the casing, and I believe you'll need a Torx screw driver to remove
the speaker inside (I might be wrong and it might just be a phillips
head)
Next: Running wires, you will
(Back door to HU)


Front door to HU
(Both Front and Back speaker wiring continues through here:


^^^YES, I am in the process of finding new covers!! eww. I wish I had ones like Doug has on his
-----------------
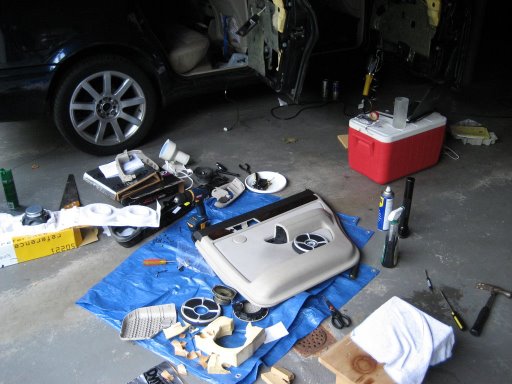
MESSYYYYY
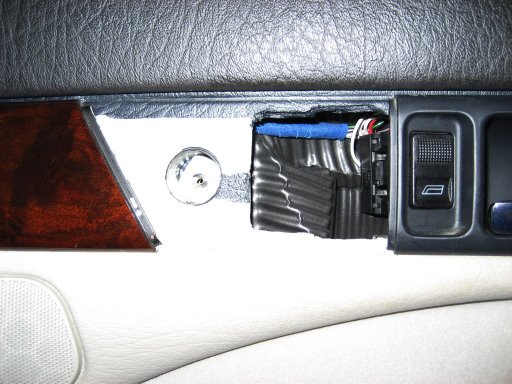
HU Wiring & IPod connector allowing controls through HU while charging ipod in glove box


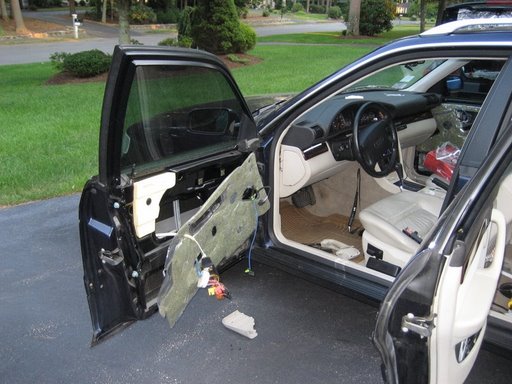
Driver Door panel removal:


--------
MDF board cutout for front speakers

Cutting off excess screw from front reverse mounted speakers.
Hardest part is making the cutout large enough to not disturb the cone
during movement from music. Success after dremel work and sanding till
it fit.


|