| Tech Article Title
|
Author
|
Date
|
| Nokia
8260 Handsfree |
hman
A4
|
2002 |
I finished the Nokia 8260 some time ago - and I
finally put together this article to share with the AW folks. Again, this
is for the Nokia 8260 cell. I know it's possible to do this for other
phone brands/models with a little work, but you can use this as a guide.
GOAL:
To integrate my Nokia 8260 with some of the aparatus and functionality
Audi already has in
the 2001 A4 -- radio mute, mic and speaker wiring, etc. (My car: 2001 A4
2.8q with Bose)
DETAILS:
The kit that integrates with the radio and OEM mic and speakers is made by
SmartEq. Their kit is called "Handsfree Pro" -- part
#797553129042 (available for $150 at your local AT&T
wireless store or ATT's site www.attwireless.com). Take that part number
with you as there are quite a few wireless kits available -- some of them
cheezy and the people there could be clueless about what you're after.
Here are the contents of the kit (phone cradle, wires, speaker, mic,
control unit, various other little doo-dads):

The control until will go underneath the
backseat and everything connects from there:

A closer look:

I
followed the instructions in Ed P's article (http://www.audiworld.com/tech/elec12.shtml)
-- soldering the various wires to the DB male connector. However, this
caused me many problems -- the connection points are so small that it was
hard to get a strong connection.
Also, a few of the connections are so close that they would end up making
contact ... causing a short circuit (blown fuse). Add to that I'm a total
novice at soldering and electronics, so not a good combination. (My
problems, not Ed's articles'!)
So I decided to purchase an additional DB straight-thru cable and cut it
to tap directly into the line. I also had to purchase a self-powered
circuit tester ($4.99 at an auto parts
store). You can see the DB25 line cut & the circuit tester on the
right:

To
determine which of those lines belongs to which pin on the circuit you
simply clip on the
lines with alligator end of the tester and touch the pins on the
connector. If the light
comes on, then you know which line it is (the pins are numbered). This
worked much better
for me -- I was able to make strong, solid connections and wrap them in
electrical tape.
I also wanted to use the on OEM speaker (the extra speaker in the driver's
door), so I cut the speaker line in the kit, and tapped into the DB cable
as well (see Ed's article for connection points). The only ones you need
to use are:
PIN on DB25#: -----> LINE:
10 -----> Yellow line from kit's harness
16 -----> Red line from kit's harness
5 -----> Blue line from kit's harness
3 -----> Black line from kit's harness
19 -----> Speaker + (white line)
25 -----> Speaker - (black line)
15 -----> Mike + (white line)
14 -----> Mike - (black line)
For the mic, I had read and heard that the OEM mike (behind the small
grille by the sunroof controls) wasn't fully compatible with this kit. So
I decided to mount the mic from the kit onto the windshield right next to
the post of the rear view mirror. It's very subtle -- I then tucked the
wire then thru the A-Pillar and down to the control unit in the back seat.

It works great
and the sound quality is superb.
Note: I had to extend it with a mic extension cable from Radio Shack
($6.99). I would have liked to place the mic in the sunroof control area;
I actually scoped this out. But it seemed beyond the scope of what I could
do -- it would
have required drilling into the headliner, massive manipulation of that
area, etc. No thanks!
Once everything is wired up correctly the phone actually automatically
puts itself into 'Car'
mode/profile when it's in the cradle.
Once everything is wired up
correctly the phone actually automatically puts itself into Car
mode/profile when it's in the cradle.

You can then select various settings -- such as auto-answer, ring
tone, ring volume, lights on/off, etc -- to take effect once the phone is
in the cradle/car mode. The nice thing about this mod is I'll never miss a
phone while driving again - unless I chose to. Too many times I don't hear
the phone ring because the radio is blasting. But now, when a call comes
in the radio mutes (CD and tape are paused) or during other phone activity
(dialing/v-mail, etc). And when the call ends, the radio returns with the
volume gradually returning to the previous setting.
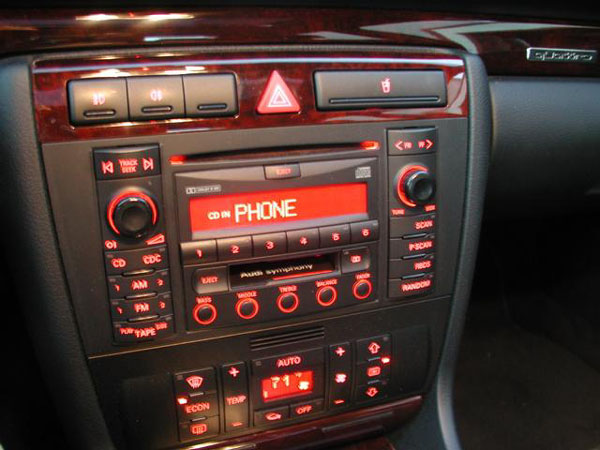
When I'm on a call, the Symphony deck displays this:
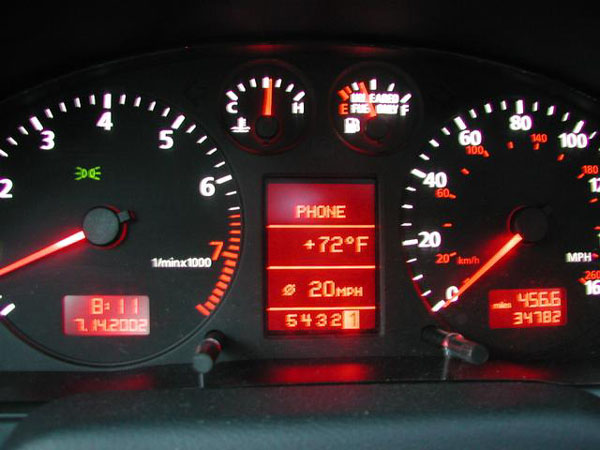
And the dash console looks like
this:
SOME OPTIONAL ITEMS
I decided to mount my phone to the dash as shown here:

I bought the bracket from Avalonmotorsports.com [zev@avalonmotorsports.com].
You have to
pull the radio out to properly mount the bracket. The tech at my dealer
gladly pulled it for me. The bracket is $35. The SmartEq phone cradle
mounts perfectly onto the bracket - in
fact, the SmartEq kit comes with all the appropriate screws to attach to
the bracket.
I also highly recommend getting an external repeater antenna of
some type. I went
without one for about a month and experienced lots of dropped calls and
bad connections.
With the external antenna, the reception is much improved. In fact, in
areas where I didn't get any signal, I can now get 2 bars of signal. I
went for the Hirschmann Glassmount (Model MCA-1890 SLIM). I like it
because it's very subtle and simple to install; it takes all of 10
minutes. I ran the wire down the passenger side A-pillar, under the dash
and on to the control unit under the backseat (there is a connector for it
directly on the control unit - no soldering required!) It cost me $45 at a
local auto stereo shop.
This is the antenna module attached to my windshield via the adhesive
patch.

COST:
The way I did it here is the total:
SmartEq Kit: $150
2 DB straight thru cables: $18
Self powered circuit tester: $5
Mic extension cable: $7
TOTAL: ~$180
Optional items:
Phone bracket: $30
Hirschmann Glassmount: $45
Talking on the phone safely while driving: PRICELESS
Many thanks to Ed P and SteveTrac (www.blacks4.com) for answering my
stupid questions when I was doing this. I couldn't have done it without
their guidance. Thanks guys!