The modification described in this article is for OFF ROAD use only. It may render your vehicle non-street legal. Use at your own risk. AudiWorld assumes no responsibility for you performing this modification to your car.
Finished my DIY down pipes the other day. I know this has been done by many before, but I figured documenting it would be cool, plus I don't think there is a real step by step out there.
I decided since I have a welder and a cut off chopsaw I'd cut them open and gut them that way. I figured it would be easier to chisel the chunks out without having to battle that kink right at the top of the pipe. The only draw back would be welding them back together and making sure that they were clocked in the correct position. If you mark them, its not a big deal. On with the mod.

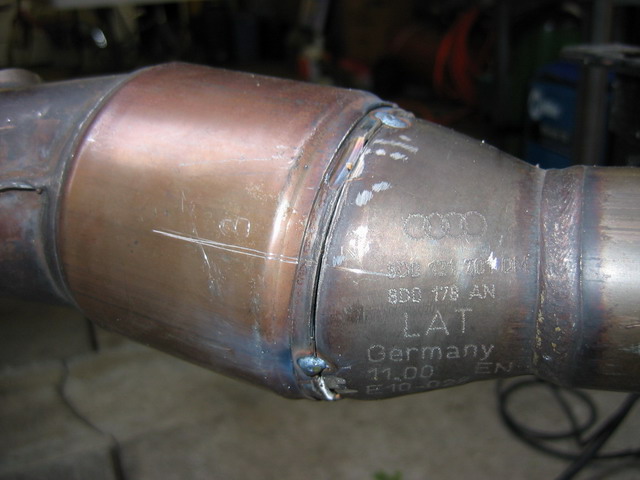
Before:(non-cutting method)
After:(non-cutting method)

First thing you need to do is to scribe the precat section so you will be able to get them positioned correctly for welding once you gut the cells. I chose to scribe lines in 3 different places. Scribe a line across the point of cutting (I chose to cut the cats right at the weld downstream of the precat). Number the lines (use a sharpie so you can see the numbers...I didn't and wish I had) 1-3 on BOTH sides of the cut so you can match them up later. I forgot to take a pic before, but here is one after I aligned and tacked the two pieces in place.

Next up is cutting the DPs in two. I used a chopsaw, but I guess a hack saw would would work just fine(actually, the thickness of the hack saw would be better since the thickness of the chopsaw blade could cause some misalignment issues later if not compensated for during welding), but I'm lazy so I used the chop saw.
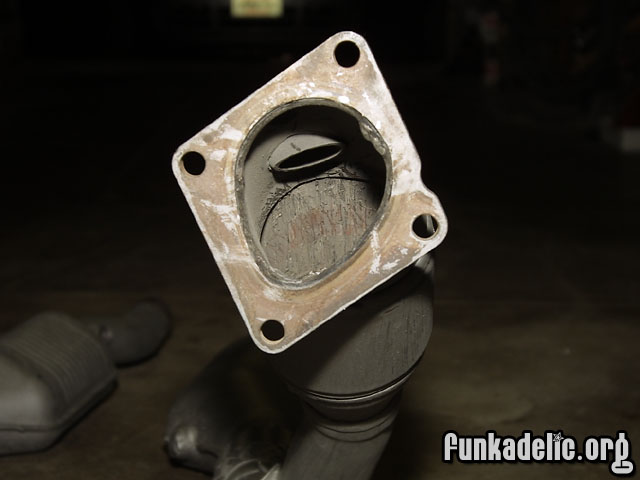
Place the DP on the saw and cut at the weld downstream of the precat. Cut as perpendicular to the axis of the cat as possible, as it will help later when lining things up for welding. Congrats, you now have two parts instead of one. Look at all that folded grid like stuff in the precat...thats the stuff you have to get rid of. I need to mention that there is talk out there of this stuff being toxic once introduced to the air. Please use a respirator and eye protection!!

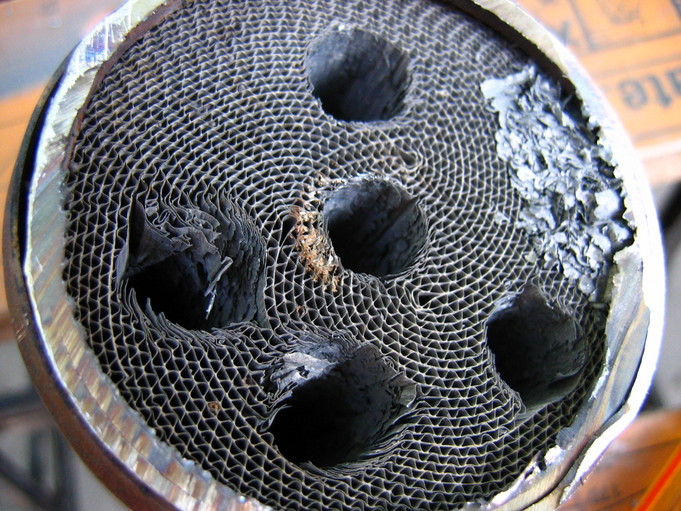
Next, secure the precat in a vice or like I did in a workmate bench/vice. Take your drill and start drilling (don't forget the respirator and eye protection!) Drill as many as you can. I decided I would drill as many holes with as possible with a large bit to speed the process. I used a powerful 3/4" drill and it went through like butta'. Here is what it should look like after drilling.
Next, take a hammer and chisel and go at it. It helps to go from one end and then the other. Sometimes you'll get lucky and it will start to separate from the tube edges. If it does, it comes out in large chunks. Otherwise its going to take some time working at it. Hang in there "you can do it!".
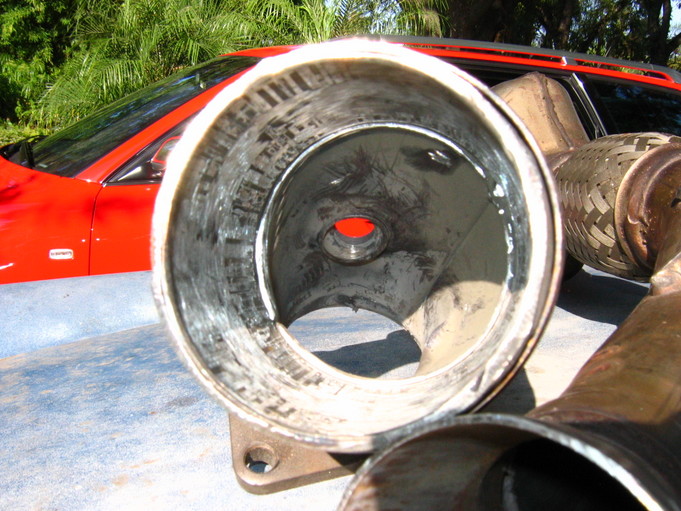
Eventually all will come out and the ground will look like this.

After the gutting, the cells are out but remnants are still stuck to the edges.

I took the time to grind(with die grinder and cutoff wheel) the sides as smooth as possible. I just knocked down the high rough spots, so its not perfect, but better than just after the gutting. Not sure if there are any gains if you take the time to really polish it...you decide.
Here it is after grinding.
Besides getting the precat sections correctly welded back in the correct position, locating the O2s in the correct position is about the only other "critical" part to this easy mod. I had never seen any piggie pipes in person, so I just asked around and checked out VAST performance and Funkadelic's (thanks guys!!)pictures for reference. I tried to get mine as far forward to allow the stock O2 wires to reach, so I put the drivers side O2 on mine a bit forward of the one(top pipe) in this picture. If you buy the awesome "Zoldman" O2 harness, you should have no problem no matter where you locate your O2s.
One of the Funkadelic example pics:

VAST example:

Next, its time to relocate two of the four O2 sensor bungs(one on each pipe)down stream of the MAIN cat. You'll need to stop by the local muffler shop and pickup 2 18mm O2 bungs. My local guy charged me 5 bucks a pop (ouch!), but they are the correct part so I ponied up the cash money and went home. You will need to drill a proper sized hole for the bung. I went and got a BIG drill bit, I forgot to measure the size, but suffice it to say its big. I drilled the holes and hammered the bungs in...nice tight fit. Uh...that just sounds wrong...hehe ;-)


You'll now need to get the ol' welder out and start zapping away. I'll assume you know how to weld...if not, well I'm not going to go into it here. I've only got a mig, so my welds are FAR from pretty. It's also been like 2 years since I've done any welding at all, so I'm really out of practice. The pipes are fairly thick steel, so burn through should not be a problem. Just make sure nothing leaks :-) This is the pass. side I think.

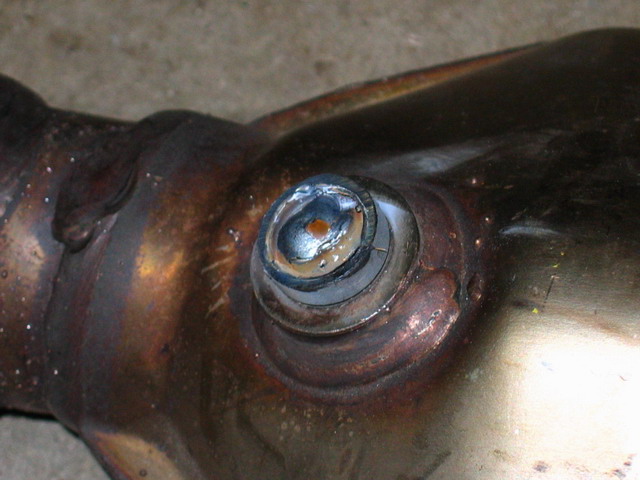
You'll need to plug the front O2 hole you'll not be using. Any 18mm pipe plug or bolt will do. Unfortunately, the only anything 18mm I could find the night I HAD to finish these were those spark plug anti-foulers that have been mentioned here. I just welded up the hole and cut off the tops. Ugly but they work just fine. I expect you to buy the correct part and not hillbilly rig it like I did. Do as I say and not as I do ;-) Here is a picture of one of the ugly "plugs".
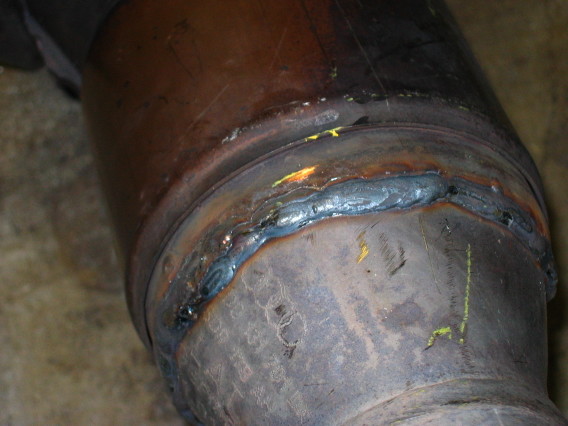
Finally, you'll need to reattach the precat section back to the rest of the down pipe. Now is where your careful marking and numbering come in to play. Just carefully line up the marks and numbers and clamp (I find a magnetic clamp works great) them and tack them up. Take your time and get them EXACTLY lined up. If not, you might have issues fitting the pipes back into the car. That would be, to say the least, a bummer!
Tacked and ready for welding.
All that's left is to do the final welding. Obviously, alternate sides to keep heat warp issues down to a minimum. Please try and lay nicer beads than I did. I'm very ashamed of how these look, but they are very solid and penetrated nicely :-)

OK, that's one. Rinse...wash...repeat for the other side.
Hope this helps. Let me know if I missed anything. I can't wait to drive the car when it comes back and they are installed!! Damn this was a lot of typing....
Oh and the standard disclaimer applies. Off Road Use Only! No one should attempt ANY PART OF THIS PROCEDURE! It is for DEMONSTRATION PURPOSE ONLY. This is only my personal experience of what I did. I DO NOT endorse this process or encourage anyone to attempt this process. You might scratch your little pinky....;-)