|
|
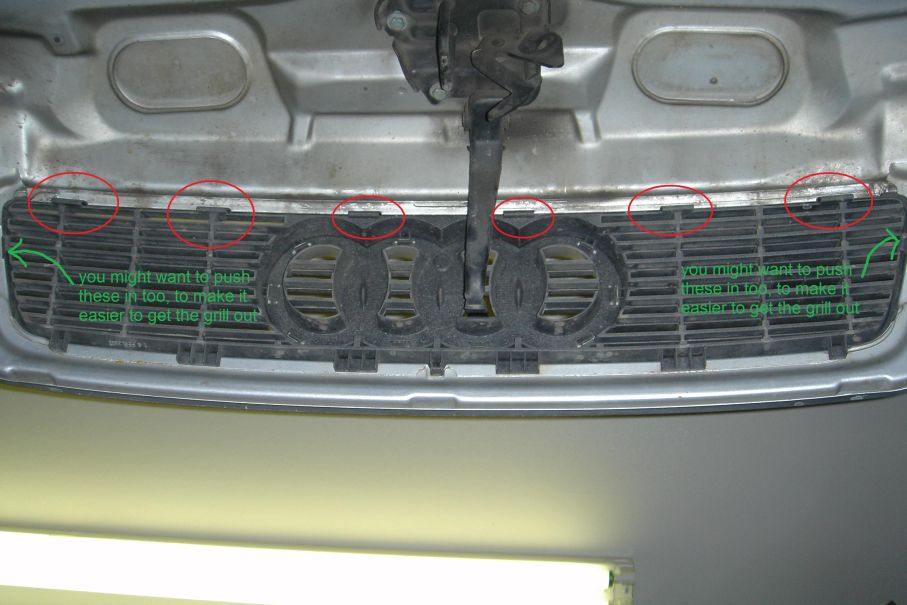
Parts Need: Step 1: Take the grill off of your car by opening the hood, and pushing the tabs on the inside of the top of the grill out. I have high lighted the ones needed to push in. It will take a bit of force, so don't be too afraid to push. Once these are unclipped, lift up the grill so that the lower tabs will lift off of the hood, and pull on the metal hood latch on the inside of the hood to get the plastic hood latch out of the grill.
Step 5: Finally we get to use the Plasti-Dip. I put on 4 fairly light coats in total, getting progressively thicker with each layer but never soaking the trim in paint. I waited for it to be dry, or pretty much dry, in between coats. Light coats will prevent you from getting drips, or being too trigger happy with the can. I used a “fat-cap” that I had from my spray painting days, and this helped me get a wider spray. However, whether or not it was the fault of the cap or not, the Plasti-Dip was one of the worst paints I have ever used for splatters. So seriously watch out for them, and wipe it away with your finger if you get one (another advantage of light coats). Step 6: I was going to wait overnight after my last coat before putting the chrome (now black) trim into the grill, but I got to anxious and put the trim into the grill after the recommended and the grill back into the hood the next morning. To put the trim back onto the grill, I recommend sliding the side tabs in first, and then working on the top/bottom, clipping the tabs in working from the sides. To put the grill back into the hood, open the hood, lift the hood latch from the metal hook on the inside to put it in the hole in the grill. Place the bottom of the grill into the back of the hole(you will see the tabs will fit right over the inside lip of the hood. And finally, work your way around the sides/top pushing the tabs in with your palm. |
|
Advertising |
Contact Us |
Cookie Policy |
Privacy Statement |
Terms of Service |
Do Not Sell My Personal Information
© 2020 MH Sub I, LLC dba Internet Brands |