| Tech Article Title | Author | Date |
| Door Latch Repair | Dan Alwood | 2008 |
My passenger side foot well and door jamb lights stopped working on my 1998.5 A4. However, the main interior light still activated when opening the passenger door. The problem on my car was one of the electrical switches in the door latch was bad (it has two switches active by one lever). The dealer wanted $200 for a whole new door latch assembly. This is how I fixed the existing switch on my original latch using a squirt of Radio Shack’s electric contact cleaner. =)
The goal is to get the door latch out of the door so you can get to the (tiny, little) switch. As is typical, getting the latch out involves removing lots of other stuff first. This is technically known as “being a pain the ass”.
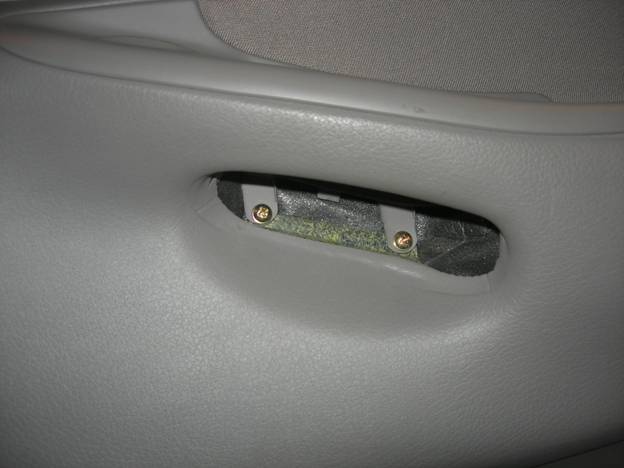
First, remove the interior door panel. There are two black screws on the upper left and right of the panel. There is also a screw under the interior door handle. After you remove it, pull the cover down and out. Two more screws are revealed (see below).
After removing all screws, lift the panel up a few inches to disengage it from the door. Before simply walking away with the panel, disconnect four electrical plugs from inside the panel. Also disconnect the latch release cable after prying off its retaining clip. Set interior panel aside.
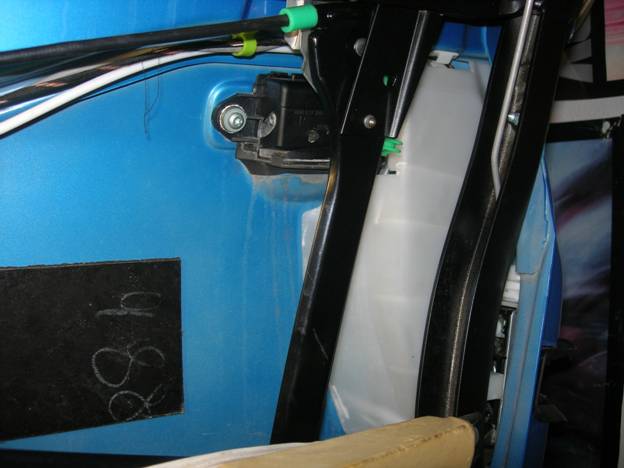
Here is how things look just after getting the door panel off. Slide the big white plastic moisture cover (that’s what I’m calling it) off by popping the bottom loose, then pulling it down a bit to loosen it more.
Slide the bottom away first and work it towards the middle of the door where you’ll have enough room to completely remove it. You’ll need to bend the cover pretty good to work it out, but it’s made of flimsy and flexible plastic.
You may be asking yourself “why not just remove the big black glass frame so you can get to everything easier?” I didn’t for two reasons: 1) I didn’t have the size T250 (or whatever) torx bit to remove the big bolts, and 2) You really don’t need to remove it to get the latch out.
You really can’t get the the latch out with it still connected to the control rods running to the door handle, so first remove the door handle. I taped off the handle to keep it from getting scratched.

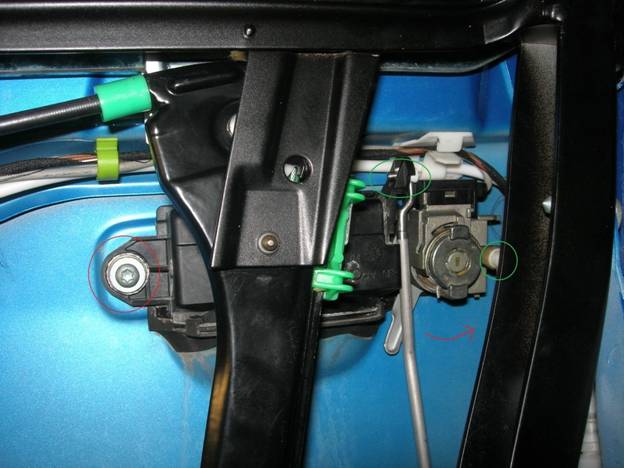
Take out the T20 bolt circled in red. Then push the lever in the direction of the red arrow to disengage the lock from the door latch assembly. Once that lever twists free, it will just drop into your hand – unless you’re not holding it, in which case it will fall down into the door; it will then need to be fished out with a magnet (don’t ask why I know this).
With the door latch free from the door, it is easy to tilt it so you can pop out the control rods (circled in green above) from the door latch and lock.
Next, unbolt the latch (more T20’s) from the edge of the door. Once loose, you can fairly easily work it totally free from the door. Unplugged the electrical cable running to the switches. The white vacuum line on top can be pulled out while squeezing the retaining ring so its ears bend free of the retaining collar (easier to see for yourself than describe). Even while squeezing the ring the line will be firmly plugged into the vacuum motor; just give it a firm pull. The latch should be totally free of the door now.
The switch unit that you disconnected from the electrical cable earlier is the black plastic part hanging off the latch on the right in the picture below. That is the bad boy you need to work free of the latch.
That switch unit will not part willingly from the latch. But as you can see in the “after” picture below, it can be done. The unit can only slide out one way, but one of the latch’s metal levers somewhat blocks the path you need to take. Take advantage of the malleable plastic and judiciously bend and pry it past the metal lever.
Once the switch unit is free, you can easily see the micro switches under the activation lever. In the picture below, the switch on the left controls the foot well and door jamb lights. The one on the right (I assume) controls the primary interior light. Both of my switch audibly “clicked” when I pressed them, but nevertheless usually did not work.
There is no way (that I could see) to repair the switch without destroying the unit, so I simply sprayed the switch with Radio Shack Contact Cleaner. I aimed the spray can’s straw right on top of the micro switch and gave it a quick burst. I went ahead and did both switches. The picture above is after spraying, so that’s why things look shiny.
As a side note, I disassembled my cruise control “set” switch and used this same cleaner on it when it started flaking out two or three years ago. It still works great today. I don’t know how exactly this cleaner works, but it does.
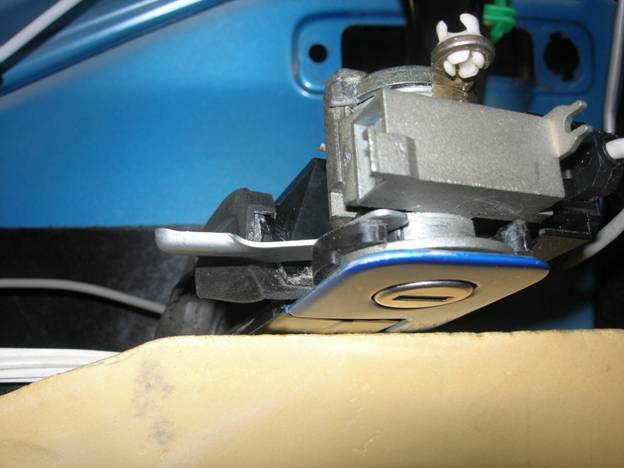
As you’re putting everything back together, it may be helpful to refer to the picture below. This is how the whole door handle assembly looks when the handle, lock, and outer plate are all lashed together. During final assembly, of course, the outer plate has to go on the outside of the door, while the rest goes on the inside.


